Monday, October 31, 2011

Halloween Treats!

0
By: Christy

Witchy Woman!

In honor of it being Halloween today, I decided to write about the Halloween party I hosted Saturday night! One of my favorite activities is hosting and entertaining and this Halloween I took full advantage with a Halloween costume party! With my house decorated, cute Halloween goodies made, and about 30 of my friends dressed in super festive costumes, we celebrated Halloween 2011 in style!

I know BCBs (Buttercream Bakers) is dedicated to giving out dessert recipes but since this is a special occasion, I figured I would bend the rules a little. The food wasn't the main focus of my party but none the less I tried to be creative. Some of the food I served included witch's fingers, hot dog mummies, and spice cake pumpkins. All were super festive but most importantly totally easy! (Both of which are prerequisites for hosting a party!)

Enjoy, and I hope everyone has a wonderful and safe Halloween!
Inspired by Pillsbury
Hot Dog Mummies
1 Package of Hotdogs (I used cheese filled, YUM!)
1 Package Crescent Rolls, cut up in strips
Mustard
Cut the hot dogs in half. Take the crescent strips and wrap the bottom 2/3's portion of the hot dog with overlapping strips of crescents. Repeat technique with a small portion on the other end of the hot dog, leaving a small space between. Bake at 350 until the crescent roll strips are golden brown. Add mustard dots in the open gap between breading as eyes for the mummy.

From Food and Wine Magazine
Spice Cake Pumpkins
1 box spice cake made according to box using mini bundt cake pans
black licorice sticks
Icing

Icing
2 tablespoons melted butter
2+ tablespoons water
1 1/2 cups powdered sugar
Orange food coloring

Once mini cakes are baked and cooled, poor icing over each cake until completely covered with icing. Cut licorice sticks in 2 inch pieces and stick straight up in the middle of each cake.

From KeepKidsHealthy.com
Witch's Fingers
1 package of string cheese
Almond slices
cream cheese

Cut each string cheese in half. Using a knife, make cuts in cheese to look like knuckles. Using cream cheese like glue, apply a small amount of cream cheese to the back of an almond slice. Place almond slice (cream cheese down) on the end of the string cheese. Trim the edges of the cheese around the almond slice to make the tip of the finger look pointed.
Read More »

Saturday, October 29, 2011

Football Oreo Truffles

0
By: Christy


Growing up in KY where UK Basketball takes the cake and then onto a small private liberal arts college with no football team, I never truly understand the true awesomeness of tailgating. But living in state of Alabama for 4 years and now in Nashville for almost 5, I quickly learned that the SEC/football is a way of life. Tailgating is part of every day life for people that live in the south. Everyone has their team's canopy tailgating tents, coolers, corn hole boards, grills, clothing, coozies, and the best  part of tailgating…. The food. 

Tailgating food that automatically comes to mind are hamburgers, hot dogs, BBQ, chips, dip, fruits/veggies, tater salad, baked beans and THE SWEETS! Cookies, brownies, dessert bars….basically anything bite sized and finger friendly is tailgating approved when it comes to sweets. The recipe I am going to share today is ULTRA EASY, super cute, and perfect for tailgating! Oreo truffles shaped like footballs. 

Ingredients: 
1 package of oreos (cookie and filling included)
1 8 oz package cream cheese
1 package milk chocolate bark coating
couple ounces white chocolate

Food process the oreos (I usually  leave out about 7 oreos from the package to ensure a nice packing consistency with the cream cheese). Mix oreo crumbs with softened cream cheese. 

Shape the truffles in desired shape (for this I did football shaped). Stick shaped balls in freezer for 15 minutes. While balls are getting cold melt the chocolate bark according to the instructions on the back of the packaging.  
Dip balls in melted chocolate. Let dry. Then melt white chocolate and decorate as needed using a fine circular icing tip or a zip lock bag with a corner tip cut off. 


Just a note: these are very dense little desserts and it doesn't take much to make a satisfying little bite sized treat!


Recipe from Bakerella
Read More »

Thursday, October 27, 2011

Microwave Caramel Popcorn

2
By: Cindy


Our category this week is tailgating and I have to honestly say that I have never been tailgating.  I think I need to remedy that soon.  I remembered a caramel popcorn recipe that Christy was given by Ann when she worked at United Community Bank and thought that would be a great tailgate food.  I am addicted to popcorn and remembered how good this caramel popcorn was and how easy it was to make.  So I made a batch tonight while I was talking to Sarah on the phone.  That's how easy this recipe is - I could make it while talking on the phone. You could serve this in a big bowl or in cute little bags but it would be great for tailgating.

2 bags of microwave popcorn, popped
1 stick butter
1/2 t salt
1 cup brown sugar
1/4 cup white corn syrup
1/2 t baking soda

Pop 3 quarts of popcorn (2 pkg) and put in a brown paper bag.  I used a big grocery sack. 

 In a large microwave bowl add 1 stick butter, 1/2 t salt, 1 c brown sugar, and 1/4 c white corn syrup.  Cook 4 times - 1 minute intervals stirring after each minute.  Add 1/2 t baking soda and stir.  Cook 20 seconds and stir. 

 Pour over popcorn and shake.  Cook 1 minute and shake.  Cook 1 minute and shake.  Pour in a pan and cool.  Store in an air tight container.


Read More »

Monday, October 24, 2011

Mississippi Mud Cake

0

If you like chocolaty gooey deliciousness then you will LOVE this recipe. This is a recipe that I stumbled upon a while ago. I cannot make these brownies and keep them in the house because I can't hold myself back from eating them. I'm warning you, this is a dangerously amazing recipe.

In the fall, my husband and I do quite a bit of tailgating.  Go Cards and Rocks! When you tailgate it's important to pack the right kind of snacks. Brownies are always a hit because they are so hassle free.  Just put them in some Tupperware and hit he road. If you are looking to take your brownie recipe to the next level at your next tailgating party, you will need this recipe! My version of brownies are always a crowd pleaser, however, they can be a bit messy.  The mess is totally worth it. I say this as I still have chocolate on my fingers because I can't quit eating them!!! Help!

Happy Baking!!
Sarah
Mississippi Mud Cake

Mississippi Mud Cake

1 box brownie mix plus whatever ingredients are needed according to box (eggs, oil, water)*
1.5 cup chopped pecans
1 bag of mini marshmallows
1 can of chocolate frosting**

1. Preheat oven to 350 degrees F. Spray a 13x9 in. pan with Pam baking spray with flour.
2.  Prepare brownies according to the box.  Pour batter into pan.  Sprinkle the pecans over the top of the brownie batter and bake for however long according to the box. It took my brownies 24 minutes.  
3. Once brownies are done and a toothpick comes out mostly clean with a few crumbs, remove brownies from heat.  Pour the entire bag of marshmallows over the brownies. Place back into oven for 5 minutes or until marshmallows puff up.


4.  While the marshmallows are puffing up in the stove, remove lid from frosting can and microwave icing for 20 seconds.  Stir. Repeat until frosting is thin enough to pour freely.  Once the marshmallows have puffed up, drizzle the entire can of frosting over the marshmallows.  Let brownies cool.  Once cooled cut up in squares to serve.  Enjoy!

*I used Betty Crocker Ultimate Fudge Premium Brownie Mix with Hershey's Fudge
**I used Betty Crocker Rich & Creamy Milk Chocolate Frosting with Hershey's Chocolate

Note:  An alternative way to make this recipe would be to sprinkle the pecans over the icing instead of placing them directly on the batter before baking.  I like it as a crunchy surprise in the middle, but it looks great on top too!
Read More »

Saturday, October 22, 2011

Pumpkin Cupcakes

2
by Cindy
I have always been a recipe collector and I have torn out and saved a massive amount of recipes most of them I haven't even tried.  This blog has given my the opportunity to go through those recipes and try new ones.  I went through the pile and found a recipe that sounded wonderful.  It was a pumpkin cupcake recipe with cream cheese icing that is all made from scratch.  The cupcakes tasted good and were really soft and moist but I didn't think they had enough pumpkin flavor so I made a recipe that my mom's friend Dee told me recently. Even though it was much easier and less ingredients the cupcakes turned out amazing! Much better than the from scratch recipe I originally tried and they also have a much stronger pumpkin flavor.  They are very moist and with the cream cheese icing couldn't be any better.  I'm going to go eat one with my coffee - yummy! Give them a try.

                                                                
1 box spice cake mix
 1 15 oz can pumpkin
1 cup chopped pecans

Mix together the ingredients.  (In case you were wondering if you needed to make the cake mix according to the box and then add the other ingredients... you don't. All you need is the mix itself mixed with the pumpkin and nuts). This will make a very thick batter. Fill cupcake liners about 3/4 full and smooth the tops.  Bake in a 350 degree oven for 22 minutes. 

Icing
12 oz  cream cheese (room temperature)
3/4 stick butter (room temperature) 
3 cups powdered sugar
1 t vanilla

Combine  the cream cheese and butter until light and fluffy. With the mixer on a low speed add the powdered sugar.  Add the vanilla and ice the cupcakes.
                                                                  
Read More »

Wednesday, October 19, 2011

Pumpkin Bread

1
 By: Christy

Picking a pumpkin recipe for me was such a difficult task because I have several top notch recipes made with pumpkin. I had it down between a pumpkin cheesecake with a gingersnap crust, pumpkin cookies that have white chocolate chips and pecans in them, and then plain ole pumpkin bread. How to choose, how to choose!? All of them are sooo good and all deserve a spot on our site but I had to pick just one.... I decided to leave it up to some of my trusty taste testers and almost all of them voted I make pumpkin bread.


Pumpkin Bread with Walnuts & Choc Chips!
I was definitely not disappointed with their choice because not only does my house now smell of cinnamony baked goods but I have some amazingly moist and delicious pumpkin bread to nom on. Right now I am actually contemplating if I really want to share my food with my taste testers at work this morning (my pumpkin bread is currently hiding at my desk until I decide! LOL)
Pumpkin bread recipes are all pretty basic and easy but one thing that really stands out for this recipe is that it doesn't turn out to be sticky like many sweet breads do. I doubled the recipe and did one plain and did another with walnuts and chocolate chips.... All proper desserts deserve chocolate right?! haha But this would be great with a variety of different add in's: cranberries, raisin, pecans, m&m's, white chocolate chips... YUM!


Ingredients: (for 1 loaf)
5 oz. pumpkin
1 egg
1/3 cup vegetable oil
1/4 cup water
1 cup sugar
1 1/4 cup flour
3/4 teaspoon baking soda
1/2 teaspoon salt
1/4 ground Cinnamon
1/4 teaspoon ground nutmeg
1/8 teaspoon ground cloves
(optional for more spice: 1/8 teaspoon of ground ginger)

Add in's I used:
1 cup chocolate chips, and 1 cup walnuts

Preheat the oven to 350 degrees
Combine pumpkin, egg, vegetable oil, water, and sugar.
Combine flour, baking soda, salt, and spices.
Slowly stir in the dry ingredient mixture into the wet mixture. Add any add in's and stir.
Pour into greased and floured pan (I just use Baking Joy spray) and bake for 45 minutes.


Hot Pumpkin Bread with butter... YUM!
Read More »

Monday, October 17, 2011

Pumpkin Pie Crumble Cake

1
During this time of year, you can't go anywhere without seeing a pumpkin.  For instance, I have 3 tiny pumpkins on my kitchen table as decoration and 2 large pumpkins on my porch waiting to be carved. The thing to do around Louisville in October is to go pumpkin picking at Huber's Farm. They have an amazing pumpkin patch and so many things to see and eat.  It's great day trip for the family and I highly recommend visiting if you ever get the chance.

So because pumpkin is all consuming in October we chose to make pumpkin our ingredient of the week. The dessert I chose to make is comparable to pumpkin pie, but so much yummier.  I like pumpkin pie, but I always found it somewhat boring.  This version is the jazzed up version of pumpkin pie.
Pumpkin Pie Crumble Cake

I love this recipe and could eat it as my meal instead of a dessert. Once you try this pumpkin pie cake, you will no longer want to eat traditional pumpkin pie! The topping is my favorite part.  Enjoy!

Pumpkin Pie Crumble Cake
Recipe from the Cake Mix Doctor by Anne Byrn

1 package yellow cake mix
8 T butter (1 stick), room temperature
4 large eggs
2 cans pumpkin (15 oz each)
1 small can evaporated milk (5 oz)
1 1/4 cup sugar
2 t cinnamon
4 T butter
1 cup chopped pecans
Cool Whip

1.  Preheat oven to 350 degrees F.  With Pam baking spray with flour, coat a 13x9 baking pan.  
Mixing the crust
Crust
2.  Measure out 1 cup of the cake mix and reserve for the topping.  Place the remaining cake mix, room temperature butter, and 1 egg in a large mixing bowl. Blend on low until well combined (about 1 minute). Using your fingertips, press the batter over the bottom of the prepared pan so that it reaches the sides of the pan. Set pan aside.
The filling
3.  For the filling, place the pumpkin, evaporated milk, 1 cup sugar, remaining 3 eggs, and cinnamon in the same large mixing bowl used to prepare the batter and with the same beaters (no need to clean either), blend on low speed until combined, about 30 seconds.  Increase the mixer speed to medium and beat until the mixture lightens in color and texture, 1 to 2 minutes.  Pour the filling over the crust in the pan, spreading to the sides with a spatula.  Set pan aside.
The crumb topping
4. For the topping, place the remaining 1/4 cup sugar, chilled butter, and reserved cake mix in a clean medium sized bowl.  The beaters must be cleaned and dried this time.  Mix on low speed until combined and crumbly, about 30 seconds to 1 minute.  Stop the mixer and stir in the pecans.  Use your fingers to thoroughly knead the pecans into the topping mixture.  Distribute the topping evenly over the filling mixture. Place the pain in the oven.
5.  Bake the cake for 70-75 minutes.  You will know when it is done when the middle of the cake doesn't shake when you move it back and forth and when the pecans have started to brown. Let cake cool for about 20 minutes.
The finished product
6. Slice cake in squares to be served. Top with cool whip (optional).
Pumpkin Pie Crumble Cake

Happy Baking!

-Sarah


Read More »

Sunday, October 16, 2011

Product Review: Cupcake Batter Dispenser

0
By: Christy
One of the worst habits I have is totally making a huge mess in the kitchen. If flour or powdered sugar is involved my kitchen looks like it snowed.... If there are small pieces like chocolate chips or nuts, somehow I manage to spill them on the floor.... AND if I'm making cupcakes I managed to drip the batter everywhere! Hence why, when I saw a cupcake batter dispenser in the Better Homes and Gardens' Cupcake Issue, I HAD to have it... Any attempt to make my mess smaller is a big Win for my house!!

One of my best friends gave me a dispenser for my birthday and I couldn't have been more excited to try out this kitchen gadget. It did make my mess considerably less in the loading the cupcake liners portion of making cupcakes. It looks like a giant mug. All you have to do is load up your cake batter, and squeeze the lever within the handle that releases a small stream of cake batter that comes out a hole in the bottom. I had heard rumors that cupcake batter dispensers leaked but this one does a great job of cutting off the batter when you release the lever. The whole batch of cake batter pretty much fits into the dispenser and until I got to the end of the batter I had no issues. At that point, I did have to use a rubber spatula to get the excess batter out (I'm def not letting good cake batter go to waste LOL) and I did make a little mess at that point but all and all I found the cupcake dispenser to be a big success!

One other con I have is it is hard to clean the cupcake dispenser. The cake batter was difficult to get out of the cracks and crevices so while it made the clean up of my muffin pans and kitchen easier, I had to put in a bit more elbow grease in the washing process for this tool.
Read More »

Saturday, October 15, 2011

Caramel filled Banana Cupcakes with a Caramel Buttercream Icing

0
If you've read my previous posts, you are aware of my love for cupcakes. For caramel week, I felt the need to experiment again. I am going to share with you my favorite banana cupcake recipe.  I've made this banana recipe several times in both cupcake and cake form, and I can't get enough of it.  However, this was the first time I've paired the caramel flavoring with this cupcake, but this may be my favorite combo yet!

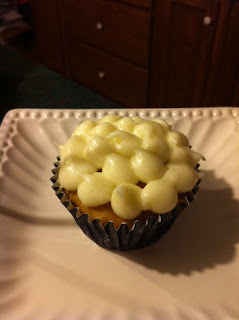
Today's cupcake was inspired by walking down the aisles of Kroger.  My trips to Kroger aren't nearly as rushed now that my son can sit without falling out of the front of the cart.  So by the end of my Kroger trip, I planned to make banana cupcakes filled with caramel syrup (the kind you put on ice cream), topped with caramel buttercream icing and a piece of caramel candy. Perfect for Halloween time.

My husband is my taste tester and when the cupcakes were finished I made him try one.  His first words after biting into a cupcake was "this may be the best yet!" This of course made my day because his normal response is "yeah, it's good." I had to agree with my husband about this cupcake being the best that I've made so far. I fell in love with this icing and couldn't quit licking the bowl, which is a problem since I'm still trying to lose baby weight.  The caramel syrup made the inside of the cupcake extremely moist.  The caramel icing just had a slight caramel flavor so it wasn't overwhelming.  Together the icing and cake was a match made in heaven.  I really liked this combination and will definitely make it again.

The only change I may make to this recipe is the amount of caramel I put inside the cupcake.  In some of the cupcakes I put more caramel than others. I found that in some of the cupcakes the caramel soaked through the cupcake and went straight to the bottom.  Next time I will just cut a shallow hole and pour in about 1 teaspoon of the caramel.  It makes it sweet and super moist! Delicious!!

Caramel Filled Banana Cupcakes with a Caramel Buttercream Icing

Banana Cupcake
recipe from The Cake Mix Doctor by Anne Bryn
1 package yellow cake mix
1/2 cup packed light brown sugar
1 t cinnamon
2 medium ripe bananas mashed (about 1 cup)
1 cup water
1/2 cup oil
3 large eggs
2 t creme de banane liqueur
1 jar of caramel topping from ice cream aisle of grocery
Banana Chips (optional) 

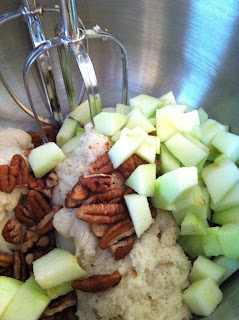
1.  Preheat oven to 350 degrees F.  Place cake mix, brown sugar, and cinnamon in a large mixing bowl.  Add mashed bananas, water, oil, eggs, and creme de banane liqueur.  Blend until well blended (about 2 minutes). 
2.  Fill cupcake liners about 3/4 full.  
3.  Bake for 19 minutes or until a toothpick comes out clean.  Let the cupcakes cool.

Caramel Buttercream Icing
1 stick butter, room temperature
4 cups powdered sugar
3 T milk
2 T caramel ice cream topping sauce/syrup

1. Place butter in mixing bowl.  Blend until fluffy.  Mix slowly the powdered sugar, cinnamon, and milk. (I add the milk 1 T at a time, just in case I don't need as much milk as planned.  It's much easier to make the icing thinner than thicker.  In some cases you may need more milk if icing is too stiff.) 
2.  Once combined, mix at medium speed until light and fluffy.

Cupcake Assembly
1. Once the cupcakes are cool, cut a small circle into the top of the cupcake and remove.  Fill with 1 t caramel sauce. Cover back up with the top of the cupcake.
2.  Ice cupcake as desired with caramel buttercream icing.
3. Top with caramel candy or banana chip.


Bonus Recipe!
Like I said earlier, I've made different combinations of flavors with this banana cake recipe. Below is a picture of my husband's birthday cupcake.  It is a banana cupcake with cinnamon buttercream icing topped with the store bought chocolate glaze from the cake mix aisle of kroger and a banana chip. Scrumptious!

Nick's Birthday Banana Cupcakes with Cinnamon Buttercream Icing
 Cinnamon Buttercream Icing
1 stick butter
4 cups powdered sugar 
3-4 T milk

1 t vanilla
1 t cinnamon

1. Place butter mixing bowl.  Blend until fluffy.  Mix slowly the powdered sugar, cinnamon, vanilla, and milk.  (I add the milk last 1 T at a time, just in case I don't need as much milk as planned.  It's much easier to make the icing thinner than thicker.  In some cases you may need more milk if icing is too stiff.) 
2. Once combined, mix at medium speed until light and fluffy.

Happy Baking!
-Sarah


Read More »

Wednesday, October 12, 2011

Chubby Hubby Bars

2
By: Christy

This morning when I woke up, it was a cool, foggy morning in Nashville. Fall is in the air with the leaves outside my office window starting to change into beautiful shades of red and yellow and the light jacket that is starting to adorn my wardrobe. Hands down, I love fall! And just like the foliage and wardrobes are changing, so are my taste buds. My recipe to do-list has seen a transformation as yummy "fall" type items and ingredients come to mind. Same with the "caramel" recipe I am about to share. This recipe is inspired by the always guilty and delicious Chubby Hubby, Ben and Jerry's Flavor ice cream. Basically a fall rendition of a summer favorite. It is just as rich and sinful as the pint of Ben and Jerry's but perfect for a cool fall day served warm with a big cup of coffee snuggled up on the couch.  The recipe is all about the shortcuts and is not only easy but completely sinful! I hope you enjoy!

Chubby Hubby (or make your hubby chubby LOL) Bars

1 XL roll of chocolate chip cookie dough
1 bag of mini Reese cups (or Reese cups cup into pieces)
1 cup  crushed up pretzel pieces
14 oz bag of caramels
1 tbsp water
1 bag semi sweet chocolate chips


I microwaved the cookie dough 30 seconds to soften up the dough or you can leave the dough out until it gets to soft/room temperature. Add to the cookie dough the bag of Reese cups and the cup of crushed pretzel pieces and mix (I found my hands were way more effective than using a utensil since it was so thick). Spread cookie dough into a 9x13 dish and  bake on 350 until the cookie is baked and starting to turn golden brown on the edges.

Let cookie cool for 30 minutes. Once cool, microwave the caramels in a bowl with 1 tbsp of water in 30 second increments until the caramel is melted. Spread over the cookie dough mixture. Put in the fridge to harden for 15 minutes.

Once caramel has hardened, melt the chocolate chips in the same manner (in a bowl in the microwave for 30 second increments until melted). Spread over caramel. Once the chocolate has hardened, wah-lah you have your very own decadent chubby hubby bars!

Read More »

Monday, October 10, 2011

Chocolate Rolo Cookies

0
By: Cindy
When I think about fall, there are so many great recipes that come to mind. Since our category this week is caramel, I wanted to make a recipe that had chocolate and oozed caramel. This recipe is quick and easy and the cookies taste so good!! You can't go wrong with these!

Chocolate Rolo Cookies

1 box chocolate cake mix (devils food or dark chocolate)
2 eggs
1/3 cup oil
1 sack Rolo candy

Mix cake mix, eggs and oil. The dough will be thick. With your hands take a small amount of dough and wrap it around each Rolo.  Put cookies on cookie sheets and bake at 350 for 9 minutes.  Let cool and store in an air tight container.  I ate a couple of Rolos but had enough dough for the rest of the sack.  Enjoy!

Read More »

Friday, October 7, 2011

Apple Cobbler Cookies

0
I love fall! It's my favorite season. I love the colors, the smell, the crisp chilly air, the need to wear a hoodie sweat shirt, pumpkins, piles of leaves, football, hot chocolate... My list could go on and on. I also love eating apple desserts in the fall. I always associate caramel apples with Halloween. When I was a kid one of my favorite books was the Trick or Treat Berenstain Bears book. I remember at the end of the book that the little bears ate caramel apples and I was always jealous.  So eating caramel apples and cooking with apples in the fall has become one of my favorite things that I don't do enough of.

Apple Cobbler Cookie
This week I decided to make Apple Cobbler Cookies from The Ultimate Shortcut Cookie Book by Camilla Saulsbury.  The cookies are delicious! They taste like little apple pies in cookie form. These are super easy and quick to make.  Shhh! The secret ingredient is Pillsbury sugar cookie dough! How easy is that! I had to give them away just so I wouldn't eat them all!

Happy Baking!
Sarah

Apple Cobbler Cookies

1 roll sugar cookie dough, room temperature
1 cup peeled, finely chopped Granny Smith Apple (1 large apple)
1/2 cup chopped pecans
2 teaspoons cinnamon, divided
1/4 cup packed brown sugar
1/3 cup quick-cooking oats
2 T butter, melted

1. Put room temperature cookie dough in mixing bowl. Add the apple, pecans, and 1 t cinnamon. Mix well with mixer or with wooden spoon.  Chill mixed dough for 1 hour in refrigerator or for 25 minutes in freezer.  
2.  Preheat oven to 350 degrees F. After dough has chilled, roll dough into 1 inch balls. In a separate bowl combine brown sugar, oats, 1 t cinnamon, and melted butter in a small bowl.  Roll each ball into crumb mixture until well coated.  Place balls on cookie sheet.
3.  Bake cookies for approximately 10-13 minutes or until cookie is firm to the touch and crumb mixture begins to brown.  Let cookies cool.


Read More »