Showing posts with label marshmallows. Show all posts

Sunday, October 20, 2013

Chocolate Dipped Cupcakes with Marshmallow Cobwebs

0
By Sarah


Cupcakes are my favorite kind of desserts to bake. Compared to making a detailed cake, cupcakes are relatively quick to make and decorate.  They are also so much easier to serve and I feel less guilty when I eat 1 or 2 cupcakes.  Because they are pretty quick to whip up, I like to experiment with different flavors and decorating techniques.

Last year, I came across a picture of a cake on Pinterest that looked like it had spider webs on it.  I thought it was so cool and I've been waiting for Halloween to come around so I could try it.  But making a cake takes too long, so I decided I would try it on a cupcake.  However, I thought it would look a little funny drizzling the melted marshmallow on a plain cupcake, I decided it would look much better if the cupcake was dipped in chocolate first!! You can tell I love everything chocolate dipped since I made chocolate dipped apples last week.  I did tweak my tempered chocolate recipe though! I like this one the best because while the chocolate got hard, it was still soft enough to cut through easily.

As for these techniques, they were super easy! The hardest part of tempering the chocolate was having the patience to let it cool down before dipping the cupcakes.  Making the cob webs were also super fun and easy, but very messy! The cobwebs would be a lot of fun for kids!

Chocolate Dipped Cupcakes with Marshmallow Cobwebs

24 iced cupcakes
1 box melting vanilla chocolate
3 tablespoons canola oil
1 bag mini marshmallows
24 spider rings

1. Make your favorite cupcake and buttercream icing.  Ice the cupcakes really high, using about 1/2 cup of icing on each cupcake.

2.  Place completed cupcakes in refrigerator to chill while tempering the chocolate.  Combine chocolate and oil in a small saucepan set over a medium saucepan of simmering water.  Don't let the water get too hot and boil because the chocolate will overheat.  Stir constantly until the chocolate is melted and smooth.  Transfer into a small, but deep bowl and let chocolate cool for 15-20 minutes.


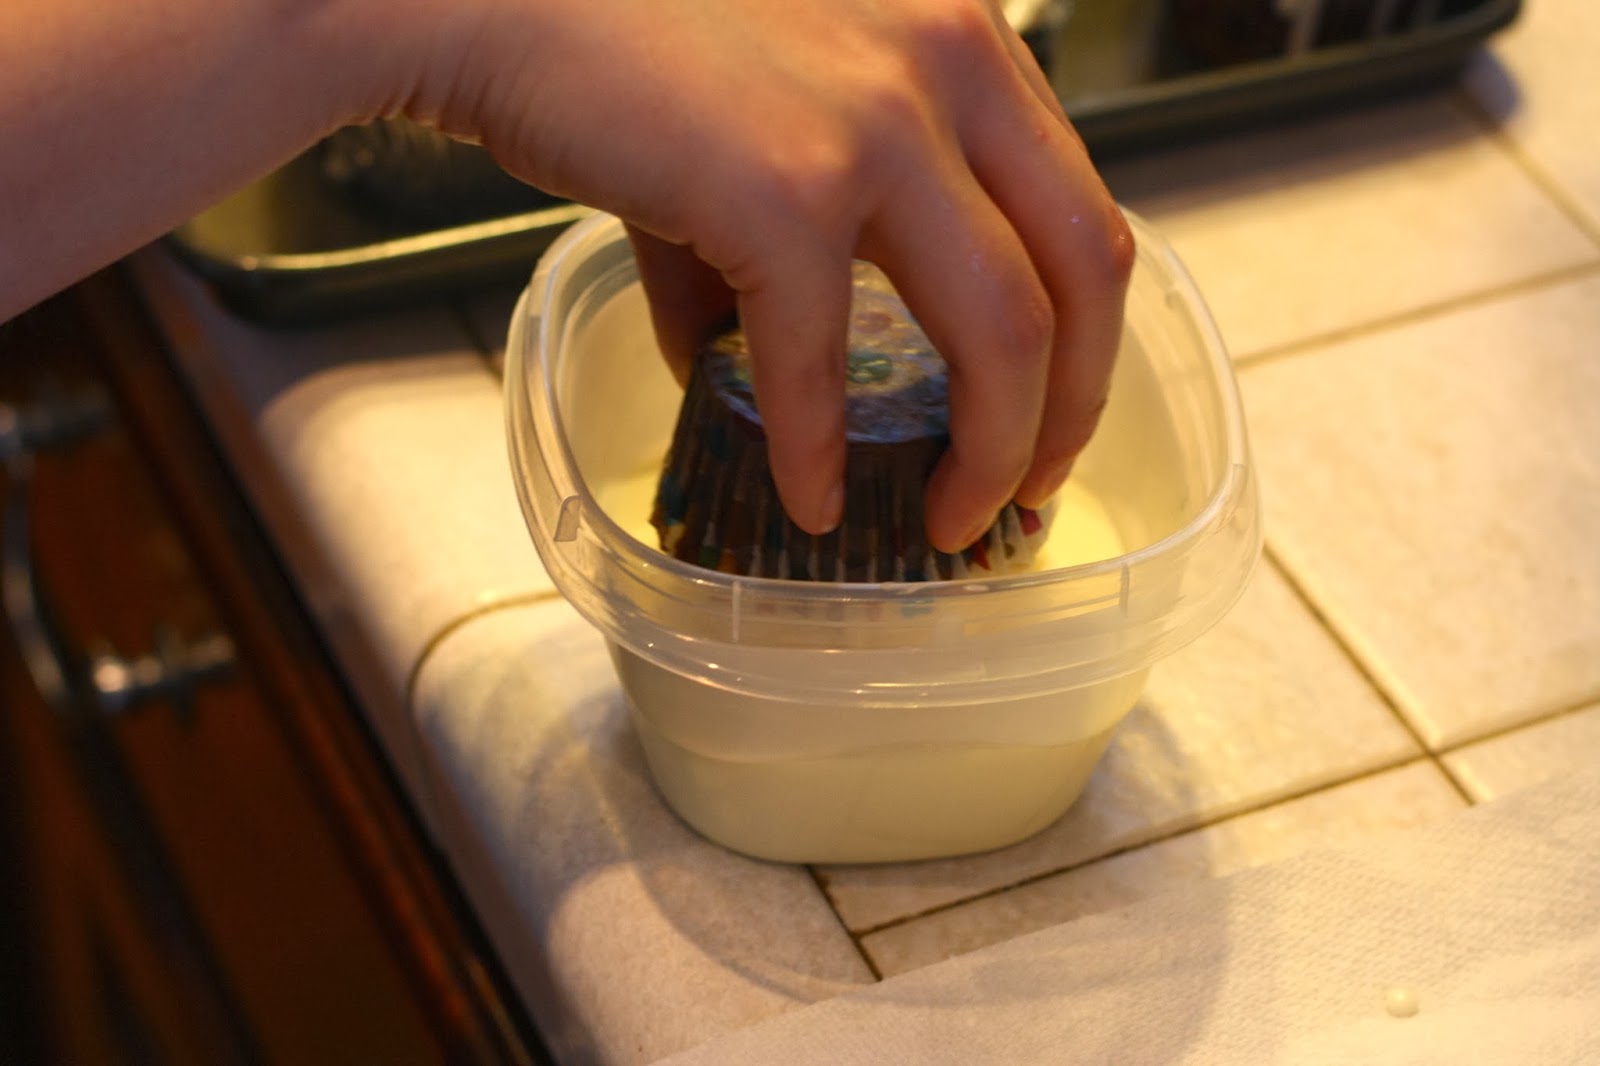
3.  Once the chocolate is cool to the touch, dip a cupcake into the chocolate by holding the cupcake by it's bottom.  Let the excess chocolate drip off and then transfer to a cookie sheet.  Place cupcakes in the refrigerator to speed up the setting process.

4.  In the meantime, take 1 bag of mini marshmallows and put in a microwaveable bowl.  Microwave for 30 seconds.  Stir until the marshmallows are completely melted and continue to stir until it is cool to the touch.  It take about 5 minutes.
Before
After
After microwaved for 30 seconds


5.  Remove cupcakes from the refrigerator once the chocolate has hardened.  Using two fingers & two hands, string the melted marshmallow all over the cupcakes. Decorate as desired.  I stuck a plastic spider ring into the cupcake as the final touch or you could use Christy's spider technique she posted last week and pipe it on the cupcake!


Here are few pics of the finished cupcakes!


Please check out our our sponsor, Caryn Hammond, of Rodan + Fields Dermatologist's amazing site for amazing products!
Read More »

Thursday, October 17, 2013

Candy Corn Peanut Mallow Bars

0
by Cindy


 I  love fall - the red and yellow leaves, the  pumpkins, and all the kids dressed up in Halloween costumes.  I love the cooler weather.  I love waking up in bed in the morning and being toasty warm.  I love this time of the year because all of the great family holidays are coming up.

I got a little taste of Halloween last weekend when I went to visit Sarah and her family.  The grand kids dressed up in their costumes, and we went to the zoo for trick or treat.  Of course, they were adorable.  I don't usually get to see them in person with their costumes on, so it was a treat for me.

My friend, Karen, told me about this recipe and I had to have it.  It's perfect for a Halloween treat, with the candy corn as the star ingredient.  It tastes very much like a Payday candy bar.  It's super quick and easy and no baking involved.  I took some to work today and they have disappeared.  I think a ghost must have eaten them. lol

Candy Corn Peanut Mallow Bars

2 cups peanuts, divided
1 1/2 cups candy corn, divided
1 bag peanut butter chips
4 T butter
1 (14 oz) can sweetened condensed milk
1 (10 oz) bag mini marshmallows

1.  Spread 1 1/2 cup peanuts and 1/2 cup candy corn on the bottom of a 9 x 13 inch pan.
2.  In a small saucepan, melt peanut butter chips and butter over medium heat.  Stirring frequently. After it is melted, add the sweetened condensed milk. 
3.  Put marshmallows in a large bowl.  Add melted peanut chip mixture and combine until marshmallows are coated.  Drop spoon fulls of the mixture over the top of the peanut and candy corn in the pan and gently spread it out evenly.
4.  Sprinkle the rest of the peanuts and candy corn over the marshmallow mixture.  Press into the marshmallow mixture.  Try cutting them but if they are too sticky, they can be refrigerated and then cut.  I found them very hard to cut when I took them out of the refrigerator.  I had to use a lot of pressure with my cutting utensil.  If they had been taken out of the refrigerator for about 10 minutes, I think they would have been easier to cut.  


recipe adapted from
julieseatsandtreats.com


Read More »

Saturday, October 5, 2013

S'mores Cupcakes with Toasted Marshmallow Icing

0
By: Sarah


Marshmallows are something we always have in my house.  My son LOVES them. His favorite ones to eat are the mini marshmallows.  If I let him he would eat them by the handful.  My husband's favorite marshmallow treat is marshmallow fluff right out of the jar on graham crackers.  When we first started dating he introduced me to this delicacy and I have to admit, it's quite yummy.

This week when I ran into Kroger to pick up yet another refill of formula and diapers, I took my regular trip down the baking aisle just to browse and I came across a new marshmallow dessert!  Did you now they now sell S'more's cupcake kits? I did not! I was intrigued! "Challenge accepted!" I said to myself while standing in the aisle drooling. The picture on the box looked pretty, but I was imagining my S'more dessert to be totally different. So that is how I decided I would create a S'mores cupcake.

I'm normally a Pillsbury Cake Mix kinda girl, but Betty Crocker's Super Moist Triple Chocolate cake mix won me over because of the name. It sounded perfect for the melted chocolate like taste you get in a real S'more that I was looking for.  I also grabbed a bag of chocolate chips and some graham crackers.  In the back of my mind I was thinking about Martha Stewart's Marshmallow Frosting recipe that I had stumbled across just a few days before and how it would be the perfect topping.  Once I was at home and the kids were asleep, I was ready to experiment!
I have to admit, I fell in love with the final product.  For experimental purposes,  I made a few cupcakes with and without the graham cracker crumb crust. However, I think between the icing and the crust, this combination with the chocolate is what makes this cupcake extraordinary!  As for the graham cracker chunks I mixed into the cupcake, it looked cool in the cupcakes, but could easily be left out.

My co-worker, Blair,  gives this recipe a Thumbs Up! She suggested a marshmallow fluff filling!
I took them to work with me to let my favorite "taste testers" try them out and they claim they are my best yet! One of my co-workers, Julie, thought she loved my Oreo cupcakes the best, but now she said she wasn't too sure. She told me that now her top 4 are the S'mores, Oreo, Cookie Dough, and Hummingbird cupcakes. There is no higher compliment to a baker than an empty container to take home!! I was pretty impressed with how these cupcakes disappeared 1 and sometimes 2 at a time ;)

S'mores Cupcakes
Inspired by Smore's Cupcake Kit in Kroger....

Graham Cracker Crust

I made my crust for the bottom of the cupcakes just like Honey Maid suggests making pie crusts.  Each cupcake only needs about 1-2 tablespoons of the crust depending on your preference.  My crust was about a 1/4 inch thick, which left plenty of room for the cupcake mix.  
1 1/4 cup graham cracker crumbs
1/4 cup sugar
5 tablespoons melted better

1. Mix crumbs, sugar, and butter together.
2. Place a tablespoon or 2 of the mix in the bottom of a cupcake liner.
3.  Use a spoon to flatten and make the crust compact by pushing the crumbs down in the liner.


Cupcake

 Betty Crocker Super Moist Triple Chocolate Cake Mix (or your favorite chocolate cake recipe)
1 cup chocoate chips
3 cups graham cracker chunks (large crumbs) - optional

1. Make the recipe according to the back of the box.
2. Add chocolate chips and graham cracker chunks and mix until blended.
3.  Fill cupcake liners about 3/4 full and bake according to the box recipe.
4. When done, remove cupcakes form oven and let cool.

Marshmallow Icing

8 egg whites
2 cups sugar
1/2 teaspoon cream of tartar

2 teaspoons vanilla 

1.  Place egg whites, sugar, and cream of tartar in a heatproof bowl of an electric mixer.  Set over a saucepan with simmering water. Whisk constantly until sugar is dissolved and whites are warm to the touch, approximately 3 to 4 minutes.
2.  Transfer bowl to electric mixer using the whisk attachment.  Beat, starting on low speed and gradually increasing to high, until stiff, glossy peaks form, approximately 5-7 minutes.  Add vanilla, and mix until combined.  Use immediately.

Ice the Cupcakes

1.  Once the cupcakes are cool it is time to ice them.  I used a Wilton disposable piping bag with tip 4B.
2.  Use a kitchen torch to toast the marshmallow icing.  Be careful not to light the cupcake liner on fire.  One of mine did! 

3. Enjoy!

Store these cupcakes in an airtight container and eat within 2 days for optimum freshness.


Please check out our our sponsor, Caryn Hammond, of Rodan + Fields Dermatologist's  amazing site for amazing products! 


Read More »

Friday, October 4, 2013

Deluxe Chocolate Marshmallow Bars

0

by Cindy


Of course when I start looking for a recipe, I always look for something that includes my favorite ingredient - chocolate.  I saw this recipe on the Taste of Home page and thought it would be good to try. It has a couple of steps but it's not difficult at all.  I think that I would like the brownie layer to be thicker, so the next time I make these, I will use a 9 x 13 inch pan instead of the 15 x 10 inch pan.  To be different, I might  leave out the rice crispy cereal in the top chocolate layer.  There could be several variations of this recipe.  It's fun to change up things.  The brownie layer is moist and soft with the gooey marshmallow middle.  The top layer has a rich chocolate taste with the crunch of the cereal.  It's a special brownie bar and would be a hit for a any event.  I've been sharing them with some of the men at work and they keep coming back for more.  

Deluxe Chocolate Marshmallow Bars

3/4 cup butter, softened
1 1/2 cups sugar
3 eggs
1 t vanilla extract
1 1/3 cups all purpose flour
3 T baking cocoa
1/2 t baking powder
1/2 t salt
1/2 cup chopped nuts, optional

Topping:
1 1/3 cups semisweet chocolate chips
1 cup peanut butter
2 T butter
2 cups Rice Krispies

1.  In a small bowl, cream butter and sugar until light and fluffy.  Add eggs, one at a time, beating well after     each addition.  Beat in vanilla.
2.  Combine the flour, cocoa, baking powder and salt; gradually add to creamed mixture.  Stir in nuts if desired.  Spread in a greased 15 x 10 inch baking pan.
3.  Bake at 350 degrees for 15-18 minutes or until set.  
4.  Sprinkle with marshmallows; bake 2-3 minutes longer or until melted.  Place pan on a wire rack.  Using a knife dipped in water, quickly spread marshmallows evenly over the top. Cool completely.
5.   For the top layer, combine the chocolate chips, peanut butter and butter in a small saucepan.  Cook and stir over low heat until melted; stir in Rice Krispies. Spread over bars immediately.  Chill until set.  Store in the refrigerator.


36 servings
Nutrition Facts:-Added by System Jul 24--> 1 serving (1 each) equals 194 calories, 11 g fat (5 g saturated fat), 30 mg cholesterol, 143 mg sodium, 23 g carbohydrate, 1 g fiber, 3 g protein.

recipe adapted from
TasteofHome.com


Please check out our our sponsor, Caryn Hammond, of Rodan + Fields Dermatologist's  amazing site for amazing products! 


Read More »

Sunday, April 21, 2013

Cowboy Cookies in a Jar - Party Favors

0
Cowboy Cookies in a Jar Recipe

By: Sarah

For the past few weekends, my family been busy attending different parties and showers. I have to admit after being cooped up in the house for 9 weeks cuddling and loving on my new baby, being so busy on the weekends has been extremely exhausting. I know someone's going to have a case of the Mondays!  However, getting to spend time with friends and family has been totally worth it and the fun we have totally makes up for my sleep deprivation.

A couple of weekends ago,  my friend Lindsey and I threw a baby shower for our friend Bethany.  Bethany is expecting her first baby in May and I'm so excited!  She has the cutest round baby bump and you can tell being a mother comes naturally to her.  She even has that motherly glow people talk about.  I'm a little jealous of Bethany because while I was pregnant, all I got was the "pregnancy sweat" and cankles! I was like a human heater with no ankles!

For the shower, Lindsey and I put our brains together (aka skimmed Pinterest) and found several great ideas and inspirations.  Below is the recipe we used for the cookies in a jar in case you want to use them for your future party!


Cowboy Cookies in a Jar Recipe
Inspired by Bakerella 

Layer the following ingredients in a mason jar, packing each layer as you go:

1 1/3 cup all purpose flour, spooned into measuring cup & leveled
1 teaspoon baking powder
1 teaspoon baking soda
1/4 teaspoon salt
1 cup cooking oats
3/4 cup m&ms
3/4 cup semi-sweet chocolate chips
1/2 cup brown sugar, packed
1/2 cup white sugar
optional:  1/3 – 1/2 cup chopped pecans (the amount you use will depend on how tight you packed the previous ingredients)

Tip:  I usually buy mason jars at Walmart or Kroger. They are much cheaper than the jars you find at craft stores. You can also customize this recipe to match your event with your choice of M&M color and/or using white chocolate chips instead of semi-sweet.

On the jar, make sure to attach the following directions:


Preheat oven to 350 degrees.
Stir dry ingredients in a large bowl and add:

1/2 cup butter (almost melted),
 1 slightly beaten egg,
& 1 teaspoon vanilla extract. 
Combine thoroughly. 
Roll into 1 1/2 inch balls & bake for 10 minutes.

 These were made with red and green M&Ms, perfect for Christmas!

If you would like a PDF of any of the labels I used, please feel free to email me. 


Enjoy a few pics from the shower! 
Yummy Goodies!
The top cake was a yellow cake filled with chocolate buttercream icing and the bottom cake was chocolate cake filled with Oreo buttercream icing. The H was made with white chocolate.


White chocolate dipped marshmallows  covered with sprinkles.
Sugar Cookies
Sugar Cookies
The gift table.
Read More »