Showing posts with label Sarahs Recipes. Show all posts

Sunday, October 20, 2013

Chocolate Dipped Cupcakes with Marshmallow Cobwebs

0
By Sarah


Cupcakes are my favorite kind of desserts to bake. Compared to making a detailed cake, cupcakes are relatively quick to make and decorate.  They are also so much easier to serve and I feel less guilty when I eat 1 or 2 cupcakes.  Because they are pretty quick to whip up, I like to experiment with different flavors and decorating techniques.

Last year, I came across a picture of a cake on Pinterest that looked like it had spider webs on it.  I thought it was so cool and I've been waiting for Halloween to come around so I could try it.  But making a cake takes too long, so I decided I would try it on a cupcake.  However, I thought it would look a little funny drizzling the melted marshmallow on a plain cupcake, I decided it would look much better if the cupcake was dipped in chocolate first!! You can tell I love everything chocolate dipped since I made chocolate dipped apples last week.  I did tweak my tempered chocolate recipe though! I like this one the best because while the chocolate got hard, it was still soft enough to cut through easily.

As for these techniques, they were super easy! The hardest part of tempering the chocolate was having the patience to let it cool down before dipping the cupcakes.  Making the cob webs were also super fun and easy, but very messy! The cobwebs would be a lot of fun for kids!

Chocolate Dipped Cupcakes with Marshmallow Cobwebs

24 iced cupcakes
1 box melting vanilla chocolate
3 tablespoons canola oil
1 bag mini marshmallows
24 spider rings

1. Make your favorite cupcake and buttercream icing.  Ice the cupcakes really high, using about 1/2 cup of icing on each cupcake.

2.  Place completed cupcakes in refrigerator to chill while tempering the chocolate.  Combine chocolate and oil in a small saucepan set over a medium saucepan of simmering water.  Don't let the water get too hot and boil because the chocolate will overheat.  Stir constantly until the chocolate is melted and smooth.  Transfer into a small, but deep bowl and let chocolate cool for 15-20 minutes.


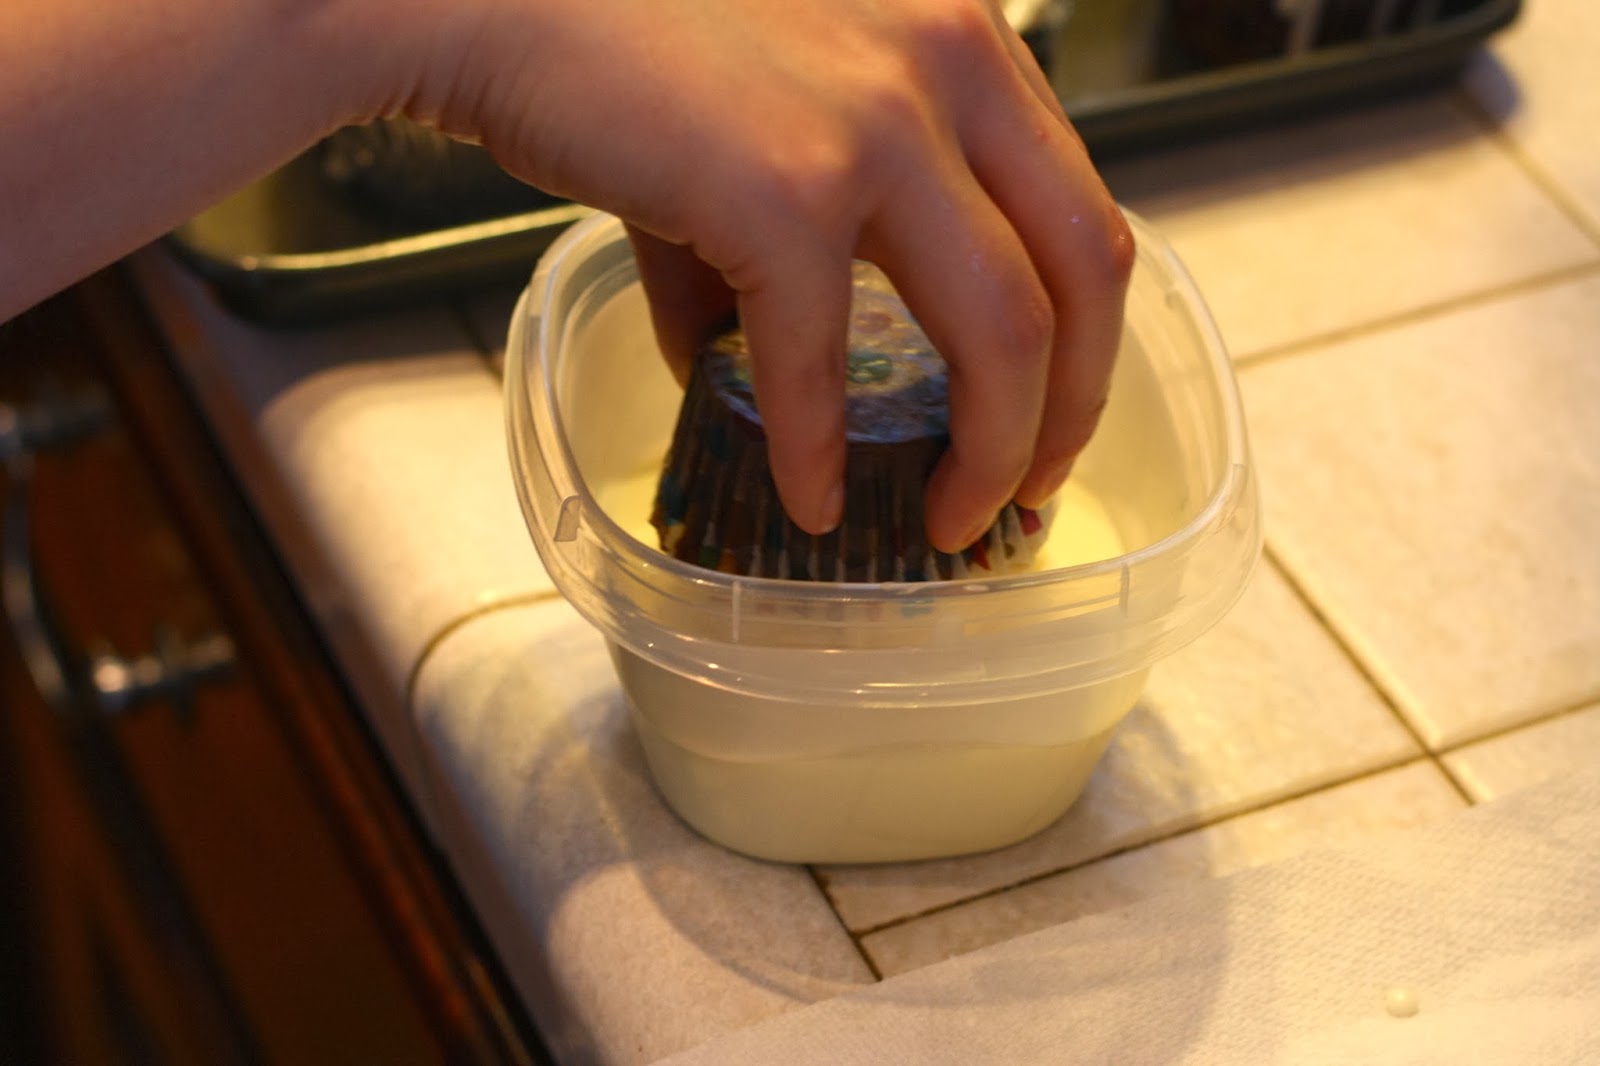
3.  Once the chocolate is cool to the touch, dip a cupcake into the chocolate by holding the cupcake by it's bottom.  Let the excess chocolate drip off and then transfer to a cookie sheet.  Place cupcakes in the refrigerator to speed up the setting process.

4.  In the meantime, take 1 bag of mini marshmallows and put in a microwaveable bowl.  Microwave for 30 seconds.  Stir until the marshmallows are completely melted and continue to stir until it is cool to the touch.  It take about 5 minutes.
Before
After
After microwaved for 30 seconds


5.  Remove cupcakes from the refrigerator once the chocolate has hardened.  Using two fingers & two hands, string the melted marshmallow all over the cupcakes. Decorate as desired.  I stuck a plastic spider ring into the cupcake as the final touch or you could use Christy's spider technique she posted last week and pipe it on the cupcake!


Here are few pics of the finished cupcakes!


Please check out our our sponsor, Caryn Hammond, of Rodan + Fields Dermatologist's amazing site for amazing products!
Read More »

Saturday, October 12, 2013

Caramel Chocolate Candy Covered Apples

0
By Sarah


A few years ago, way before kids, my husband and I went to the St. James Court Art Show in Louisville.  I don't get to go every year and I was disappointed that I didn't get to go a few weeks ago. This festival is amazing and if you are ever in the Louisville area when it's going on, you have to go! This art show was first started in 1957 to help raise money for the Saint James Court Association as well to bring local artists and residents together.  In 2003, 2004, 2006, 2009, 2010, & 2011 the St. James Court Art Show was voted best art show in the nation. According to their site, they now have nearly 750 exhibitors and more than 300,000 attendees!

Anyway, Nick and I found ourselves walking the streets of artists and vendors amazed at all of the talent that surrounded us. I looked through hundreds of paintings, browsed handfuls of homemade necklaces and earrings, yet I didn't fall in love with anything.  Finally, we turned the corner and I saw it! I had to have it! It was perfect for me! What was it, you say? A caramel, chocolate, & candy covered apple of course!!! Yes, out of the entire art fair, the only thing Nick and I bought was a dessert! It looked so delicious with all the yummy goodness drizzled all over it and it tasted event better than it looked.

Since that day I have always thought about recreating my souvenir, so what better time than apple week at BCB! I have to admit, this dessert was a little more work than I expected. I decided to take a short cut and not make homemade caramel, so I melted caramel candies instead.  That process took longer than I expected because it is so easy to let it get too hot and burn.  Another surprise was that the entire 11 oz bag of caramels only covered 4 large granny smith apples.  Making this dessert is also somewhat messy.  However, I was impressed with the way the apples looked when they were done and I think they would make excellent gifts dressed up in a little bag! Also, they tasted even better than I remember!

Ingredients:

11 oz bag of caramels
16 oz of vanilla melting chocolate
candy of your choice (heath bar crumbs, candy corn, nuts, m&m's, etc.)
kabob skewers (trimmed to the length of your preference)
4 large granny smith apples
parchment paper

1. Clean apples and trim stems off.  Stick skewers through the top and push half way into the apple.  Chill apples in refrigerator while melting the caramel.
2. Unwrap all of the caramels and put in sauce pan.  Put over light - medium heat and stir frequently.  Be careful not to let it get too hot because caramel will burn easily.  Once it is melted you are ready to cover your apples.
3.  One at a time, roll the apples in the hot caramel sauce.  Once it is completely covered, place on parchment paper.  The caramel will not take long to set.
4.  Once you have covered all of your apples with caramel it is time to melt the chocolate.  Temper the chocolate in a saucepan sitting in simmering water.  This will keep the chocolate from getting too hot and boiling.  Stir frequently until the chocolate has melted entirely.
5.  Once it is melted, remove from heat and let sit for 10-12 minutes.  Then dip apples into the chocolate covering it entirely.  After the apples are covered in chocolate, let them sit for a couple of minutes and next roll in candy to cover. Once all apples are covered in chocolate and candy, place them back in the refrigerator to let the chocolate harden up.


6.  Pour the remaining melted chocolate in a Wilton disposable icing bag.  After a few minutes, take the apples out of the refrigerator and drizzle the melted chocolate all over the apples and decorate as desired.  Finally, place them back into the refrigerator to let the drizzles harden up. In about 10 minutes the apples are all done and ready to devour!! Enjoy!


Caramel, Chocolate & Nut
Caramel & Chocolate
Caramel, Chocolate, and Candy Corn
Caramel, Chocolate, & Heath Bar bits


Please check out our our sponsor, Caryn Hammond, of Rodan + Fields Dermatologist's  amazing site for amazing products! 


Read More »

Saturday, October 5, 2013

S'mores Cupcakes with Toasted Marshmallow Icing

0
By: Sarah


Marshmallows are something we always have in my house.  My son LOVES them. His favorite ones to eat are the mini marshmallows.  If I let him he would eat them by the handful.  My husband's favorite marshmallow treat is marshmallow fluff right out of the jar on graham crackers.  When we first started dating he introduced me to this delicacy and I have to admit, it's quite yummy.

This week when I ran into Kroger to pick up yet another refill of formula and diapers, I took my regular trip down the baking aisle just to browse and I came across a new marshmallow dessert!  Did you now they now sell S'more's cupcake kits? I did not! I was intrigued! "Challenge accepted!" I said to myself while standing in the aisle drooling. The picture on the box looked pretty, but I was imagining my S'more dessert to be totally different. So that is how I decided I would create a S'mores cupcake.

I'm normally a Pillsbury Cake Mix kinda girl, but Betty Crocker's Super Moist Triple Chocolate cake mix won me over because of the name. It sounded perfect for the melted chocolate like taste you get in a real S'more that I was looking for.  I also grabbed a bag of chocolate chips and some graham crackers.  In the back of my mind I was thinking about Martha Stewart's Marshmallow Frosting recipe that I had stumbled across just a few days before and how it would be the perfect topping.  Once I was at home and the kids were asleep, I was ready to experiment!
I have to admit, I fell in love with the final product.  For experimental purposes,  I made a few cupcakes with and without the graham cracker crumb crust. However, I think between the icing and the crust, this combination with the chocolate is what makes this cupcake extraordinary!  As for the graham cracker chunks I mixed into the cupcake, it looked cool in the cupcakes, but could easily be left out.

My co-worker, Blair,  gives this recipe a Thumbs Up! She suggested a marshmallow fluff filling!
I took them to work with me to let my favorite "taste testers" try them out and they claim they are my best yet! One of my co-workers, Julie, thought she loved my Oreo cupcakes the best, but now she said she wasn't too sure. She told me that now her top 4 are the S'mores, Oreo, Cookie Dough, and Hummingbird cupcakes. There is no higher compliment to a baker than an empty container to take home!! I was pretty impressed with how these cupcakes disappeared 1 and sometimes 2 at a time ;)

S'mores Cupcakes
Inspired by Smore's Cupcake Kit in Kroger....

Graham Cracker Crust

I made my crust for the bottom of the cupcakes just like Honey Maid suggests making pie crusts.  Each cupcake only needs about 1-2 tablespoons of the crust depending on your preference.  My crust was about a 1/4 inch thick, which left plenty of room for the cupcake mix.  
1 1/4 cup graham cracker crumbs
1/4 cup sugar
5 tablespoons melted better

1. Mix crumbs, sugar, and butter together.
2. Place a tablespoon or 2 of the mix in the bottom of a cupcake liner.
3.  Use a spoon to flatten and make the crust compact by pushing the crumbs down in the liner.


Cupcake

 Betty Crocker Super Moist Triple Chocolate Cake Mix (or your favorite chocolate cake recipe)
1 cup chocoate chips
3 cups graham cracker chunks (large crumbs) - optional

1. Make the recipe according to the back of the box.
2. Add chocolate chips and graham cracker chunks and mix until blended.
3.  Fill cupcake liners about 3/4 full and bake according to the box recipe.
4. When done, remove cupcakes form oven and let cool.

Marshmallow Icing

8 egg whites
2 cups sugar
1/2 teaspoon cream of tartar

2 teaspoons vanilla 

1.  Place egg whites, sugar, and cream of tartar in a heatproof bowl of an electric mixer.  Set over a saucepan with simmering water. Whisk constantly until sugar is dissolved and whites are warm to the touch, approximately 3 to 4 minutes.
2.  Transfer bowl to electric mixer using the whisk attachment.  Beat, starting on low speed and gradually increasing to high, until stiff, glossy peaks form, approximately 5-7 minutes.  Add vanilla, and mix until combined.  Use immediately.

Ice the Cupcakes

1.  Once the cupcakes are cool it is time to ice them.  I used a Wilton disposable piping bag with tip 4B.
2.  Use a kitchen torch to toast the marshmallow icing.  Be careful not to light the cupcake liner on fire.  One of mine did! 

3. Enjoy!

Store these cupcakes in an airtight container and eat within 2 days for optimum freshness.


Please check out our our sponsor, Caryn Hammond, of Rodan + Fields Dermatologist's  amazing site for amazing products! 


Read More »

Monday, September 23, 2013

Owls & Onesies - Decorated Sugar Cookies for a Girl's Baby Shower

0


By: Sarah

My husband has a big family! He has 3 brothers and a sister, which are all married or engaged.  Our kids make up the 6 & 7th grand kids on his side.  As wild as it can be with all of us together, I love Nick's family! His brothers and sisters, and their significant others, are all genuinely nice and they are always accepting of every one's thoughts and opinions (which there are a lot of). I always hear people complaining about their significant other's family, but not me! My husband's family is so close and they love to get together as much as they can. When we are all together, it's a little chaotic, but you have never heard so much laughter.  Nick's parents are also amazing! Nick reminds me so much of his dad.  His dad seems to know everything when it comes to fixing things and he is such a sweet, gentle man. His mom is also one of the most compassionate, caring, and patient women I know, which also reminds me of Nick.  All in all, I am blessed to have married into such an amazing family! 

Anyway, this past Sunday I made cookies to take to Crystal's (my sister in law) shower.  She is having baby number 2 (the 8th grand kid) and I couldn't be more excited. It is going to be so much fun for Caroline, my daughter, to have a cousin so close in age.  For Crystal's special day, I decided to make a variety of cookies including an owl* and onesie shape.  

*To make the owl cookie, I used a tulip cookie cutter and cut off the stem. 

Sugar Cookie Recipe 
from www.sweetopia.net
**2.5 cups unsalted butter (room temperature)
2 cups sugar
2 large eggs
3 t vanilla
5 cups flour
1 t salt

**I only used 2 cups of butter because my cookies kept spreading.  Christy always uses the full amount the recipe calls for and her cookies turn out amazing, so it depends on your oven. I couldn't tell a difference in the flavor.    
1. Cream the butter and sugar together in the bowl of an electric mixer on low to medium speed.  (Use the paddle attachment).  Mix until thoroughly incorporated – for about one minute.  Scrape down the sides of the bowl with a plastic spatula and mix again for a few seconds more.
Over mixing the butter and sugar in this step will cause too much air to be incorporated into the dough.  If you’d like a light and fluffy cookie, that’s ideal, however the dough will spread more during baking; not ideal if you’d like the cookie to hold its shape.
2. Add eggs slowly and mix.  Scrape down the bowl with your spatula at least once and mix again.
3. Add liquid vanilla extract.  Stir briefly.
4. Sift your dry ingredients together.  (Flour and salt).
5. Add all of the flour mixture to the bowl.  Place a large tea towel or two small tea towels between the edge of the bowl and the electric mixer so that the flour won’t escape.  Mix on low speed for 3o seconds.  Remove the tea towels and observe the dough mixing; when it clumps around the paddle attachment it’s ready.  It’s also important at this stage not to over mix the dough (the gluten's in the flour develop and the dough can become tough).
6. Roll the dough out between 2 large pieces of parchment paper.  Place on a baking sheet and into the fridge for a minimum of 1 hour.
7. Once the dough is cold, remove from refrigerator, peel off the parchment paper.  Cut out the cookie shapes and place shapes on baking sheet.  Re-roll scraps between the parchment paper and place back in refrigerator.  Repeat until out of dough.
8. Put cookie dough shapes back into the fridge for 10 minutes to 1 hour to chill again.  They will then hold their shape better when baked.
9. Preheat your oven to 350°F or 176°C.
10. Bake cookies for 8-12 minutes or until the edges become golden brown.  The baking time will depend on the size of your cookie.
11. Let cookies cool to room temperature and decorate!


Royal Icing Recipe
from www.sweetopia.net
3/4 cup warm water
5 T meringue powder
1 t cream of tartar
2.25 lbs powdered sugar
1 teaspoon vanilla

1.  Mix water and meringue powder with whisk for 30 seconds.
2.  Add cream of tartar and whisk for 30 seconds. Add 1 teaspoon of vanilla. 
3.  Add all the powdered sugar and mix on slow with mixer for 10 minutes.
4.  Tint with food coloring.

Use the 10 second rule when determining if your icing is at the right consistency.  Basically, drag a knife through the icing going about 1 inch deep.  Count to 10. If the line disappears right at 10 seconds, the icing is perfect.  If it disappears before 10 seconds it is too thin.   If it is very close, I go ahead an use it to decorate.  However, if it is far off and the line quickly disappears, add some powdered sugar.  If it takes much longer than 10 seconds, it is too thick.  Add some more water.  I usually add water 1 tsp at a time to make sure I don't over do it.

How to decorate these cookies:
The hardest part of making these cookies, is making the icing the right consistency.  My biggest piece of advice is that it is much easier to make it thin than it is to make it thick, so go slow when you add water to the icing.  

1.  Determine how many colors you will use and divide your icing accordingly.  I usually sketch my cookies out so that I have a blueprint of what my cookies will look like and I can see what colors I will need the most or little of.  Once you have your icing divided, it's time to add the food coloring.  I use Wilton food coloring.  

In the picture you can see that I have wet paper towels covering my icing.  If it's just going to be a few minutes that I'm away from the icing I use a wet paper towel, but if I plan on being away longer, I cover my icing with saran wrap.  Have the saran wrap touching the icing and keeping as much air away from the icing as possible.  This icing dries out super quick so please be careful.  For extended periods of time, I use a plastic covered bowl (like Tupperware) along with the saran wrap under the lid.  

2.  Prepare your bags.  This is also something that takes a few minutes so I recommend doing this in advance.  I use Wilton's disposable icing bags, couplers, and tips 1, 2, 3. 
3.  Once your bags are prepared, it's time to fill them up with icing.  I find it is easier to put the icing bag in a tall glass because if I fill it while holding it, I make a huge mess.  Once it's full, I twist the top of the bag and secure it with a Wilton rubber band.  Royal icing is pretty runny and if you aren't careful it will pour out the back of the bag, which is why I secure it with the rubber band.  Once I have the bags filled with icing, I cover the tips with a wet paper towel so the icing doesn't dry in the very tip.  If it does, a toothpick will come in handy.  

4.  Finally, it's time to decorate!  Take your cooled cookie and outline it with your base color using tip 3.  Once it is outlined, fill it in.  You will want to do this back to back while the outline is still wet.  To make the polka dots, once you have filled in the entire cookie, take the 2nd color and place little dots where desired.  As you can tell the icing is somewhat raised and you can see a lot of lines.  In order to make it smooth, I hold the cookie between my thumb and middle finger and I shake it side to side.  Once it is smooth I sit it down to dry.  When shaking it, it's important not to shake it too hard because the icing will start to roll off the cookie.  

5.  I usually let the cookies dry for about 30-45 minutes before adding the details on top of my bottom layer.  

For the onesie, all that is left to do is to outline the onsie shape on top of the cookie and add an initial. I usually use tip 1 or 2 for the outline and writing.

For the owl, I then added the wings, eyes, and beak using tip 3 for the wings and eyes and tip 1 for the beak.  I added the wings by first outlining the shape of the wings and then filling it in with the icing.  A few shakes and it was super smooth.  Then I added two large dots for eyes.  No need to shake for that because I wanted them to be somewhat raised and to stay in a circle.  Next I added a tiny triangle for the beak.  After 30-45 minutes, I finally added the outline on top of the cookie, the small dots for eyelashes, and two dots for the eyes using tips 1.  

For my circular "baby" cookies, I decorated the base just the same as the onesie and owl cookies.  I let them sit for 30-45 minutes and then came back to add a border.  When adding a border of the small dots using tip 2, I spaced the dots pretty far apart.  If I had placed them next to each other, they would melt together to form one big dot. I then let the spaced dots dry for about 30 minutes and then came back and filled in the spaces. Finally, I wrote baby with tip 1 and I was done.  

I usually let these cookies dry over night and by morning the icing has hardened up and the cookies are stackable.  These cookies travel very well. 

These cookies are not hard to make, but it does take patience and quite a bite of detail work.  I love making them and I love eating them even more! 
Enjoy! 


Here are some pics of my son decorating some cookies.  His technique is much more fun and messy!! I think he ended up eating more icing than what he put on his cookies.


Please check out our sponsor, Caryn Hammond, of Rodan + Fields Dermatologist's  amazing site for amazing products! 
Read More »