Thursday, June 28, 2012

4th of July Cupcakes

0
by Cindy


Summer has come so quickly and I can't believe July the 4rth is almost here.  Since it's on a Wednesday this year, it certainly messes up having a long weekend, but I'm looking forward to seeing my family this weekend.
I made cupcakes for the occasion.  They are not fancy but they are festive, and festive is fun. lol  I just used a white cake mix and added food coloring to make the red, white, and blue cake mix.  As I say, it's all about the icing, and my kids love this icing.  They say that they could eat it with a spoon.  It's the icing that I use on all my birthday and shower cakes.  For those of you in Webster County who miss my cakes, here's your chance to make it yourself. 
God bless America!  Enjoy the 4rth and be safe.

1 pkg white cake mix
red and blue food coloring

White Icing
2 lb sack of powdered sugar
1 t clear vanilla extract
1/8 t butter flavor extract
1/2 t salt
1/2 c water
1 cup Crisco (do not substitute with a generic)

Make the white cake mix according to box instructions.  Put paper muffin cups into muffin pan. (Makes realisitically about 18 cupcakes).  Separate the cake batter into three bowls.  Add the food coloring until you get the darkness you want.  Using a small cookie scoop, add a layer blue cake batter to muffin cups first.  Then add a layer of white cake mix, following with the red cake batter.  Bake according to cake mix directions or until toothpick comes out clean. 


Icing
Put powdered sugar in mixing bowl.  Add vanilla extract, butter flavor extract, and salt.  With mixer running on low, add water.  If it is a little too thick, add water a teaspoon at a time until it is desired consistency.  With the mixer still running on low. add the Crisco. 
Put a line of blue food coloring down one side of a decorating bag, and put a line of red food coloring on the opposite side of the bag.  Add icing and pipe on the cupcakes. 
Read More »

Sunday, June 24, 2012

Peanut Butter, Banana, and Chocolate Icebox Pie

0
I made this pie for Father's Day (which we celebrated a week late).  Growing up I hung out a lot at my Dad's parents house.  Frank, which his what I call my grandfather, hates peanut butter! My sister and I would always make Frank little treats to eat and we would sneak peanut butter in them. His face was priceless each time he found the peanut butter. (Secretly, I always thought he liked it, but come to find out he was telling the truth). So today when we sat down for lunch at my house, I told him that I had made him a special treat, Peanut Butter Pie! Needless to say, his love for peanut butter hasn't changed. I made him a Peach Upside Down Cake just in case ;)


Peanut Butter, Banana, and Chocolate Icebox Pie*
Adapted from Southern Living, June 2012

2 cups cinnamon graham cracker crumbs (about 15 sheets)
1/2 cup chopped honey roasted peanuts
1/2 cup butter, melted
1 (4 oz) semisweet chocolate baking bar, chopped
2 cups whipping cream, divided
1 (8 oz) package cream cheese, softened
1 cup creamy peanut butter
1/2 cup firmly packed light brown sugar
2 tsp. vanilla extract
2 large bananas, sliced

1. Preheat oven to 350 degrees.  Stir together graham cracker crumbs, finely chopped peanuts, and butter.  Firmly press mixture  on buttom and sides of a greased 9 inch pie plate. Bake 10-12 minutes, or until lightly browned. Remvoe from oven and cool completely.   
2.  Microwave chocolate and 1/2 cup whipping cream at medium (50% power) 1.5 minutes or until chocolate is almost melted, stirring with whisk at 30-second intervals. Spoon mixture into prepared crust.  Cover chocolate mixture with banana slices.
3.  Beat cream cheese, peanut butter, brown sugar, and 1/4 cup whipping cream at medium speed until light and fluffy.
4.  Beat vanilla and remaining 1.25 cups whipping cream at high speed until stiff peaks form.  Fold whipped cream mixture into peanut butter mixture.  
5. Spread peanut butter mixture over banana slices.  Cover and chill for 8 hours.  Serve pie with desired toppings such as chopped peanuts, whipped cream, chocolate chips, chocolate syrup, etc.

Happy Baking!!
Sarah 

*This recipe was really rich and I like the combination for the peanut butter, chocolate, and bananas.  However, you could omit the chocolate and bananas and just fill pie with the peanut butter filling. Also, you could use a pre made graham cracker crust. It would be just as delicious and several less steps!!


Read More »

Friday, June 22, 2012

Peanut Peanut Butter Brownies

0
By Christy

I've said it before, and I'll say it again... I love the marriage of chocolate and peanut butter flavors! I remember when I was little mom used to take low fat chocolate ice cream bars and put chunky peanut butter on the sides of the bar. What a genius idea! I really did think that treat hung the moon (and I'm pretty sure it probably still does). That was the beginning of the love affair for me, chocolate and peanut butter. Therefore when baking with peanut butter came up this week of course my go to was to give you all a recipe with a combination of both.  Today I present to you a peanut peanut butter brownie. It is rich, moist, and super easy to make!

Ingredients:
1 box of brownies prepared according to box
3/4 cup of salted peanuts
1/2 cup creamy peanut butter
1- 14 oz can of sweetened condensed milk

Preheat the oven to 350 and prep a 9x13 pan with butter or baking joy spray.
Prepare the brownie mix according to the box directions. Once well combined add the peanuts to the brownie batter. Split the batter in half. Put half the brownie batter into the bottom of the pan - use a spoon to spread it out.
Mix together the peanut butter and condensed milk until well combined. Pour the peanut butter mixture over the brownie batter in the pan. Take the remaining brownie batter and crumble it over the top of the peanut butter mixture as evenly as possible. Using a spoon swirl the top brownie layer into the peanut butter. Bake for 30 minutes at 350 or until firm in the center.
Read More »

Wednesday, June 20, 2012

Peanut Butter-Chocolate Twist Cupcakes

0
By Cindy

We celebrated a birthday at the office Monday, so I volunteered to make cupcakes.  I decided to make these peanut butter cupcakes because most everyone likes chocolate and peanut butter.  They are totally from scratch but I think making a chocolate cake mix would be just as good, because I always say that it's all about the icing.  Homemade icing is the best part of a cupcake or cake for me.  The cake turned out soft and tender, and the icing was delicious with just a hint of chocolate.  I grated a part of a chocolate bar over the tops right after I frosted them, and added a half of a mini Reese Cup.  They look beautiful. 

Peanut Butter-Chocolate Twist Cupcakes

1/2 cup butter
3 eggs
2 1/2 cups all-purpose flour
2 1/2 t baking powder
1/2 t salt
1/3 cup creamy peanut butter
1 cup packed brown sugar
3/4 cup granulated sugar
1 1/2 t vanilla
1 cup milk
4 ounces milk chocolate, melted
1 recipe Peanut Butter Frosting
1 recipe Chocolate Frosting
Shaved milk chocolate and/or bite-size chocolate-covered peanut
butter cups, halved

1.  Allow butter and eggs to stand at room temperature for 30 minutes.  Meanwhile, line muffin cups with paper baking cups.  In a medium bowl combine flour, baking powder, and salt.
2.  Preheat oven to 375 degrees F.  In a large bowl beat butter with an electric mixer on medium speed for 30 seconds.  Add peanut butter; beat until combined.  Gradually add brown sugar and granulated sugar, about 1/4 cup at a time, beating on medium speed until combined.  Scrape side of bowl; beat about 2 minutes more or until fluffy.  Add eggs, one at a time, beating well after each addition.  Beat in vanilla.  Alternately add flour mixture and milk to butter mixture, beating on low speed after each addition just until combined.
3.  Place half of the batter into a separate mixing bowl; add melted chocolate.  Beat with electric mixer on low speed just until combined.
4.  Fill prepared muffin cups by alternating spoonfuls of peanut butter batter and chocolate batter, filling each cup about 2/3 full.  Use a butter knife or skewer to swirl batter in each cup.
5.  Bake for 15 to 18 minutes or until a toothpick inserted in centers comes out clean.  Cool cupcakes in muffin cups on wire racks for 5 minutes.  Remove cupcakes from muffin cups.  Cool completely on wire racks.

6.  Fit a pastry bag with a round or star tip.  Spoon Peanut Butter Frosting along one side of the bag; spoon Chocolate Frosting along the other side of the bag (frostings will be side by side in the bag).  Pipe frosting in swirls onto the cupcakes.  Top with shaved chocolate and/or peanut butter cup halves. 

Peanut Butter Frosting:  Allow one 8-ounce package cream cheese to stand at room temperature for 30 minutes.  In a large mixing bowl beat cream cheese, 1/2 cup creamy peanut butter, and 2 teaspoons vanilla with an electric mixer on medium speed until light and fluffy.  Gradually beat in 6 cups powdered sugar.  Add milk, 1 teaspoon at a time, until frosting reaches piping consistency.  Divide frosting into two portions.  Set one aside for Chocolate Frosting.  Makes 2 (about 1 1/2 cup) portions.

Chocolate Frosting:  In a medium bowl combine one portion of the Peanut Butter Frosting and 4 ounces milk chocolate, melted and cooled.  Beat with an electric mixer on medium speed until combined.  If necessary, beat in additional powdered sugar or milk until frosting reaches piping consistency.  Makes about 1 1/2 cups.

Recipe from
Better Homes and Gardens Special Interest Publications Cupcakes 2012
Read More »

Monday, June 18, 2012

Chocolate Filled Chocolate Chip Cookies

0
By Christy

At least once a week Mom, Sarah and I usually partake in at least one 3 way call on the way home from work. With how busy we get, it seems like the only time we have a free moment to chat is when we are riding in the car, and luckily we all get off work about the same time. Of course the topic of baking usually comes up and when we talked about making cookies this week, Sarah brought up how amazing the chocolate filled chocolate chip cookies from Penn Station are. I have actually never eaten at Penn Station, but I was determined to recreate this cookie she was describing. In my mind I was putting two and two together: I had a  half a jar of Nutella left over from my Cinnamon Sugar Nutella Croissants, and I had all the ingredients to whip up some chocolate chip cookies. Therefore this experiment was immediately put on my to do list. 
I rank these cookies an 11 out of 10. I LOVED them. Of course it would be impossible to not love nutella, and I already know I love my recipe for chocolate chip cookies ---so really how could this experiment have failed? (Pretty sure it couldn't). The nutella stays soft in the center of the cookie and it's OMG moist, and delicious and ultra chocolaty. And I didn't even mind the chocolate that got on my fingers because it just made the cookie even more finger licking good. LOL


Start by whipping up (or if you are in a rush, use premade cookie dough) a recipe of cookie dough.
Here is a link to BcB's favorite chocolate chip cookie recipe we posted in the past.

The rest is simple. Take about a tablespoon and a half of cookie dough and flatten it into the palm of your hand or onto a floured surface. Add about 1 teaspoon of chilled nutella or an off brand of hazelnut chocolate spread to the center of the flattened cookie dough. Wrap the excess cookie dough edges around the nutella to seal the spread into the center of the cookie. If the nutella squeezes out of the dough a little, no worries, it kind of makes a chocolate swirl in the cookie and still bakes up nicely. (trust me, I learned from experience on a few, because I put too much nutella filling-- but wait, is there really ever too much nutella?)


Be prepared, the cookies are pretty big! Look how big they are pre-baked!

Read More »

Thursday, June 14, 2012

Product Review: Rubber Spatula Beater Blade

0
By: Christy

If you know me, you know that I am exceptionally good at giving my opinion. Hence, why I must love doing product reviews. lol I aquired my kitchen aid mixer a little less than a year ago, and as soon as I got it I starting thinking of all the fun attachments and gadgets I could buy to go along with my new favorite kitchen toy. The list is long, but one of the few items I have actually got around to purchasing is a rubber spatula beater blade.


You can find these at a wide variety of stores, including Target or Walmart, and they are especially easy to find around the holidays (obviously because they are good gifts). Ranging around $20, this would be great moderately priced gift for any person that has a kitchen aid mixer.

I love this product. I don't use it for everything I mix (if I am mixing dough or something super thick I use my normal beater), but I do choose to use this product quite a bit because for the most part it means no more having to stop and push down your mixture from the sides of the mixing bowl. Genius! Plus it is dishwasher safe.Now while it is close to being perfect, it isn't 100% perfect. It doesn't always mix the very bottom of the bowl very well, and it makes a little bit more noise (since it is scraping the sides) than normal but those really are its only flaws. All in all I give this product a 8.5 out of 10 for awesomeness .
Read More »

That 70's Cornflake Cookie

0
by Cindy


It seems like most of the recipes that I have accumulated over the last 30 years have come from potluck dinners at my church.  Potluck dinners are a great place to try new dishes and find new and delicious recipes.  Someone brought these cookies to a potluck several years ago, and I thought they were fantastic.  I must admit though, that it seems like food tastes better when someone else makes it. lol  I played with the recipe a little and added white chocolate chips to the last 3rd of the dough, because as you all should know by now that I'm a chocoholic.   The dough was not real thick or stiff like most cookie recipes so it was very easy to mix.  I did add a little more flour on the last 3rd of the dough because they were coming out a little flatter than I wanted.  They are soft and chewy on the inside and I still love these. 

That 70's Cornflake Cookies

1 cup butter (softened)
1 cup vegetable oil
1 cup white sugar
1 cup brown sugar
1 large egg
1 cup crushed cornflakes
1 cup shredded coconut
1 cup chopped nuts
1 cup quick-cooking oats
4 cups flour, decrease to 3 1/2 cups for a chewer cookie
1 T baking soda
1/2 t salt
2 t vanilla

Preheat oven to 325 degrees.  Cream butter, sugars, vanilla and eggs.  Add oil.  Mix in dry ingredients. 
Form dough into walnut sized balls, and place on a cookie sheet and flatten with a fork dipped in water.(I didn't add all the flour so I just used the small cookie dipper to scoop out the dough and didn't press flat with a fork). 
 
Bake 10-12 minutes.  Cook on the pan for a minute or two, then transfer to a rack to cool.

Note:  You can change this and add white chocolate chips and macadamia nuts, etc.

Read More »

Friday, June 8, 2012

Frozen Strawberry Fluff Dessert

0
By Christy

I have started noticing a trend with my boyfriend and my desserts... he always seems to love the treats I make that incorporate fruit. Already knowing that ice cream probably ranks as his favorite dessert category, I decided to make this recipe for him.... a frozen strawberry fluff dessert.

It was a first try recipe that I found on another food blogger's site, She Wears Many Hats. Gosh did she make this dessert look good. I love reading lots of different food blog sites. I actually have a few of my favorites listed in the side panel of our blog but I am always on the look out for more new sites to follow. What are some of ya'lls favorite food blogs or do you have a food blog too?


Ingredients:
1 cup flour
1/4 cup brown sugar
1/4 cups chopped nuts (I used pecans)
1 stick of butter, melted
2 egg whites
1/2 cup granulated sugar
10 fluid ounces whipping cream (I think it would be just as good to use Cool whip instead of whipping your own cream)
2 tablespoons fresh lemon juice
2 cups sliced fresh strawberries, crushed/smashed

Preheat the oven to 325. Combine flour, brown sugar, nuts, and melted butter and spread in a 8x8 pan. (I of course couldn't find mine so I used a different shape.). Bake at 325 for 20 minutes. Stir a couple of times while baking and let cool completely afterwards.
Once Cooled, evenly press 2/3rds of the mixture in the pan to create crust. Beat egg whites and granulated sugar together with mixer until it forms stiff peaks. In another bowl, whip cream until it forms soft peaks as well or just use a large container of cool whip instead.
Gently combine the egg white meringue, whipped cream/cool whip, lemon juice and strawberries. Spread this mixture over the crust. Sprinkel the remaining crust mixture over the top and freeze for 3-6 hours before serving.

Read More »

Thursday, June 7, 2012

Robert Redford Cake

2
by Cindy
This recipe has been around for many, many years, and I remember the first time I ever tasted it.  I was in my 20's and working in Clay.  There was probably only one or two restaurants to choose from, but we went to this restaurant that was on Main Street quite often.  I think it was located about where Clay Video used to be or in that area.  I would order a chicken salad stuffed tomato and then get Robert Redford Cake.  It was glorious.  Some people call this cake Better Than Sex Cake too.  I looked on the web and didn't see this exact recipe anywhere, but I went back to my old cookbooks from Clay and this is the exact recipe that I had that first time because it is Carolyn Bowling's recipe.  I think she and her husband owned the restaurant.  It's not any kind of fancy schmancy recipe, but it is easy and plain good.  It's a hit at any pot luck too. I used to make this recipe often using low-cal and sugar free ingredients, but I wanted to share the full fledged Robert Redford Cake with you, because it really is better than the low fat version (go figure-lol).  Oh and by the way, I really do love Robert Redford - still today.lol

Robert Redford Cake

1 pkg (13 oz) Pecan Sandies Cookies, crushed
1/2 cup melted butter
1 (16oz) large tub Cool Whip
1-8 oz pkg cream cheese, softened
1 cup sugar
1 large pkg instant chocolate pudding
3 cups milk

Crush cookies or chop them in a food processor taking out any large pieces.  Mix the melted butter with crushed cookies and press into a 9x13 inch pan. 
Whip cream cheese then add sugar.  Add 1/2 of the Cool Whip and mix together.  Place dollops all over the cookie crust and then spread it evenly over the crust being careful not to disturb the crust. 
Mix the pudding with the milk until thickened (whisk a couple of minutes).  Pour this onto the cream cheese layer.  Let the pudding set for a few minutes then carefully spread the rest of the cool whip on top.  Garnish with nuts or mini chocolate chips.


recipe adapted from
Carolyn Bowling's recipe in
Butter 'n Love Recipes
Clay Elementary School Cookbook
Read More »

Tuesday, June 5, 2012

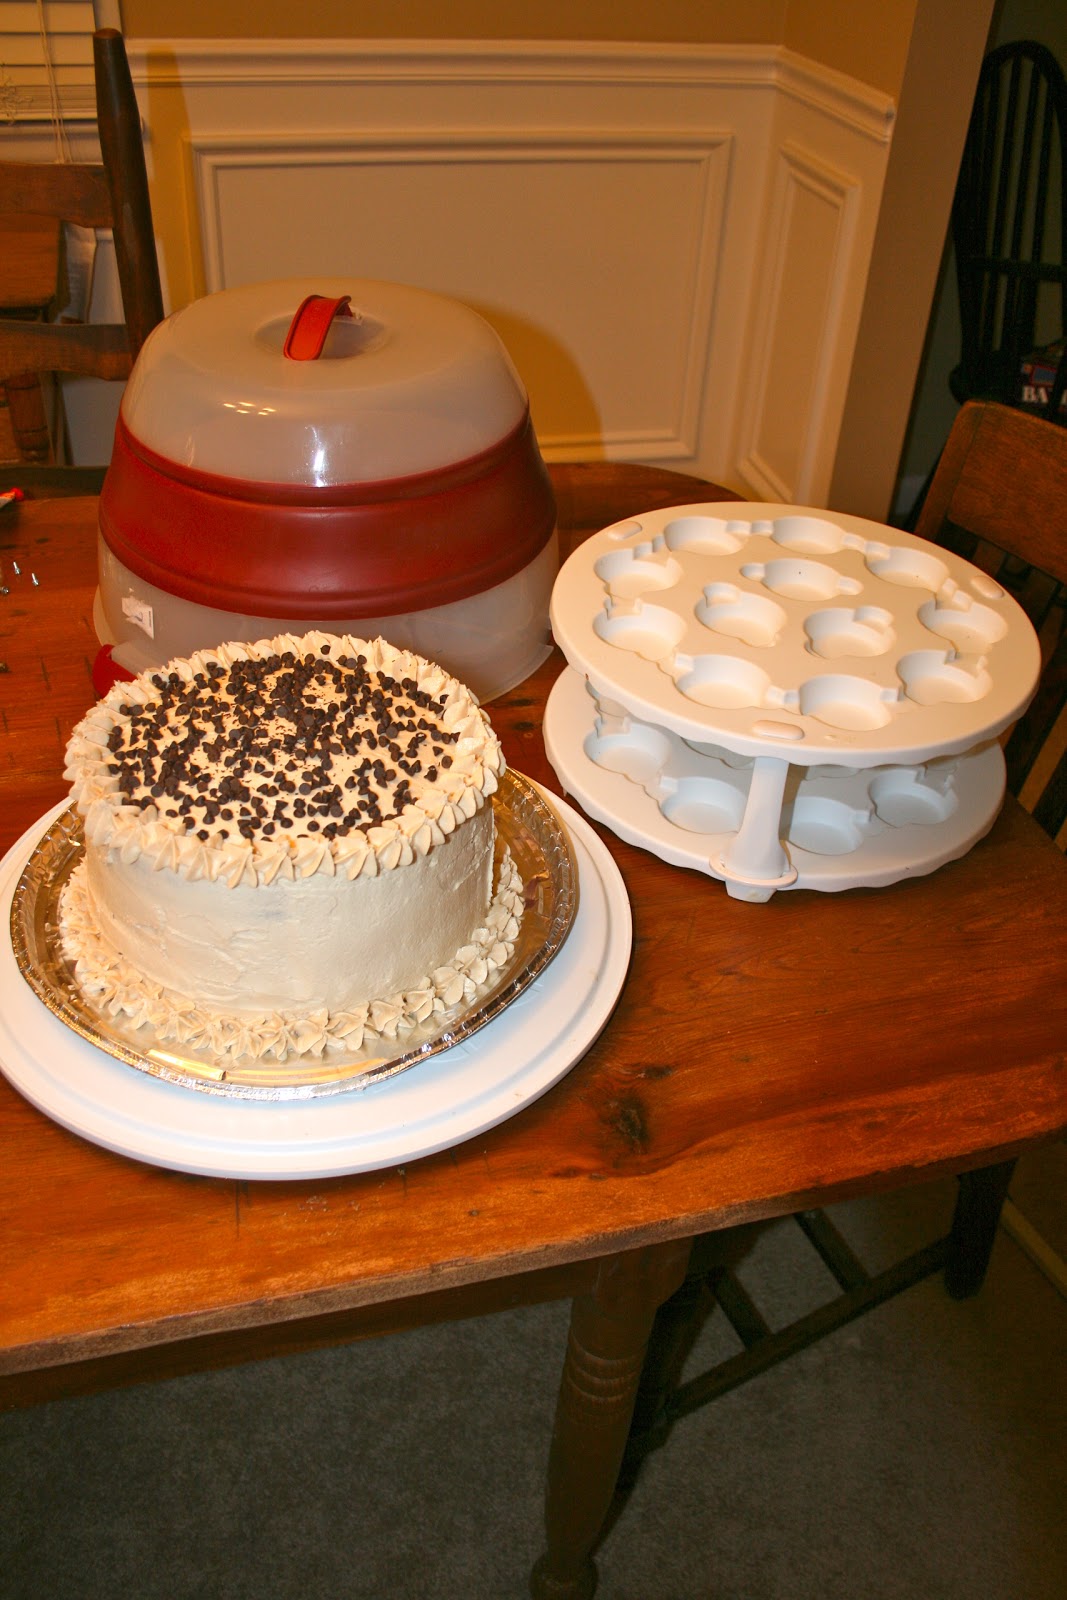
Product Review: Cupcake / Cake Carrier

1
By Christy

There are some things you buy and after using your new purchase a few times you begin to wonder how you ever lived with out it. There are a few things that come to mind when I think of these kinds of items.

This carrier has silicon sides that can collapse down to one layer but also expands and can hold up to 24 cupcakes and a 3 tier cake. It is very sturdy and there is no scare of the sides collapsing by accident or the floor bottoming out due to a heavy cake. I have never had cupcakes or cakes get messed up while being transported in this carrier and it is by far one of my favorite baking tools I have ever purchased, especially since I love taking my baked goods outside the home.


The carrier is big but it fits perfectly in my spare refrigerator and I keep it stored collapsed. It is easy to clean and I have even put the cupcake and bottom in the dishwasher. All around, I give this product an A+ and highly recommend it to all our of our readers. I actually found mine at TJMaxx but if you want to get one for yourself, check out this link. Happy Baking!
Read More »

Wednesday, May 30, 2012

Frozen Oreo Dessert

0
by Cindy


This year has been the most unseasonably warm year that I can remember, so it's time to break out the recipes for frozen desserts.  This dessert will help cool anyone off after a long hot day.  My friend, Karen, gave me this recipe to try, and who doesn't like Oreo cookies and ice cream mixed together?  It tastes really good, but I like a stronger chocolate flavor so I think I will add more chocolate chips to the chocolate sauce next time.  If you are really in a hurry, you could use a jar of chocolate topping, and I think it would still taste great.  This recipe is super easy and there is no baking so the oven doesn't heat up the kitchen.  The sauce takes a little time to bring to a boil but it still is a very simple and satisfying recipe.  There is a nice crunch in the crust and the different textures really make a great combination. 

Frozen Oreo Dessert

1 pkg Oreo Cookies (40 cookies) crushed
1/2 cup butter
1 regular size (1.5 qt) vanilla ice cream, softened
2 cups powdered sugar
2/3 cup chocolate chips (I would use at least 1 cup)
1 reg size can (12 oz) evaporated milk
1/2 cup butter


Crust:     40 Oreo cookies, crushed
               1/2 cup melted butter
               Mix together and press in a 9x13 inch pan and freeze. Reserve 1/2 cup for the top as a garnish.

Layer 2:  Spread one regular size ice cream on top of the crust.   Let soften first.  Freeze. 
       
Layer 3:  2 cups powdered sugar, 1/2 cup butter, 1 regular can of evaporated milk, 2/3 cup  chocolate chips (I would use at least 1 cup)
                Mix all together and bring to a boil over medium heat, stirring constantly.  Boil for 8 minutes. Let cool.
Pour cooled chocolate sauce on top of the ice cream and refreeze.  Sprinkle with reserved Oreos.


adapted from recipes by Donna Fletcher and ZoAnn Flynn
Read More »

Tuesday, May 29, 2012

Low Calorie, Low Carb Egg Cups

0
By Christy


 Last week I was the host of my friends' book club- Reading Between the Wines. Our club is basically about 10 to 15 girls that get together to eat and drink (and we might talk about the book of the month. LOL) This month I decided my food theme would be breakfast since I had been craving it. I made quiche, muffins, banana bread, fresh fruit, the fruit tart from my previous post, and the breakfast cups I am about to tell you about. These are low calorie, low carb egg cups and they were the hit of the party. The best part was the egg cups were the healthiest, easiest and cheapest thing I served. I have now made them a total of 4 times in a the last week if that gives you a hint at how much I like them. Mom even made them with Turkey and mozzarella this weekend and had great remarks too. So next time you need a quick, super easy and scrumptious breakfast, this should be your go to recipe.  Enjoy!

Ingredients:
Round slices of ham lunch meat
Eggs
Salt and pepper to taste
Shredded Parmesan Cheese
Green onion

Preheat the oven at 350. Place the ham in a muffin tin in a cup like shape (similar to a cupcake liner). Crack open an egg and put the egg inside the cupped ham. Salt and pepper the egg as desired. Bake in a preheated oven for 14 minutes if you want a slightly runny yoke or a little longer if you want your egg to come out like a hard boiled egg. As soon as they are done baking top the eggs with Parmesan cheese and green onions. Serve immediately or freeze in an airtight container. If you do freeze, just zap the frozen egg cup in the microwave before eating.
Read More »

Monday, May 28, 2012

Pastry Cream Fruit Tart

0
By Christy


A couple weeks ago I took a tart making class at the Nashville Farmers Market. We learned to make several different tarts from Chef Andy Manchester. The fruit tart was by far my favorite. It would be good as a dessert but I decided to serve this delicious vanilla custard topped with strawberries for breakfast. The homemade crust is super flaky and tastes almost like a sugar cookie and the custard is like glorified vanilla pudding. And to make things easy, this fruit tart can be topped with any type of fresh fruit. I think this may be my new favorite sweet treat and of course that means I must share it with you all! Nothing says summer more than a dessert topped with fresh fruit.-- Enjoy!

Sucre Crust:
8 oz all purpose flour
8 oz cake flour
4 oz sugar
pinch of salt
3 sticks cold butter
2 egg yolks
1 oz heavy cream

In a mixer, combine all dry ingredients. Cube the cold butter and add to the dry ingredients. Mix on low until the mixture looks crumbly but there are still some pea sized chunks of butter. In another bowl, combine the heavy cream and the egg yolks. Once mixed, add the liquids to the flour mixture. Mix on low until it is just combined. Press the dough into a disk, wrap tightly in plastic wrap for at least thirty minutes. (this can also be stored for 3 days before use). When you are ready to make your tart, take the dough out of the refrigerator and allow the dough to soften to a workable consistency but it should still be pretty cold. Roll out the dough on a lightly floured surface to about a quarter of an inch and line the tart shell of choice. You will need to par bake (cook it before you add the custard). Poke small holes in the bottom of the dough with a fork and place tart back in the refrigerator for 10 minutes. This shell will need to be completely baked so bake it on 350 for about 15 minutes- or until it is golden brown.


Pastry Cream:
2 cups whole milk
1/2 of a vanilla bean or 1 1/2 teaspoons vanilla paste or extract
125 grams sugar
50 grams cornstarch
120 grams egg yolks
50 grams softened butter

Combine 1 1/2 cups of the milk with half of the sugar and the vanilla in a pot and heat till just before it boils. combine the other half of the sugar and cornstarch in another bowl. Add the remaining milk and egg yolks to the sugar and cornstarch and mix well. Temper (pour a little of the hot mixture into the cold mixture--this keeps the eggs from cooking/curtailing) the hot milk into the cornstarch mixture and mix. Combine the two back into the pot and cook on medium heat for a few minutes stirring constantly with a whisk. At this point start to turn up the heat slowly while continuing to whisk constantly. When the mixture begins to thicken, reduce the head a little and continue to whisk until the mixture becomes very think and it may "plop" (steam will escape through the custard making a plopping sound). Place custard in a mixer and mix on low until the custard is close to body temperature. Feel the bowl with your hand. At this point, add butter a little at a time until completely incorporated. Take the custard and spread out as thinly as possible on a baking sheet and place plastic wrap directly onto the custard to prevent a skin from forming. Chill covered until ready to use, up to 5 days. When ready to sure, whip the custard to a smooth consistency.


To put the tart together, just add the pastry cream and top with sliced fruit. If you are going to keep this out for a while consider covering the fruit with a fruit glaze which is just apricot jam and water boiled together and washed onto the fruit. This will keep the fruit looking nice and shiny and fresh looking.


Read More »

Wednesday, May 23, 2012

Morning Glory Muffins

0
by Cindy

I've been wanting to make this recipe for a while and this was the perfect week to make it since we are making breakfast foods.  Of course this muffin could be eaten at any time or any meal; it's very versatile.  I've seen this recipe in 2 magazines, once a long time ago and once more recently, then Donna from the office next door, gave me a selection of recipes that she thought I might like.  This recipe was also in the group of recipes she gave me, so I thought it was time. It is a great muffin recipe, and is very moist and chocked full of great ingredients like apples, carrots, nuts, and coconut.  It's a very easy recipe and makes about 18 muffins.  The recipe says that the cooked muffins freeze well and I'm going to freeze some to save for later.  
Have a great Memorial Day weekend!

Morning Glory Muffins 

2 cups all purpose flour
1 1/4 cup sugar
2 t baking soda
2 t cinnamon
1/2 t salt
2 cups grated carrots
1/2 cup shredded coconut
1/2 cup chopped pecans
3 eggs
1 cup vegetable oil
1 apple, cored and shredded
2 t vanilla extract

In a large mixing bowl, combine flour, sugar, baking soda, cinnamon, and salt.  Stir in carrots, raisins, coconut and pecans.  In a separate bowl, combine eggs, oil, apple and vanilla.  Add to flour mixture.  Stir only until combined.  Spoon into greased or lined muffin tins.  Bake at 350 degrees 15-18 minutes. (Baked muffins freeze well) Yield: about 18 muffins

P.S. I did spell check the first publishing of this but when I looked at it, the changes weren't made -  sorry for the spelling the first time around. lol
Read More »

Wednesday, May 16, 2012

Banana Bread

0
By Christy

Perfectly over ripe bananas
What is the best thing to do with old bananas?

It's a no brainer for me... banana bread. Last week I noticed my roommate had bought bananas but was shamelessly letting them go to waste. At first I was sad to see him let perfectly good bananas just go bad but then I started secretly hoping he wouldn't eat them so I could use them to make banana bread. When the time came when I thought there was no chance he was going to eat them, I decided it was time to plot my banana bread making moment before he actually decided to toss them. I had the hardest part of the challenge down (quite a few overly ripe bananas) but then my next issue was finding a recipe in which I had all the ingredients already at home since my banana bread plotting started pretty late at night. With a little due diligence I finally found a recipe on Whipped, another food blog, that sounded good enough but was also basic enough I knew I could 'whip' (pun intended) it up without having to make a grocery store run.  On this blog this recipe was described as their favorite banana bread and I have to admit it was as absolutely delicious as described.

Ingredients:
1 1/2 cups all purpose flour
1 teaspoon baking soda
1/2 teaspoon salt
1 cup white sugar
2 eggs, lightly beaten
3 large ripe bananas, mashed
1/4 cup melted butter
(I added chopped pecans for decor too!)

Grease and flour loaf pans and preheat the oven to 350. In a bowl, whisk together flour, soda, salt and sugar. Mix in the slightly beaten eggs and mashed bananas. Slowly stir in the melted butter until just incorporated. Bake until golden brown and the stick test comes out clean (it will depend on what size loaf pans you use).

According to Whipped's recipe, the more bananas, the moister the bread. Do NOT over mix the batter (don't use a mixer). Do not over bake. Let the bread completely cool before storing to prevent the edges and outside from getting sticky.

Happy Baking! :)

Read More »