Thursday, December 19, 2013

Jam Cake with Caramel Icing

0
by Cindy
 It's the most wonderful time of the year.....I think so anyway.  I am loving being busy and preparing for gatherings and potlucks.  My girl friends came over last night for a dinner party and cookie exchange.  It was great fun and the cookies were fantastic.  Everyone put a special effort into their cookies, and we now have cookies to share with family and friends. 
 I'll be getting ready next Monday for a potluck at my office and having the United Methodist Women from Clay over to my house for dinner and Christmas devotional time.  I have a wonderful group of new friends here and also special old friends from Kentucky.  It reminds me of the Girl Scout song, "Make new friends but keep the old, one is silver and the other gold."  I love my new friends and the old ones as well.  They have helped me through some difficult times and enriched my life.  Thanks to all of you. 
I was getting ready to make this next recipe for Sarah and Christy's Kentucky grandparents, but  Mimi fell yesterday and had to have surgery for a broken hip.  I'm kind of in limbo about when to make this for them, because I don't know what or where they will be for the next few weeks.  It's one of their favorite cakes, and I've been making it for them for Christmas many years.  It's a little time consuming but not really that difficult.  There are short cut cake recipes that use cake mixes with special additions, but this is the from scratch recipe that I've used.  I'm still a strong believer that it's all about the icing, so if your short of time, take the cake short cut. 
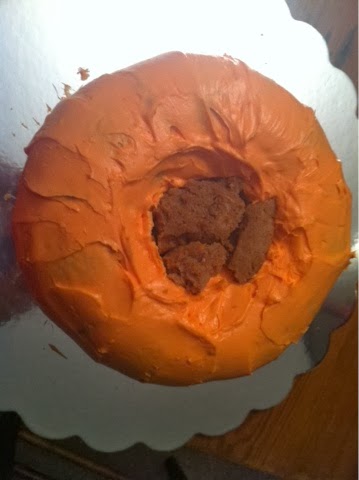
 This cake is super moist because of the blackberry jam, and the caramel icing is just the right flavor to complement the cake.  I think the trickiest part is the icing, because it takes patience to wait until it is firm enough to spread on the cake. This is where pecans can be added to hide any imperfections. Perfect in no time. 

Jam Cake

2 cups sugar
1 cup butter
2 eggs
4 cups flour
1 t allspice
1 t nutmeg
1 t cinnamon
1 t cocoa
2 cups buttermilk
2 t baking soda
2 cups blackberry jam
1 cup chopped nuts
1 cup raisins

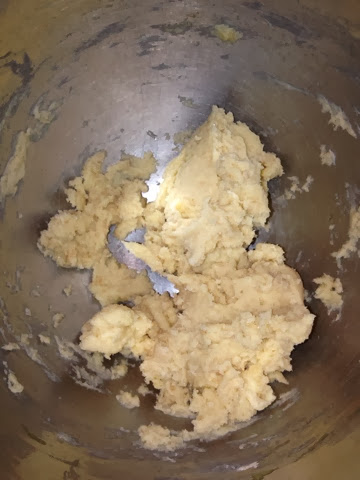
Cream sugar and butter, add eggs and mix well.  Mix together buttermilk and baking soda.  Add flour, which has been sifted with the spices, alternately with the buttermilk mixture, ending with the buttermilk.  Add jam, nuts and raisins.  Pour into 3 - 9 inch cakes pans, which have been either greased and floured or sprayed with Baker's Secret (flour/oil spray).  I have also added wax paper to the bottoms of the cake pans and sprayed that also.  Bake at 350 degrees for 40 minutes or more.  It never really looks quite done all the way in the center of the cake, because if you cook it too long, the outside gets too done.  Remove the cakes after 5 - 7 minutes and let cool on racks.  I used to make two of this recipe to make 3 - 2 layer cakes.  I only make a 2 layer cake and use the excess cake mix for cupcakes.  These will have a shorter cooking time but will have to be watched closely. 


Caramel Icing

1 cup butter or margarine
2 cups brown sugar
1/2 cup milk
3 1/2 cups powdered sugar

Melt butter; add brown sugar.  Cook over low heat for 2 minutes; add milk.  Continue to stir.  Let mixture come to a boil.  Remove from the heat and add the powdered sugar.  Ice the cake when consistency is thickened from cooling.  Garnish with pecans. 


Read More »

Tuesday, December 10, 2013

White Chocolate Cheesecake

0
by Cindy
The days are quickly counting down to Christmas.  There are so any things to get done.  I've only gotten a few gifts bought and I still have a lot of baking to do.  I was snowed in this weekend, so I decided to start my baking.  After a quick and slick run to the closest grocery store, I made my favorite Christmas family recipe, Chocolate Sherry Dream Bars, and my favorite cake, Red Velvet Cake. I love baking at Christmas because of all the wonderful memories I have of baking with my mom  and with my girls. Of course, I also love these recipes because they taste so good.  

 I'm always looking for a great cheesecake recipe, so I made a new cheesecake recipe for the church Christmas dinner.  It was a White Chocolate Cheesecake with Strawberry Topping.  It was smooth and had a nice light white chocolate flavor.  The strawberry sauce topped it off nicely.  

White Chocolate Cheesecake

Cookie Crust
1 cup flour
1/4 cup sugar
1 stick butter, softened
dash of vanilla
1 egg, slightly beaten (just part of this)

Cheesecake
4 pkg (8 oz each), softened
1/2 cup plus 2 T sugar
1 T all-purpose flour
1 t vanilla extract
4 eggs, lightly beaten
8 oz white baking chocolate, melted and cooled

Strawberry Sauce
1/2 cup sugar
2 T cornstarch
1/2 cup water
1 1/2 cups chopped fresh strawberries
Red food coloring, optional

1.  In a small bowl, combine flour and sugar.  Add the butter then vanilla and about half of the egg mixture (add small amounts of the egg mixture until the mixture forms a ball.) Spread the mixture in the bottom of a spring board pan.  Bake for 10-15 minutes or until slightly brown.  Cool.
2.  In a large bowl, beat the cream cheese, sugar, flour, and vanilla until well blended.  Add eggs and yolks; beat on low speed just until combined.  Stir in white chocolate.  Pour over cooled crust.  Place pan on a baking sheet.
3.  Bake at 350 degrees for 45-50 minutes or until center is just set.  Cool on a wire rack for 10 minutes.  Carefully run a knife around the edge of pan to loosen; cool 1 hour longer.  Refrigerate overnight.
4.  For sauce, in a medium saucepan, combine sugar, cornstarch and water until smooth.  Add strawberries.  Bring to a boil; cook and stir until thickened.  Remove from the heat; stir in a few drops of food coloring if desired.  Cool.
5.  Spread strawberry sauce over top of cheesecake.  Refrigerate overnight. Yields 12 servings.


recipe adapted from
Taste of Home


Read More »

Tuesday, November 19, 2013

Deep & Dark Ganache Chocolate Cake

0
by Cindy

Last week I mentioned that I was wanting to make a decadent chocolate cake, so since this is a wild card week, meaning we can make anything we want, I made, OMG-oh so good, Deep & Dark Ganache Chocolate Cake.  It tasted as good as I had imagined.  The icing is made of bittersweet chocolate and even though I prefer milk chocolate, I still loved this cake.  It was moist and rich with a strong chocolate flavor.  The pecans on the outside add a nice crunch to it.  

 I will confess something here, I can do many, many things, pretty well, but I am not great at anything.  Of course, I wanted my cake to look as perfect as the one in the picture of the Taste of Home Magazine recipe, so to compensate for my imperfections,  I just improvised a little.  That is why I added the pecans to the sides of the cake.  The cake looked good without the pecans, but not as good as the Taste of Home photo.  By adding the pecans to the outside of the cake, all of my imperfections were covered up, and it tasted even better.  

Deep & Dark Ganache Chocolate Cake

6 ounces bittersweet chocolate, chopped or chips
1 1/2 cups hot brewed coffee
4 eggs
3 cups sugar
3/4 cup canola oil, or vegetable oil
2 t vanilla extract
2 1/2 cups all purpose flour
1 cup baking cocoa
2 t baking soda
3/4 t baking powder
1 1/4 t salt
1 1/2 cups buttermilk

Ganache Frosting

16 ounces bittersweet chocolate, chips or chopped
2 cups heavy whipping cream
5 t light corn syrup

1.  Line bottom of three greased 8 inch square baking pans with parchment paper, grease or spray with non stick spray.
2.  Place chocolate in a small bowl.  Pour hot coffee over chocolate; stir with a whisk until smooth.  Cool slightly.
3.  In a large bowl, beat eggs on high speed until lemon-colored. Gradually add the sugar, oil, vanilla and chocolate mixture, beating until well blended.  In another bowl, mix the flour, cocoa, baking soda, baking powder and salt; add to chocolate mixture alternately with buttermilk, beating well after each addition.
4.  Transfer to prepared pans.  Bake at 325 degrees for 30-35 minutes or until a toothpick inserted in center comes out clean.  Cool for 10 minutes before removing from pans to wire racks; remove paper.  Cool completely.
5.  For Ganache Frosting, place chocolate in a large bowl.  In a small saucepan, bring whipping cream and corn syrup just to a boil.  Pour over chocolate; stir with a whisk until smooth.
6.  Let stand at room temperature to cool and thicken slightly, at least 45 minutes, stirring occasionally.  (Mixture will be very soft, but will thicken when spread onto cake).
7.  Place one cake layer on a serving plate; spread with 1/3 cup ganache. 
 Repeat layers.  Top with remaining cake layer.  Spread remaining ganache over top and sides of cake.  Add pecans to the sides for added crunch. Yield: 24 servings.

Two-Layered Deep & Dark Ganache Cake and Cupcakes
Prepare cake as directed, using twelve paper-lined muffin cups and 2 greased and parchment lined 8-in square baking pans.  Fill muffin cups three-fourths full; bake at 375 degrees for 15-17 minutes or until a toothpick comes out clean.  Divide remaining batter between prepared cake pans.  Reduce oven setting to 325 degrees; bake cake layers as directed.  Yield:  One 2 layered cake and one dozen cupcakes (24 servings).

I used 1 tablespoon of frosting for each cupcake and after icing the cake had a lot of left over frosting, so feel free to use more on the inside layer and the top and sides.
I also had to bake the cake layers a little longer.  If this happens, just add extra time on a timer and check the cakes after the added time until done.


recipe adapted from
Taste of Home
Deep & Dark Ganache Cake


Read More »

Sunday, November 17, 2013

Pastime Photography 1 Hour Photo Shoot Giveaway!

0

Marie of Pastime Photography in Louisville, KY has partnered with us to offer one of our readers a 1 hour photo shoot along with a cd of all the edited photographs! She is an amazing photographer and a blast to work with! Sarah loved the pictures Marie took of Caroline, when Caroline was just two weeks old.  The photo shoot will be available in the Louiville, KY area.

Here are a few examples of her work:


One winner will be drawn randomly using the Rafflecopter application below on Monday, November 25, 2013. Good luck!

a Rafflecopter giveaway
Read More »

Friday, November 8, 2013

Cinnamon Roll Pumpkin Vanilla Sheet Cake

0
by Cindy

Well Halloween is behind us and the next family holiday will be here before we know it.    Everyone is making their travel, cooking, and eating arrangements for the big day.  I'm getting excited.  It's been a year since we have all been together, and I am looking forward to having who ever will attend.  I'm bless with a wonderful family and will be thankful for all who attend (and of course, those that don't).  Since Sarah  is vacationing and on a break, Christy and I decided to make something with cinnamon this week.  I almost caved in and made a decadent chocolate cake, but I prevailed and stayed on course.  That chocolate cake is on my list though, so be watching for it.  

I found this recipe on the Kenergy website.  They share customer recipes and this one sounded really good. These cake squares have a hint of pumpkin flavor and are very rich, moist and gooey.  It's kind of like a dump cake, because I just dumped almost all of the ingredients in the mixing bowl.  It's super easy and is done from beginning to end in about an hour.  

Cinnamon Roll Pumpkin Vanilla Sheet Cake

1 box yellow cake mix 
4 eggs
1/2 cup canola or vegetable oil
1/2 cup milk or buttermilk
3.4 oz box vanilla instant pudding mix
1/2 cup sour cream
15 oz. can pumpkin
1 stick butter (8 T)
3/4 cup packed brown sugar
1/2 t ground cinnamon
3/4 cup powdered sugar
1/4 - 1/2 cup heavy whipping cream (start with 1/4 c and add small amounts until desired consistency is acquired)

Preheat oven to 350 degrees and spray jelly roll pan with non-stick cooking spray.
Place cake mix, eggs, oil, milk, pudding mix, sour cream, and pumpkin in mixing bowl.  Beat well to combine about 1 1/2 minutes.  Pour into prepared pan and spread out evenly.
Place butter into a microwave safe bowl and melt, about 40 - 50 seconds, depending you microwave strength.  Add brown sugar and cinnamon, mixing until combined. 
 Drizzle mixture evenly over the cake.  Take a knife and run it through to make swirls.
Bake cake for 35 - 45 minutes, until cooked through and remove.  Place powdered sugar and cream into a bowl and mix until creamy and smooth.  Drizzle over warm cake.  Let cool for 20 minutes before cutting into squares.  Refrigerate.


adapted from 
Kenergycorp.com
shared by Sharla Austin-Darnell from the 
picky-palate.com


Read More »

Thursday, October 31, 2013

Pumpkin Shaped Cake Tutorial

0


By Christy
 
HAPPY HALLOWEEN! Halloween has been pretty quiet for me this year. No costume, most likley no trick or treaters (I only got 2 last year), and it has been ugly and rainy in Nashville ALL day today. It almost feels as if Hallween didn't really happen this year which makes me sad because I LOVE halloween and getting all dressed up and going to costume parties! But it definitley feels like fall and this tutorial is the perfect fall addition to your baking list. It is a super easy, semi homeade pumpkin shaped cake. How impressive would this look on your table at Thanksgiving, your next church dinner, book club, etc? Also, if you need a last minute halloween idea this pumpkin would look great if you iced a jack-o-latern face on it to take this dessert to the next level of fun and festive. 

Here is how to make a pumpkin shaped cake.
 
What's needed:
1 to 2 Cake mixes and all ingredients required
2 bundt cake pans
2 to 3 cups of icing
Food coloring
1 snickers bar
 
 
Step 1: You will need to make 2 bundt cakes of the same size. Depending on the size of your bundt cake pans, you may need to make up to two batches of cake mix. I had two small, 6 inch bundt pans, and 1 cake mix easily did the trick. I actually chose a spice cake... it seemed fitting for a cake shaped like a pumpkin. Bake bundt cakes as directed and let cool.  
 

Step 2: The way these cakes are assembled to look like a pumpkin is by placing two bundt cakes, with the bottoms facing each other, together. Most likely your bundt cakes didn't rise evenly resulting in a rounded portion of what is normally the bottom of a bundt cake. Normally since this is the bottom of the cake, it doesn't really matter that this portion isn't flat but since we will be butting the bottoms of the cakes together, we need to the cakes to fit together evenly. This will ensure the pumpkin's shape is more uniform. Therefore, with a cerated knife, cut the rounded area off the cake making the bottom completley flat. 
  
 
Step 3: Make Icing, I made my all time favorite cream cheese icing which paired well with the spice cake. Then dye the icing the color of your choice.
 
 
Step 4:  Place first cake, pretty side down, onto a serving plate. I filled the hole in the very center of the cake with scraps made from leveling the cakes. I then topped the cake with a generous portion of icing. Take the other bundt cake, flat side down, and place it on top of the other bundt cake while lining up the cakes so the lines match.
 
 
Step 5: Take remaining icing and ice the whole cake. I made the stokes going downwards instead of side to side to make it look more like the natural lines that run down a pumpkin. I again filled the well in the middle of the bundt cake with cake scraps and iced over it. 
 
 
Step 6: Take a snicker bar and cut it in half or a little large (depending on the size of your cake) at an angle to represent the stump. Stick the snickers into the center of the top. I stuck the chocolate end into the cake exposing the end with nuts and filling. I thought that extra detail made it look more like a stump that had been cut, just like on a real pumpkin.


Please check out our sponsor, Caryn Hammond, of Rodan + Fields Dermatologist's amazing site for life changing products!
Read More »

Wednesday, October 30, 2013

Pumpkin Spice Cupcakes

0
by Cindy


Halloween is tomorrow and all the little ghost and goblins will be going door to door for their treats.  My girlfriends and I had a party at one of our houses Saturday night, and I had so much fun dressing up. I went as a pirate.   I borrowed the costume from Christy - thanks Christy - and bought a hat and sword to go with the costume.  It was fun dressing up and being with the girls and a few other guests.  
For the party, I decided to make mini pumpkin cupcakes.  The pumpkin flavor is just right because of all of the spices that are added.  The cream cheese icing has pumpkin in it too, so even the icing tastes like pumpkin.  They were the perfect bite sized dessert for a finger food menu and very delicious.

Pumpkin Spice Cupcakes
3 1/4 cups all purpose flour
2 t baking powder
2 t ground cinnamon
1 1/2 t ground cloves
1 t ground allspice
1 t ground allspice
1/2 t baking soda
1/2 t salt
2 3/4 cups granulated sugar
1 cup vegetable oil
4 large eggs
1 (15-ounce) can pumpkin (not pie filling)

1 recipe Pumpkin Cream Cheese Frosting

1.  Heat the oven to 350 degrees and arrange rack in the middle.  Line 2 (12-well) muffin pans or mini muffin pans with paper liners.  Coat the liners with non stick spray:  set aside.
2.  Whisk together the flour, baking powder, cinnamon, cloves, allspice, nutmeg, baking soda, and salt in large bowl. Set aside.
3.  Mix the sugar and oil in a bowl and beat on medium until sugar is incorporated, about 1 minute, scrapping down the sides of the bowl occasionally.  
4.  Add the eggs, one at a time, beating well after each addition, about 1 1/2 minutes total mixing time.  Reduce the speed to medium low and add the pumpkin.  Beat until just combined, about 30 seconds, again scrapping down the sided of the bowl.
5.  On low speed, slowly add the flour mixture, and beat until completely incorporated, about 1 minute. 
6.  Fill the muffin liners 3/4 of the way.  Bake for 12 minutes then rotate the pans and bake another 10 minutes or until a toothpick inserted in the center of the cupcakes comes out clean.  For mini cupcakes, bake them for about 12-13 minutes or until tooth pick comes out.  
7.  Cool on a wire rack about 5 minutes and then remove them from the pans to completely cool.  Frost with Pumpkin Cream Cheese Frosting.


Pumpkin Cream Cheese Frosting

6 cups powdered sugar, sifted
1 t ground cinnamon
1/4 t ground nutmeg
12 ounces cream cheese, at room temperature
8 T butter (1 stick) at room temperature
1/3 cup pumpkin (not pie filling)

1.  Whisk together the powdered sugar, cinnamon, and nutmeg in a medium bowl and set aside.
2.  Mix together the cream cheese and butter on medium until smooth, about 1 minute.
3.  Add the pumpkin and beat until blended.
4.  Slowly and on low add the powdered sugar until the desired consistency is acquired.  If it's too soft, add more powdered sugar. 


recipe adapted from
chow.com


Read More »

Sunday, October 27, 2013

Rodan + Fields Giveaway Winner

0
Congratulations to Melanie M. for winning the amazing Rodan + Fields Hand Treatment Regimen!

We appreciate all of the entries from our readers! Also, a big THANK YOU to Caryn for giving away such an awesome product to our readers!!  Don't forget to check out Caryn's site for all of her wonderful products! Keep your eye out for more giveaways in the next few weeks!

Sincerely,
The Buttercream Bakers


Please check out our sponsor, Caryn Hammond, of Rodan + Fields Dermatologist's amazing site for life changing products!
Read More »

Sunday, October 20, 2013

Chocolate Dipped Cupcakes with Marshmallow Cobwebs

0
By Sarah


Cupcakes are my favorite kind of desserts to bake. Compared to making a detailed cake, cupcakes are relatively quick to make and decorate.  They are also so much easier to serve and I feel less guilty when I eat 1 or 2 cupcakes.  Because they are pretty quick to whip up, I like to experiment with different flavors and decorating techniques.

Last year, I came across a picture of a cake on Pinterest that looked like it had spider webs on it.  I thought it was so cool and I've been waiting for Halloween to come around so I could try it.  But making a cake takes too long, so I decided I would try it on a cupcake.  However, I thought it would look a little funny drizzling the melted marshmallow on a plain cupcake, I decided it would look much better if the cupcake was dipped in chocolate first!! You can tell I love everything chocolate dipped since I made chocolate dipped apples last week.  I did tweak my tempered chocolate recipe though! I like this one the best because while the chocolate got hard, it was still soft enough to cut through easily.

As for these techniques, they were super easy! The hardest part of tempering the chocolate was having the patience to let it cool down before dipping the cupcakes.  Making the cob webs were also super fun and easy, but very messy! The cobwebs would be a lot of fun for kids!

Chocolate Dipped Cupcakes with Marshmallow Cobwebs

24 iced cupcakes
1 box melting vanilla chocolate
3 tablespoons canola oil
1 bag mini marshmallows
24 spider rings

1. Make your favorite cupcake and buttercream icing.  Ice the cupcakes really high, using about 1/2 cup of icing on each cupcake.

2.  Place completed cupcakes in refrigerator to chill while tempering the chocolate.  Combine chocolate and oil in a small saucepan set over a medium saucepan of simmering water.  Don't let the water get too hot and boil because the chocolate will overheat.  Stir constantly until the chocolate is melted and smooth.  Transfer into a small, but deep bowl and let chocolate cool for 15-20 minutes.


3.  Once the chocolate is cool to the touch, dip a cupcake into the chocolate by holding the cupcake by it's bottom.  Let the excess chocolate drip off and then transfer to a cookie sheet.  Place cupcakes in the refrigerator to speed up the setting process.

4.  In the meantime, take 1 bag of mini marshmallows and put in a microwaveable bowl.  Microwave for 30 seconds.  Stir until the marshmallows are completely melted and continue to stir until it is cool to the touch.  It take about 5 minutes.
Before
After
After microwaved for 30 seconds


5.  Remove cupcakes from the refrigerator once the chocolate has hardened.  Using two fingers & two hands, string the melted marshmallow all over the cupcakes. Decorate as desired.  I stuck a plastic spider ring into the cupcake as the final touch or you could use Christy's spider technique she posted last week and pipe it on the cupcake!


Here are few pics of the finished cupcakes!


Please check out our our sponsor, Caryn Hammond, of Rodan + Fields Dermatologist's amazing site for amazing products!
Read More »