Tuesday, December 4, 2012

Miss Margie's Pecan Pie

0
by Cindy
Wow is it December already?  Christmas is right upon us and it seems like yesterday was summer.  It feels like summer today too with this wonderful warm weather. The last few weeks have been incredibly busy but so wonderful. 
Since all of my family couldn't be together at one time on Thanksgiving, I had two "sittings"at my house that day.  We all enjoyed the food and being together.  It was great to have my mom, brother, and my brother's family over for the first sitting.  My mom, Sarah, Nick and Carter, and Christy and her boyfriend, Ish, came for the 2nd sitting. Christy's boyfriend's mother, Paula, and JD, a friend from Clay, came to eat with us too.  I love to have friends and family at my house.  It's been a little over a year since I moved from Clay, and even though our family circumstances have changed so much, life is good.  I still miss my friends and church family, but I'm making new friends, and I rejoined the church where I attended as a child just last Sunday. 
The week after Thanksgiving I was lucky enough to have my daughter, Sarah, and her son come and stay with me for three days while she attended a work training.  I took off from work and took care of my favorite little boy, Carter.  I know I had a fantastic time and I hope he did too.. He'll be two years old next week, and it doesn't seem possible.  Sarah's getting ready to have another baby in early February, and we're so excited about number 2.

  For one of my Thanksgiving desserts, I made pecan pie.  Margie, Sarah and Christy's aunt, always brought pecan pie to every Thanksgiving that I held at my house and to many church potluck dinners.  Everyone in Clay knew and loved Miss Margie. For many years, she was the heart of Clay School.  Pecan pie was one of her specialties.  I was wondering about her recipe a few years ago and remembered that it was in an old Clay Elementary Cookbook.  In honor of her, I made her pecan pie recipe for Thanksgiving.  It turned out great, but I did have to cook it longer than the recipe said.  It had a great pecan crunch on top and the middle was sweet, gooey, and rich.  My mom told me the key to cooking a pecan pie long enough is to cook it until it cracks in the center.  The pecan top kind of puffs up and causes the crack, and that's when to take it out of the oven.  I covered the edge of the crust with a gadget that protects the edges, otherwise the crust would have gotten too brown. You can't go wrong with Miss Margie's Pecan Pie, so give it a try during this holiday season.   

Miss Margie's Pecan Pie

1 unbaked pie shell
1 cup sugar
dash salt
1/2 cup dark corn syrup
2 T melted butter
1 cup pecans (chopped or whole)

Preheat oven to 350 degree. Beat sugar, eggs, and salt.
  Add the other ingredients and mix. 
Pour into an unbaked pie shell. 
Bake for 30 minutes or until it sets. (I say about 45 to 60 minutes until it cracks)


Recipe from
Butter 'n Love Recipes
Clay Elementary School

Read More »

Wednesday, November 14, 2012

Chocolate Cupcakes

0
by
 Cindy


I always want an excuse to make something chocolate, so I made chocolate cupcakes for a meeting that I went to.  All cooks want people to love the foods they make, so I always try to pick something I think everyone will like.   These cupcakes were delicious and looked beautiful.  This recipe called for dutch processed cocoa and chocolate extract.  I did use the dutch processed cocoa but couldn't find any chocolate extract at 3 different grocery stores.  Walmart looked like it was out of the extract, and Fresh Market and Schnucks didn't carry it.  I think the dutch processed cocoa has a deeper chocolate flavor.  I don't keep superfine sugar, so I just used regular granulated sugar.  You may want to double the frosting recipe, because I didn't have enough to finish all the cupcakes.  The cupcakes were tender, rich, and moist, and I put a generous amount of icing on top.  You can sprinkle them with chopped chocolate or chocolate sprinkles to make them look even more appetizing.  It is an easy recipe to follow, but if you want a shortcut just use a box chocolate cake mix and make this frosting to go on top. 

Chocolate Cake
makes 24 cupcakes

1 cup Dutch process cocoa
2 cups boiling water
1 cup butter, softened
2 cups superfine sugar
4 large eggs
2 3/4 cups all-purpose soft-wheat flour
1 t baking soda
1 t baking powder
1/2 t salt
1 t chocolate extract
paper baking cups
vegetable cooking spray

1.  Preheat oven to 350 degrees.  Combine cocoa and boiling water in a large heatproof bowl, stirring until blended and smooth; cool completely.
2.  Beat butter at medium speed with an electric mixer until creamy; gradually add sugar, beating until blended.  Add eggs, 1 at a time, beating until blended after each addition.
3.  Combine flour and next 3 ingredients; add to butter mixture alternately with cocoa mixture, beginning and ending with flour mixture.  Beat at low speed just until blended after each addition.  Stir in chocolate extract.
4.  Place paper baking cups in 2 (12-cup) muffin pans, and coat with cooking spray; spoon batter into cups, filling two-thirds full.
5.  Bake at 350 degrees for 12 to 15 minutes.  Cool in pan on wire rack 10 minutes; remove from pans to wire racks, and cool completely.

Chocolate Frosting
makes 3 cups

1/2 cup butter, softened
1/2 cup unsweetened cocoa
1/3 cup whipping cream
1/8 t salt
1 (16 oz.) package powdered sugar

1.  Beat first 4 ingredients at medium speed with an electric mixer until creamy.
2.  Gradually add powdered sugar, beating at low speed until blended.  Beat at high speed 2 minutes or until creamy.


recipe by
Simply Sweet
Best Cupcakes Ever!
Oxmoor House
Read More »

Thursday, November 8, 2012

Banana Bread Cake

0
By Christy


I recently came across a grocery store in east Nashville (thank you, Piggly Wiggly!) that bundles a bunch of ripe bananas and sells them for like 50 cents. While I am sure most people just walk on past, these little brown speckled delights sent a light bulb off in my head saying “How Genius!!! Now I will never have an excuse not to make banana bread EVER again!”.  Usually the lack of having ripe bananas deters me from making banana bread when cravings strike me because ripe bananas are essential to good banana bread.  But as I stood there in the grocery store starring down perfect banana bread worthy ripe bananas I had absolutely no excuse not to go straight home and bake….. Which is exactly what I did! LOL I have posted my favorite banana bread recipe on the site before so I wanted to mix things ups,  but how? I LOVE banana bread. I LOVE icing! So why have I never attempted to put those things together? That is when I decided to make Banana Bread Cake and boy do I wish I had tried making it sooner! It was sooo delicious! The brown butter icing perfectly complimented the moist, slightly sweet and banana flavored bread. We had it for dessert, for breakfast, as a snack…. Once it was made we couldn’t find any excuse not to eat it. Enjoy and if you make the recipe let me know what you think!!!

Banana Bread Cake
1 1/2 cups granulated sugar
1 cup sour cream
1/2 cup (1 stick) softened butter
2 eggs
4 ripe bananas
2 tsp vanilla extract
2 cups all purpose flour
1 tsp baking soda
3/4 tsp salt (unless you use salted butter)
1/2 cup walnuts or pecans (optional)

Brown Butter Icing
1/2 cups (1 stick) butter
4 cups powdered sugar
1 1/2 tsp vanilla extract
3 tbsp milk

Directions:

Can you see the chucks of banana? YUM!

Preheat the oven at 375. Spray cake pan with baking joy or grease and flour (depending on how thick you want the cake to be, choose pan size accordingly. I wanted mine to be more like cake bars so I used a 10X15 pan). In a large bowl, beat together sugar, sour cream, butter, and eggs until creamy. Blend in the bananas and vanilla extract. While mixer is still going, slowly add the flour, baking soda and salt and blend for about 1 minute. Add nuts. Spread batter evenly into pan and bake for 25 minutes and golden brown.


While the cake is baking it is a good time to make the icing. Heat the butter in a large saucepan over medium heat until boiling. Let the butter turn a delicate brown and remove from the heat immediately. Add the powdered sugar, vanilla and milk. Stir until smooth and spread the brown butter frosting over the top of the cake while it is still slightly warm. Cut an serve.


Read More »

Sunday, November 4, 2012

Florida Eats and Good Treats

0
By Christy


Last week mom and I got the privilege of going to a destination wedding for one of our close family friends in Marco Island, Florida. It was a fabulous wedding all around: Great people, beautiful views, a fun wedding, and awesome food.  Obviously the good food is something we felt we had to share. lol One of the most delicious things on the agenda was the rehearsal dinner at Cafe De Marco. We got to feast like the locals at the locally owned restaurant chowing down on things such as crab stuffed mushrooms, shrimp cocktail, artichoke dip, lobster bisque, oysters, lobster, grouper, scallops, crab cake, key lime pie… it was someone from an inland state's seafood dream and probably one of the best seafood meals I have ever eaten. 


The food at the wedding located at the Marriott's Marco Island Resort,was just as good and we got things such as mini beef wellingtons, coconut chicken, miniature loaded potatoes, coconut grouper, jerk chicken, and shrimp alfredo and italian sausage marinara pasta. 


Another delicious meal we had was in Port Charlotte, FL at Laishley Crab House. Even though mom almost got attacked by birds on the patio in at attempt to steal her fries, still didn't change the fact we left quite satisfied. We got Sea Scallop Sliders and a Asian Grouper Salad. They were both awesome and now that we have been away from the coast a few days I am craving some of these delicious entrees as we speak. No seafood in Nashville puts a candle to some of the great meals we had on our short vacation. 


Do any of you all have any great local eateries in your hometown or a favorite dining location when you are on vacation?
Read More »

Thursday, November 1, 2012

Banana Pudding Cupcakes

3
by Cindy

We're having a birthday at the office today, and that always gives me a great reason to try out a new recipe.  Kim wanted a fruit flavored cake, so Christy and I talked about what ingredient we wanted to bake with this week.  Bananas it is.  
 
This banana cupcake tastes soft and light, and the banana curd in the middle is the pudding part of the cake.  It's not overwhelmingly sweet and has a very natural banana flavor.  I would have liked more banana curd in the center of the cupcakes, so next time I'll squeeze in a little more.  Kim said she liked the fact that nuts were not added to the cake.  She said that usually with banana flavored recipes there are usually nuts included.  That is so true. Everyone in the office gave this cupcake high marks, and I loved it too. 

If you wanted to make some short cuts, cool whip could be used instead of fresh whipped cream. A cake doctor type recipe with bananas would probably work too.  As I always say, it's always about the icing and in this case the filling too.    


Banana Pudding Cupcakes

1 recipe Banana Cake
1 recipe Fresh Banana Curd
1 recipe Fresh Whipped Cream
Topping: vanilla wafers, fresh banana slices

1.  Prepare Banana Cake as directed.
2.  Insert the end of a wooden spoon or dowel into the center of each cooled cupcake to make a hole.  Fill a zip-top plastic freezer bag with Fresh Banana Curd.  Use scissors or kitchen shears to snip about 1/4 inch from one corner of bag; insert bag into the hole of one cupcake.  Squeeze gently until filling comes to the top of the cupcake.  Repeat with remaining cupcakes.

3.  Frost each cupcake with 2 T Fresh Whipped Cream, using a piping bag and metal tip No. 12 or a zip-top plastic freezer bag with one corner snipped off.  Top each with 1 vanilla wafer and banana slice just before serving.
 

Banana Cake

1 1/2 cup mashed ripe bananas
2 t lemon juice
1 cup butter, softened
2 cups sugar
3 large eggs
3 cups all-purpose soft-wheat flour
1 1/2 t salt
1 1/2 cups buttermilk
2 t vanilla extract
Paper baking cups
Vegetable cooking spray

1.  Preheat oven to 350 degrees.  Combine bananas and lemon juice in a small bowl; set aside.

2.  Beat butter and sugar at medium speed with an electric mixer until creamy.  Add eggs, 1 at a time, beating until blended after each addition.
3.  Combine flour, baking soda, and salt.  Add to butter mixture alternately with buttermilk, beginning and ending with flour mixture.  Beat at low speed just until blended after each addition.  Stir in vanilla and reserved banana mixture.

4.  Place paper baking cups in  2 (12 cup) muffin pans, and coat with cooking spray; spoon batter into cups, filling two-thirds full.

5.  Bake at 350 degrees for 12 to 15 minutes or until wooden pick inserted in center comes out clean.  Cool in pans on wire racks 10 minutes; remove from pans to wire racks, and cool completely.

Personal note:  It actually made 7 or 8 more cupcakes.  I only needed half of the banana curd so half the recipe.  I needed  more whipped topping.  I had enough for 24 cupcakes but not enough for the extra cupcakes it made.  I would have loved to put more whipped topping on each cake, but I didn't have enough to be very generous.  Make whipped topping using at least 2 cups of whipping cream.  I also added a little more powdered sugar to the whipping cream.   


Fresh Banana Curd

4 large ripe bananas
4 T butter
1 1/2 cups sugar
4 T fresh lemon juice
4 large eggs

1.  Mash bananas in a large bowl with a fork until creamy.

2.  Combine mashed banana and remaining ingredients in a medium saucepan over medium-low heat.  Cook, whisking constantly, until mixture thickens and coats a spoon.  (Do not boil.)  Cool completely.

Note:  Store any leftover curd in an airtight container in refrigerator for up to 3 days.

Fresh Whipped Cream

makes 3 cups
1 1/2 cups whipping cream, chilled
2 t vanilla extract
1/4 cup powdered sugar

1.  Beat whipping cream at high speed with an electric mixer until soft peaks form.  Add vanilla and sugar, and beat until stiff peaks form.

2.  Store in refrigerator until ready to use.


recipe from
Simply Sweet
Best Cupcakes Ever!


Read More »

Saturday, October 27, 2012

Apple Pinwheel Cake

0
by Cindy
  

I like to bake with fruits that are in season, so I decided to make this pinwheel apple cake recipe that I found in a cookbook.  The picture in the cookbook looked so pretty and neat.  I made it and wasn't sure if it was that good, but my friend, Gail, came to stay with me last week and loved this cake.  I didn't like the way it turned out brown on top, but it was the sprinkle of cinnamon and sugar that turned brown, not the apples.  It didn't burn either and was just brown on top and tasted good.  The cake was light with a hint of spices.  I used a gadget to peel and core the apples that I bought from a Pampered Chef party many years ago. This gadget is fantastic.  It peels the apple while coring it at the same time.  It also slices the apples so the slices are all uniform in width.  If you're going to need many peeled and sliced apples, this gadget is fantastic for doing just that.  It's easy to use and to clean. 

Apple Pinwheel Cake

Topping
4 to 5 apples
1 T lemon juice
1 1/2 T granulated sugar
1 1/2 t ground cinnamon

Cake
1 pkg white cake mix
1/4 cup granulated sugar
8 oz cream cheese, softened
3 eggs
1/3 cup vegetable oil
1/4 cup water
1 t ground cinnamon
1. Preheat oven to 350 degrees F.  Spray a 10 1/2 inch springform pan with Baker's Secret or other flour oil spray.   
2. Topping: Peel, core and thinly slice apples to make 4 cups.  Toss in lemon juice and set aside.  In a separate bowl, combine sugar and cinnamon. Set aside.

3.  Cake:  In a large mixer bowl, combine cake mix, sugar, cream cheese, eggs, oil, water and cinnamon.  Beat on low speed for 1 minutes to blend, then on medium speed for 2 minutes.  Spread batter evenly in prepared pan.  Arrange apple slices attractively on top of batter, overlapping slightly as necessary.  Sprinkle with cinnamon-sugar mixture.


  Bake for 60 to 70 minutes or until a tester inserted in the center of cake portion comes out clean.  Cool 30 minutes in pan on a wire rack.  Serve warm or cool.


Read More »

Monday, October 22, 2012

Pound Cake

0
by Cindy


There are a ton of pound cake recipes out there, and my friend Karen has been searching and trying, for years, recipes to find the one that tastes like her mom's pound cake.  Karen's mom was a very special lady, and from what Karen has told me, she was one of the best moms around. Her mom had many delicious recipes and was a wonderful homemaker, and I know Karen misses her every day.  Karen keeps her mom alive by continuing the tradition of cooking and baking recipes that her mom shared with her. (btw-Karen is also a wonderful homemaker too - just like her mom).   Karen thinks that she has found the recipe that tastes the most like her mom's, and she shared the recipe with me this week.   I made it last night and had a piece this morning with my coffee. It tastes fantastic!  The texture is soft and moist, and I love the hint of flavor from the almond extract.  It's not a difficult recipe and it is sooo good.   Thanks Karen for sharing this recipe, for making your mom proud, and being a great friend too! 

The Best Pound Cake Recipe

3 sticks butter, softened
1 - 8 oz. cream cheese, softened
3 cups sugar
6 eggs
1/2 t almond flavoring
3 cups flour
1/2 t baking powder

Cream butter, cream cheese and sugar together. 
In a separate bowl mix eggs and almond flavoring.  In another bowl mix together flour and baking powder.  Add egg mixture and flour mixture, alternately, ending with the flour mixture. 
Spray a bundt pan with Baker's Secret.  Pour batter in the pan and bake at 325 for 1 hour and 10 minutes. 


Read More »

Wednesday, October 17, 2012

Chocolate, Chocolate Chip Brownies

0
By Christy


Is it weird to admit to you all that I have never, well before this recipe, made homemade brownies? I know, it even shocks myself! I have always been a huge fan of how easy and super delicious some of the box brownie mixes are but little did I know, homemade brownies can be super simple and easy too!

 This adventure all began Sunday afternoon when I was innocently browsing through the new Taste of Home magazine and I flipped to a page where they had brownies listed for their recipe swap- Very Chocolate Chip Brownies. Gosh, I am such a sucker for chocolate and immediately, I skimmed the ingredients and without a question, I walked right into my kitchen and began whipping up these delicious, super rich and chocolatey brownies. Within the hour I sat down with a hot steamy brownie with some cold milk and at that point in time my life was 100% complete. LOL But really, if you are having a chocolate craving this will hit the spot! (And if you bake a lot, you probably have all the ingredients on hand)

Ingredients:
1 1/2 cups sugar
2/3 cup butter 
1/4 cup water
2 - 12 oz bags semisweet chocolate chips, divided
4 eggs
1 1/2 cups all purpose flour
1/2 tsp baking soda
1/2 tsp salt

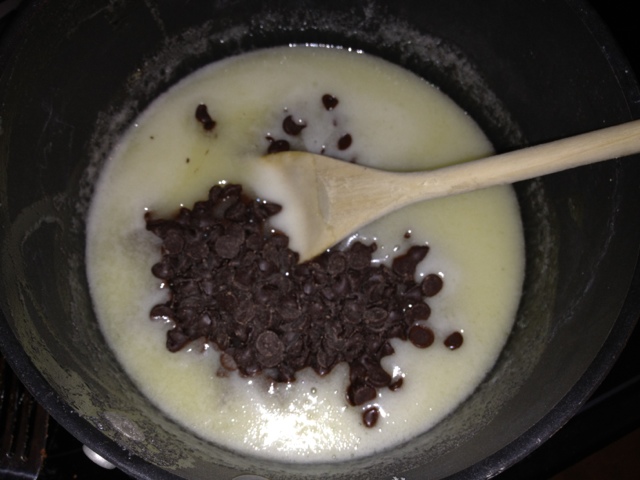
In a large saucepan, combine the sugar, butter and water. Bring to a boil, stirring constantly. Remove from heat and stir in 1 bag (2 cups) chocolate chips. In a large bowl, beat eggs and vanilla and then combine it with the chocolate mixture. Slowly add the flour, baking soda and salt, mixing well before stirring in the remaining chocolate chips. 
Spread into a greased 9x13 baking dish and bake at 325 for 40 minutes (or until you stick a toothpick into the center and it comes out clean). Cool before slicing. These can be frozen for up to 3 months. 
Read More »

Saturday, October 13, 2012

Mom's Chocolate Fudge

0
by Cindy


I love recipes that bring back memories from years ago, and this is one of those recipes. 
This recipe is really old and I thought it was my mom's, but she told me yesterday that it was actually my Aunt Sarah's recipe.  I remember Mom making it and pouring it on a plate, and we had to wait for it to harden.  My Mom only make this fudge once twice a year, so it was always a special treat for us.   Mom's fudge tasted better than mine.  I think I cooked it too long and let it cool down too much before I poured it in the pan.  It should have turned out looking smoother and shinier. The next time I make it, I will test it for soft balls earlier, beat it, add the pecans, and pour it in my pan while it is still hot.  The fudge recipes today are quicker and easier and have a softer consistency.  This fudge reminds me more of candy.  It takes a while to cook and is a little tricky, but for me it was a sweet memory of yesterday......  thanks Mom.

Chocolate Fudge

2 cups sugar
lump butter
2 squares (2 oz) melted Bakers Unsweetened Chocolate
dash salt
2/3 cup milk
2 t vanilla
2 T Karo Syrup
1 cup chopped nuts

Melt chocolate on low.  Combine with other ingredients and cook until forms soft ball.  Beat with a spoon or spatula and add nuts.  Pour onto greased or sprayed pan.  Cut into squares. 


Read More »

Saturday, October 6, 2012

Apple Spice Cupcakes with Caramel Buttercream Icing

0
By Christy


 I have been back on my cupcake making binge again and have remade several of the recipes I  have already posted on here in previous posts. As expected, they prove again and again just how amazing and delicious they are! But I also wanted to add a new one to my cupcake repertoire..... a cupcake that said "fall". I LOVE fall and so happy it is here and in its honor I am presenting to you all Caramel Apple Cupcake.I know... mom just posted a cupcake that sounds similiar but this recipe is quite different and uses all kinds of short cuts, has a totally different consistenty/flavor and has buttercream icing..... So needless to say, don't let the name trick you into thinking they are the same thing. These are moist, fluffy apple cakes topped with caramel butter cream icing. The really were sinfully amazing! (and super easy to make too!)

Apple Cake:
1 box French Vanilla Cake mix
1 large can of apple pie filling
1 teaspoon apple pie spice
3 eggs

Caramel Icing:
1 stick of softened butter
8 oz cream cheese, room temperature
1/2 cup store bought caramel sauce
1 to 1 1/2 pounds powdered sugar

Preheat the oven to 350. Open the can of pie filling, and using a sharp knife cut the apple pieces into bite sized pieces while it is still in the can by pushing the knife around the side of the can. (this sounds weird, but once you start --it will all make sense). In a mixing bowl add cake mix, pie filling, spice, and eggs and mix thoroughly. Fill cupcake liners about 3/4th full (the batter will be VERY thick, but the batter fills out the liner once cooked and rises quite a bit--so don't overfill). Cook for about 14-18 minutes. Let cool completely prior to icing.

To make the icing, start by beating the cream cheese and butter with a mixer until smooth. Add the caramel topping and mix again. Slowly add the powdered sugar and mix until it is the consistency you are looking for (not too stiff but not too soft). Depending on the caramel you buy, it may be thicker or more liquidy. The more liquid the caramel, the more powdered sugar you will need to make it a stiffer consistency for proper piping of the icing. Once the cupcakes are iced, drizzle with more caramel sauce and store them cupcakes in the refrigerator prior to serving. Since these cupcakes do have fruit in them, try to eat them as quickly as possible for optimal freshness.

I added these cookies  I found at Trader Joe's to the top of the cupcake  for a little extra punch of decor and tastiness!
Inspired by www.yourcupofcake.com
Read More »

Thursday, October 4, 2012

Sticky-Bun Pumpkin Muffins

0
by Cindy

I love all of the fall decorations and the pumpkins everywhere.  I like the fact that when I decorate for fall in September, the decorations can stay up for 3 months.  So we are baking with pumpkins this week, and my favorite pumpkin recipe is Pumpkin Roll (thanks Marilyn!), but that recipe is already here on the blog.  This recipe caught my eye and is from Southern Living.  Who doesn't like a sticky bun and why not make it with pumpkin?  These muffins taste really good.  They have a soft texture, and I love the crunchy pecans that are on top. They are easy to make and tasted wonderful with my coffee this morning. 

Sticky-Bun Pumpkin Muffins

Yield: Makes about 2 dozen
2 cups pecan halves and pieces
1/2 cup butter, melted
1/2 cup firmly packed light brown sugar
2 T light corn syrup
3 1/2 cups all-purpose flour
3 cups granulated sugar
1 T pumpkin pie spice
1 t baking soda
1 t salt
1 (15 oz.) can pumpkin
1 cup canola oil
2/3 cup water
4 large eggs

1.  Preheat oven to 350 degrees F.  Bake pecans in a single layer in shallow pan 8 to 10 minutes or until toasted and fragrant, stirring halfway through.
2.  Stir together melted butter and next 2 ingredients.  Spoon 1 rounded teaspoonful butter mixture into each cup of lightly greased 12-cup muffin pans, and top each with 1 rounded tablespoonful pecans. (Save excess for later).

3.  Stir together flour and next 4 ingredients in a large bowl, and make a well in center of mixture.  Whisk together pumpkin, next ingredients, and 2/3 cup water: add to dry ingredients, stirring just until moistened. 

4.  Spoon batter into prepared muffin pans, filling 3/4 full.  Place an aluminum foil-lined jelly-roll pan on lower oven rack to catch any overflow.

5.  Bake at 350 degrees F on middle rack for 25 to 30 minutes or until wooden pick inserted in center comes out clean.  Invert pan immediately to remove muffins, and arrange muffins on a wire rack.  Spoon any topping remaining in muffin cups over muffins.  Let cool 5 minutes.

Personal Note:
My muffins didn't take 25 minutes to bake, so check them after about 15 minutes with a toothpick.  I had enough extra batter that I could have made at least 6 more muffins, so keep that in mind if you want to make a few more then prepare another muffin pan.  With my excess batter I made 24 mini muffins.  I used the excess pecan mixture to sprinkle on top of the muffin dough instead of putting it in the bottom of the muffin pans.  I baked them about 13 minutes but checked often as to not overbake.       


recipe from
Southern Living
Read More »