Thursday, November 1, 2012

Banana Pudding Cupcakes

3
by Cindy

We're having a birthday at the office today, and that always gives me a great reason to try out a new recipe.  Kim wanted a fruit flavored cake, so Christy and I talked about what ingredient we wanted to bake with this week.  Bananas it is.  
 
This banana cupcake tastes soft and light, and the banana curd in the middle is the pudding part of the cake.  It's not overwhelmingly sweet and has a very natural banana flavor.  I would have liked more banana curd in the center of the cupcakes, so next time I'll squeeze in a little more.  Kim said she liked the fact that nuts were not added to the cake.  She said that usually with banana flavored recipes there are usually nuts included.  That is so true. Everyone in the office gave this cupcake high marks, and I loved it too. 

If you wanted to make some short cuts, cool whip could be used instead of fresh whipped cream. A cake doctor type recipe with bananas would probably work too.  As I always say, it's always about the icing and in this case the filling too.    


Banana Pudding Cupcakes

1 recipe Banana Cake
1 recipe Fresh Banana Curd
1 recipe Fresh Whipped Cream
Topping: vanilla wafers, fresh banana slices

1.  Prepare Banana Cake as directed.
2.  Insert the end of a wooden spoon or dowel into the center of each cooled cupcake to make a hole.  Fill a zip-top plastic freezer bag with Fresh Banana Curd.  Use scissors or kitchen shears to snip about 1/4 inch from one corner of bag; insert bag into the hole of one cupcake.  Squeeze gently until filling comes to the top of the cupcake.  Repeat with remaining cupcakes.

3.  Frost each cupcake with 2 T Fresh Whipped Cream, using a piping bag and metal tip No. 12 or a zip-top plastic freezer bag with one corner snipped off.  Top each with 1 vanilla wafer and banana slice just before serving.
 

Banana Cake

1 1/2 cup mashed ripe bananas
2 t lemon juice
1 cup butter, softened
2 cups sugar
3 large eggs
3 cups all-purpose soft-wheat flour
1 1/2 t salt
1 1/2 cups buttermilk
2 t vanilla extract
Paper baking cups
Vegetable cooking spray

1.  Preheat oven to 350 degrees.  Combine bananas and lemon juice in a small bowl; set aside.

2.  Beat butter and sugar at medium speed with an electric mixer until creamy.  Add eggs, 1 at a time, beating until blended after each addition.
3.  Combine flour, baking soda, and salt.  Add to butter mixture alternately with buttermilk, beginning and ending with flour mixture.  Beat at low speed just until blended after each addition.  Stir in vanilla and reserved banana mixture.

4.  Place paper baking cups in  2 (12 cup) muffin pans, and coat with cooking spray; spoon batter into cups, filling two-thirds full.

5.  Bake at 350 degrees for 12 to 15 minutes or until wooden pick inserted in center comes out clean.  Cool in pans on wire racks 10 minutes; remove from pans to wire racks, and cool completely.

Personal note:  It actually made 7 or 8 more cupcakes.  I only needed half of the banana curd so half the recipe.  I needed  more whipped topping.  I had enough for 24 cupcakes but not enough for the extra cupcakes it made.  I would have loved to put more whipped topping on each cake, but I didn't have enough to be very generous.  Make whipped topping using at least 2 cups of whipping cream.  I also added a little more powdered sugar to the whipping cream.   


Fresh Banana Curd

4 large ripe bananas
4 T butter
1 1/2 cups sugar
4 T fresh lemon juice
4 large eggs

1.  Mash bananas in a large bowl with a fork until creamy.

2.  Combine mashed banana and remaining ingredients in a medium saucepan over medium-low heat.  Cook, whisking constantly, until mixture thickens and coats a spoon.  (Do not boil.)  Cool completely.

Note:  Store any leftover curd in an airtight container in refrigerator for up to 3 days.

Fresh Whipped Cream

makes 3 cups
1 1/2 cups whipping cream, chilled
2 t vanilla extract
1/4 cup powdered sugar

1.  Beat whipping cream at high speed with an electric mixer until soft peaks form.  Add vanilla and sugar, and beat until stiff peaks form.

2.  Store in refrigerator until ready to use.


recipe from
Simply Sweet
Best Cupcakes Ever!


Read More »

Saturday, October 27, 2012

Apple Pinwheel Cake

0
by Cindy
  

I like to bake with fruits that are in season, so I decided to make this pinwheel apple cake recipe that I found in a cookbook.  The picture in the cookbook looked so pretty and neat.  I made it and wasn't sure if it was that good, but my friend, Gail, came to stay with me last week and loved this cake.  I didn't like the way it turned out brown on top, but it was the sprinkle of cinnamon and sugar that turned brown, not the apples.  It didn't burn either and was just brown on top and tasted good.  The cake was light with a hint of spices.  I used a gadget to peel and core the apples that I bought from a Pampered Chef party many years ago. This gadget is fantastic.  It peels the apple while coring it at the same time.  It also slices the apples so the slices are all uniform in width.  If you're going to need many peeled and sliced apples, this gadget is fantastic for doing just that.  It's easy to use and to clean. 

Apple Pinwheel Cake

Topping
4 to 5 apples
1 T lemon juice
1 1/2 T granulated sugar
1 1/2 t ground cinnamon

Cake
1 pkg white cake mix
1/4 cup granulated sugar
8 oz cream cheese, softened
3 eggs
1/3 cup vegetable oil
1/4 cup water
1 t ground cinnamon
1. Preheat oven to 350 degrees F.  Spray a 10 1/2 inch springform pan with Baker's Secret or other flour oil spray.   
2. Topping: Peel, core and thinly slice apples to make 4 cups.  Toss in lemon juice and set aside.  In a separate bowl, combine sugar and cinnamon. Set aside.

3.  Cake:  In a large mixer bowl, combine cake mix, sugar, cream cheese, eggs, oil, water and cinnamon.  Beat on low speed for 1 minutes to blend, then on medium speed for 2 minutes.  Spread batter evenly in prepared pan.  Arrange apple slices attractively on top of batter, overlapping slightly as necessary.  Sprinkle with cinnamon-sugar mixture.


  Bake for 60 to 70 minutes or until a tester inserted in the center of cake portion comes out clean.  Cool 30 minutes in pan on a wire rack.  Serve warm or cool.


Read More »

Monday, October 22, 2012

Pound Cake

0
by Cindy


There are a ton of pound cake recipes out there, and my friend Karen has been searching and trying, for years, recipes to find the one that tastes like her mom's pound cake.  Karen's mom was a very special lady, and from what Karen has told me, she was one of the best moms around. Her mom had many delicious recipes and was a wonderful homemaker, and I know Karen misses her every day.  Karen keeps her mom alive by continuing the tradition of cooking and baking recipes that her mom shared with her. (btw-Karen is also a wonderful homemaker too - just like her mom).   Karen thinks that she has found the recipe that tastes the most like her mom's, and she shared the recipe with me this week.   I made it last night and had a piece this morning with my coffee. It tastes fantastic!  The texture is soft and moist, and I love the hint of flavor from the almond extract.  It's not a difficult recipe and it is sooo good.   Thanks Karen for sharing this recipe, for making your mom proud, and being a great friend too! 

The Best Pound Cake Recipe

3 sticks butter, softened
1 - 8 oz. cream cheese, softened
3 cups sugar
6 eggs
1/2 t almond flavoring
3 cups flour
1/2 t baking powder

Cream butter, cream cheese and sugar together. 
In a separate bowl mix eggs and almond flavoring.  In another bowl mix together flour and baking powder.  Add egg mixture and flour mixture, alternately, ending with the flour mixture. 
Spray a bundt pan with Baker's Secret.  Pour batter in the pan and bake at 325 for 1 hour and 10 minutes. 


Read More »

Wednesday, October 17, 2012

Chocolate, Chocolate Chip Brownies

0
By Christy


Is it weird to admit to you all that I have never, well before this recipe, made homemade brownies? I know, it even shocks myself! I have always been a huge fan of how easy and super delicious some of the box brownie mixes are but little did I know, homemade brownies can be super simple and easy too!

 This adventure all began Sunday afternoon when I was innocently browsing through the new Taste of Home magazine and I flipped to a page where they had brownies listed for their recipe swap- Very Chocolate Chip Brownies. Gosh, I am such a sucker for chocolate and immediately, I skimmed the ingredients and without a question, I walked right into my kitchen and began whipping up these delicious, super rich and chocolatey brownies. Within the hour I sat down with a hot steamy brownie with some cold milk and at that point in time my life was 100% complete. LOL But really, if you are having a chocolate craving this will hit the spot! (And if you bake a lot, you probably have all the ingredients on hand)

Ingredients:
1 1/2 cups sugar
2/3 cup butter 
1/4 cup water
2 - 12 oz bags semisweet chocolate chips, divided
4 eggs
1 1/2 cups all purpose flour
1/2 tsp baking soda
1/2 tsp salt

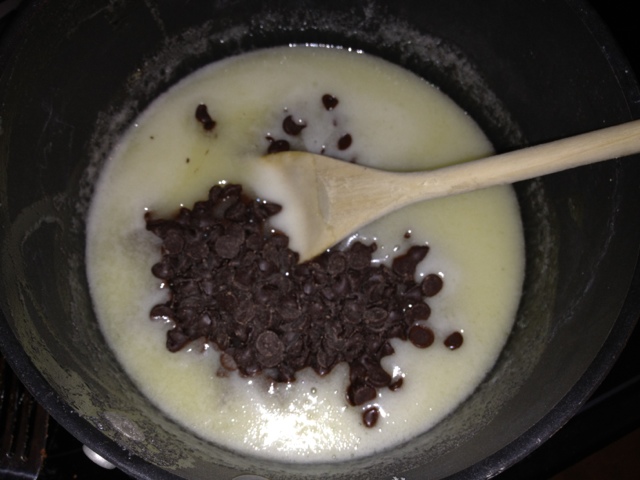
In a large saucepan, combine the sugar, butter and water. Bring to a boil, stirring constantly. Remove from heat and stir in 1 bag (2 cups) chocolate chips. In a large bowl, beat eggs and vanilla and then combine it with the chocolate mixture. Slowly add the flour, baking soda and salt, mixing well before stirring in the remaining chocolate chips. 
Spread into a greased 9x13 baking dish and bake at 325 for 40 minutes (or until you stick a toothpick into the center and it comes out clean). Cool before slicing. These can be frozen for up to 3 months. 
Read More »

Saturday, October 13, 2012

Mom's Chocolate Fudge

0
by Cindy


I love recipes that bring back memories from years ago, and this is one of those recipes. 
This recipe is really old and I thought it was my mom's, but she told me yesterday that it was actually my Aunt Sarah's recipe.  I remember Mom making it and pouring it on a plate, and we had to wait for it to harden.  My Mom only make this fudge once twice a year, so it was always a special treat for us.   Mom's fudge tasted better than mine.  I think I cooked it too long and let it cool down too much before I poured it in the pan.  It should have turned out looking smoother and shinier. The next time I make it, I will test it for soft balls earlier, beat it, add the pecans, and pour it in my pan while it is still hot.  The fudge recipes today are quicker and easier and have a softer consistency.  This fudge reminds me more of candy.  It takes a while to cook and is a little tricky, but for me it was a sweet memory of yesterday......  thanks Mom.

Chocolate Fudge

2 cups sugar
lump butter
2 squares (2 oz) melted Bakers Unsweetened Chocolate
dash salt
2/3 cup milk
2 t vanilla
2 T Karo Syrup
1 cup chopped nuts

Melt chocolate on low.  Combine with other ingredients and cook until forms soft ball.  Beat with a spoon or spatula and add nuts.  Pour onto greased or sprayed pan.  Cut into squares. 


Read More »

Saturday, October 6, 2012

Apple Spice Cupcakes with Caramel Buttercream Icing

0
By Christy


 I have been back on my cupcake making binge again and have remade several of the recipes I  have already posted on here in previous posts. As expected, they prove again and again just how amazing and delicious they are! But I also wanted to add a new one to my cupcake repertoire..... a cupcake that said "fall". I LOVE fall and so happy it is here and in its honor I am presenting to you all Caramel Apple Cupcake.I know... mom just posted a cupcake that sounds similiar but this recipe is quite different and uses all kinds of short cuts, has a totally different consistenty/flavor and has buttercream icing..... So needless to say, don't let the name trick you into thinking they are the same thing. These are moist, fluffy apple cakes topped with caramel butter cream icing. The really were sinfully amazing! (and super easy to make too!)

Apple Cake:
1 box French Vanilla Cake mix
1 large can of apple pie filling
1 teaspoon apple pie spice
3 eggs

Caramel Icing:
1 stick of softened butter
8 oz cream cheese, room temperature
1/2 cup store bought caramel sauce
1 to 1 1/2 pounds powdered sugar

Preheat the oven to 350. Open the can of pie filling, and using a sharp knife cut the apple pieces into bite sized pieces while it is still in the can by pushing the knife around the side of the can. (this sounds weird, but once you start --it will all make sense). In a mixing bowl add cake mix, pie filling, spice, and eggs and mix thoroughly. Fill cupcake liners about 3/4th full (the batter will be VERY thick, but the batter fills out the liner once cooked and rises quite a bit--so don't overfill). Cook for about 14-18 minutes. Let cool completely prior to icing.

To make the icing, start by beating the cream cheese and butter with a mixer until smooth. Add the caramel topping and mix again. Slowly add the powdered sugar and mix until it is the consistency you are looking for (not too stiff but not too soft). Depending on the caramel you buy, it may be thicker or more liquidy. The more liquid the caramel, the more powdered sugar you will need to make it a stiffer consistency for proper piping of the icing. Once the cupcakes are iced, drizzle with more caramel sauce and store them cupcakes in the refrigerator prior to serving. Since these cupcakes do have fruit in them, try to eat them as quickly as possible for optimal freshness.

I added these cookies  I found at Trader Joe's to the top of the cupcake  for a little extra punch of decor and tastiness!
Inspired by www.yourcupofcake.com
Read More »

Thursday, October 4, 2012

Sticky-Bun Pumpkin Muffins

0
by Cindy

I love all of the fall decorations and the pumpkins everywhere.  I like the fact that when I decorate for fall in September, the decorations can stay up for 3 months.  So we are baking with pumpkins this week, and my favorite pumpkin recipe is Pumpkin Roll (thanks Marilyn!), but that recipe is already here on the blog.  This recipe caught my eye and is from Southern Living.  Who doesn't like a sticky bun and why not make it with pumpkin?  These muffins taste really good.  They have a soft texture, and I love the crunchy pecans that are on top. They are easy to make and tasted wonderful with my coffee this morning. 

Sticky-Bun Pumpkin Muffins

Yield: Makes about 2 dozen
2 cups pecan halves and pieces
1/2 cup butter, melted
1/2 cup firmly packed light brown sugar
2 T light corn syrup
3 1/2 cups all-purpose flour
3 cups granulated sugar
1 T pumpkin pie spice
1 t baking soda
1 t salt
1 (15 oz.) can pumpkin
1 cup canola oil
2/3 cup water
4 large eggs

1.  Preheat oven to 350 degrees F.  Bake pecans in a single layer in shallow pan 8 to 10 minutes or until toasted and fragrant, stirring halfway through.
2.  Stir together melted butter and next 2 ingredients.  Spoon 1 rounded teaspoonful butter mixture into each cup of lightly greased 12-cup muffin pans, and top each with 1 rounded tablespoonful pecans. (Save excess for later).

3.  Stir together flour and next 4 ingredients in a large bowl, and make a well in center of mixture.  Whisk together pumpkin, next ingredients, and 2/3 cup water: add to dry ingredients, stirring just until moistened. 

4.  Spoon batter into prepared muffin pans, filling 3/4 full.  Place an aluminum foil-lined jelly-roll pan on lower oven rack to catch any overflow.

5.  Bake at 350 degrees F on middle rack for 25 to 30 minutes or until wooden pick inserted in center comes out clean.  Invert pan immediately to remove muffins, and arrange muffins on a wire rack.  Spoon any topping remaining in muffin cups over muffins.  Let cool 5 minutes.

Personal Note:
My muffins didn't take 25 minutes to bake, so check them after about 15 minutes with a toothpick.  I had enough extra batter that I could have made at least 6 more muffins, so keep that in mind if you want to make a few more then prepare another muffin pan.  With my excess batter I made 24 mini muffins.  I used the excess pecan mixture to sprinkle on top of the muffin dough instead of putting it in the bottom of the muffin pans.  I baked them about 13 minutes but checked often as to not overbake.       


recipe from
Southern Living
Read More »

Tuesday, September 25, 2012

Glorified Chocolate Chip Oatmeal Cookie Bars

0
By Christy

So I am behind... I'm behind on house work, friend time, and most importantly for you all reading... Baking! LOL I am in the middle of finals for school, working full time, and living my life and there hasn't been much left for the latter part of that statement. I did manage to squeak in some baking last week but actually putting together the blog has been the hard part.

BUT When we decided to cook bars I was so excited because I had come across a recipe that sounded to die for! And HOLY MOLY: They were soooo good and SO easy!! (so easy, even a caveman could do it! lol) If you need to whip something together quick that will have everyone raving, this is a go-to recipe for you! And if you want to not only impress people but knock some socks off too, just simply supply a generous portion of milk or some vanilla ice-cream and their hearts will be all yours!

You get the texture of a cookie, the crunch from the oats and chocolate chips and then the added caramel….The caramel flavor in the middle isn't very powerful but the ooey-gooeyness gives the cookie bar that moistness and rich flavor makes these a truly glorified, chocolate chip oatmeal cookie bar!

Ingredients:
1 1/4 cups store bought caramel sauce
3/4 cup butter, melted
3/4 cup brown sugar, packed
1 cup flour
1 cup rolled oats
1 teaspoon baking soda
6 ounces semisweet chocolate chips
This is for an 8x8 pan. I made 1 1/2 recipes but I recommend doubling!!!

Preheat the oven to 350 degrees. Combine in a large bowl, combine melted butter, brown sugar, flour, oats, and baking soda. Pat half of the oatmeal mixture into the bottom of an 8x8" pan. Bake at 350 degrees for 10 minutes. Remove pan from oven and sprinkle chocolate chips over crust. Pour caramel sauce over chocolate chips. Crumble remaining oatmeal mixture over caramel. Return to oven and bake an additional 15-20 minutes, until the edges are lightly browned. Remove from oven and cool completely before cutting.

Inspired by:http://luluthebaker.blogspot.com/2010/10/carmelitas.html

Read More »

Thursday, September 20, 2012

Caramel Apple Cupcakes

0
by Cindy


We've had a few cool mornings to remind us how wonderful it is to experience the change of seasons.  My dogwood tree has turned red and the maple trees will be so beautiful when they turn yellow and red.  I love the beauty of fall and the cool crispness in the air.  I will miss being out in my mail jeep in the midst of the change this year, but I have a wonderful view out of my huge office window and a beautiful yard in which to watch the fall transformation. 

My office is hosting the Desk and Derrick Club meeting tonight and providing supper for the group.  I love all the planning and preparations that go into hosting an event.  I love to decorate and make special recipes for the seasons.  We're having sandwiches from Schlotzsky's Deli, and I'm making a Spinach Salad with candied pecans and Craisins and Caramel Apple Cupcakes.

  I wanted to make something seasonal for dessert so I picked out this recipe for Caramel Apple Cupcakes.  The recipe sounded delicious and it is.  When I made the cake, I was a little concerned because there were so many apples in the mixture that there didn't seem to be that much batter.  It was very thick too.  It turned out fine though, and they taste wonderful, with  lots of apples in each cupcake to really get the apple flavor.

The icing is a traditional caramel icing.  It is very similar to the icing that I put on the Jam Cakes that I make at Christmas.  My suggestion for anyone making this is to chop up the apples first and then make the icing, because the icing does have to cool for an hour.  I didn't do this so I was up pretty late last night.  The apple cupcakes topped with the Old-fashioned Caramel Icing are a great combination, and do have the caramel apple taste.  I hope everyone enjoys them tonight. 


Caramel Apple Cupcakes

Fresh Apple Cake

1/2 cup butter, melted
1 cup granulated sugar
1 cup firmly packed dark brown sugar
2 large eggs
1 t vanilla
2 cups all-purpose soft-wheat flour
1 t baking soda
1 t salt
2 t ground cinnamon
4 large Granny Smith apples, peeled and chopped
Paper baking cups
Vegetable cooking spray

1.  Preheat oven to 350 degrees.  Stir together first 5 ingredients in a large bowl until blended.

2.  Combine flour and next 3 ingredients; add to butter mixture, stirring until blended.  Stir in apple.
3.  Place paper baking cups in 2 (12-cup) muffin pans, and coat with cooking spray; spoon batter into cups, filling two-thirds full.

4.  Bake at 350 for 12 to 15 minutes or until a wooden pick inserted in center comes out clean.  Cool in pans on wire racks 10 minutes; remove from pans to wire racks, and cool completely.

Old-fashioned Caramel Frosting

1 cup butter
1 (16 oz.) package dark brown sugar
1/2 cup evaporated milk
1/4 t baking soda
1 T light corn syrup
4 cups powdered sugar

1.  Melt butter in a 3-qt. heavy saucepan over medium heat.  Add brown sugar; bring to a boil, stirring constantly.  Stir in evaporated milk, baking soda, and corn syrup; bring to a boil.  Remove from heat, and let cool completely (about 1 hour).  Transfer to bowl.
2.  Gradually add powdered sugar to caramel mixture, beating at medium speed with an electric mixer until blended.  Beat at high speed 2 minutes or until creamy.  Use immediately.


Recipe from
Simply Sweet Best Cupcakes Ever!
Oxmore House
Read More »

Friday, September 14, 2012

Chocolate-Peanut Butter Fudge Bars

0
by Cindy


I love Reese Cups, and I think the pairing of peanut butter and chocolate is genius.  I remember the Reese Cup commercial when I was growing up.  Two people run into each other and one person's chocolate bar gets put in the other's peanut butter.  I bet several of you remember that one.  It's a good commercial when it is still remembered years later, but it's so true. 

I've been wanting to make something "oh so good" lately and I found this recipe from Woman's Day.  It has three layers and uses a boxed brownie mix so it's pretty easy. It calls for Triple Chocolate Decadence Brownie mix, but I used my favorite boxed brownie mix, which is the one that has the Hershey's chocolate syrup packet (Betty Crocker Original Supreme Brownie Mix.)  You can do so much with brownies by added nuts, chocolate chips, marshmallow cream ...etc. The only other thing I will change the next time I make this is to use milk chocolate chips instead of semi-sweet chocolate chips on the top layer.  I think this is just a personal preference, so you could use either.  I tested one or two (they were small, lol)  this morning with my coffee (not the healthiest breakfast choice, I know)  and they are really good.  I love the three layers, and it is "oh so good" and chocolatey.  The brownie layer is chewy with a little crunch from the peanuts, and the middle layer is soft and creamy with the flavor of peanut butter.  The top layer is almost pure chocolate, which is what I love.  If you love peanut butter mixed with chocolate, you will love these. 


Chocolate-Peanut Butter Fudge Bars

1 box (18 oz) Triple Chocolate Decadence Brownie Mix
1/2 cup peanut butter chips
1/2 cup dry roasted peanuts, chopped

Peanut Butter Filling
3/4 cup creamy peanut butter
1 c marshmallow cream (such as Marshmallow Fluff or Creme)
3/4 stick (6T) unsalted butter, softened
3/4 cup confectioner's sugar

Chocolate Glaze
6 oz bittersweet baking chocolate, coarsely chopped
5 T unsalted butter
1 T light corn syrup

1. Heat oven to 350 F.  Line a 9 inch square pan with foil, letting the foil extend above the pan on opposite sides.  Coat foil with nonstick spray.
2.  Prepare brownie mix as package directs for fudgy brownies.  Stir in peanut butter chips and peanuts.  Spread evenly in prepared pan.
3.  Bake 30 minutes, or until a wooden pick inserted in center comes out with moist crumbs attached.  Cool completely in pan on a wire rack.
F.  Filling:  Beat peanut butter, marshmallow cream and butter in a medium bowl with mixer on high until well blended.  Reduce speed to low, add confectioners' sugar and beat until blended.  Spread evenly on brownie.
5.  Glaze:  Microwave chocolate and butter, stirring at 30-second intervals, until melted and smooth.  Cool slightly; stir in corn syrup.  Spread evenly over filling.  Refrigerate 1 hour until filling is firm and glaze is set.


Note:  To cut, lift out of pan and pull foil down on the sides.  I love this tool to cut brownies and bars because it cuts so smoothly and neatly.  It is a very handy tool to have in the kitchen and I have used it for this and many other ways. 


recipe from
WomansDay.com
Read More »

Wednesday, September 12, 2012

Nashville Restaurant Week

0

For all you Nashvillians, if you didn't already know- This week is Nashville Originals Restaurant Week! It is a semi-annual event held every year in Nashville by some of Nashville's best local dining venues! They offer special prices and menus (mostly 3 courses) and it really is one of my favorite times to dine out in Nashville!

If you are interested on more info, check out their website for a list of the restaurants and their menus! You wont regret it!!!! (I tried Jimmy Kelley's last night and headed to Yellow Porch tonight)

http://www.nashvilleoriginals.com/restaurantweek.php
Read More »

Friday, September 7, 2012

Strawberry Shortcake Cookies

0
By Christy


Somehow or another Labor Day has come and gone.... Sometimes I really do wonder where the time goes. This week we are taking the time to pull out one final super summery recipe in honor of the passing summer heat and super fresh fruit and veggies, AND with excitement as all our fall ideas are on the horizon! Today my recipe is called strawberry shortcake cookies. You get the delicious cakey aspect of a shortcake but the sweet and richness of the strawberries all served up in a single serving cookie. Can we say Y-U-M! They are fresh, and delicious and I can't imagine anyone who wouldn't like these cookies.

Ingredients:
12 ounces strawberries diced into 1/4 inch pieces
2 teaspoons lemon juice
1/2 cup & 2 tablespoons granulated sugar
2 cups all purpose flour
lemon zest from 1 lemon
2 teaspoons baking powder
1/2 teaspoon salt
6 tablespoons cold butter, cut into pieces
2/3 cup heavy cream

Preheat the oven to 375. Mix strawberries, 2 tablespoons sugar, and lemon juice in a small bowl and set aside.
In a large bowl, mix together lemon zest, 1/2 cup sugar, flour, baking powder and salt and mix until well combined. Using a pastry cutter or a paddle attachment on a mixer blend in butter until you have coarse crumbs. Add the cream to the bowl and continue mixing until the dough starts to come together. Gently stir in the strawberry mixture.


Using a cookie scoop, drop dough on a prepared baking sheet (I recommend using parchment paper). If you want an extra hint of sugar, sprinkle the top with granulated or coarse sugar. Bake for 12-15 minutes or until the cookies are golden brown.
Since these cookies contain fresh fruit, keep them stored in an airtight container and are best served the first day of preparing. They should be good up to 2 days.

This recipe was inspired by: Budding Baketress
Read More »

Homemade Vanilla Ice Cream

0
by Cindy


Sadly summer is coming to an end, so to say goodbye to summer I made some more homemade ice cream.  No one has sent me any ice cream recipes, but Kimberly, at the office, gave me one to try.  This recipe is her husband's mother's recipe. They love her ice cream so I gave it a try.  
 It is really so quick and easy to make the custard.  It only took about 10 minutes to put it all together, then I just poured it in my countertop ice cream maker, and it was done in 30 minutes or less.  I used Egg Beaters just to be on the safe side.  I don't like to make anyone sick from using raw eggs.  I know it doesn't happen very often, but I just don't like to take chances like that.  I left out the Junket Mix, because I bought a package of Junket Mix and it was in pill form.  I thought it would be a package of dry powder like a pudding mix, so I wasn't sure if it was the correct Junket Mix.  It needed to be added to water to dissolve.  I tasted the Junket and water mixture and didn't really think it tasted very good, so I didn't add it.  I'm going to make this recipe again with the Junket Mix, because Kimberly says that it really tastes even better with the mix.  I thought it tasted good, but I decribed it to Kimberly as a little icy, like snow ice cream (by the way - I really love snow ice cream).  I think the Junket Mix must make it more creamy and bind it together.   I'm going to investigate the Junket Mix and see if I can find the powder package and make this recipe again using it. 

Homemade Ice Cream

2-boxes Junket Mix (vanilla)
3 T vanilla extract
1 pint Half & Half
1 cup  whipping cream (2 if desired)
8 to 9 cups milk
5 eggs
1/2 to 3/4 t salt
2 cups sugar

Beat eggs well.  Add sugar and Junket Mix.  Mix in the rest of the ingredients.  Makes 6 quarts


Read More »