Thursday, September 20, 2012

Caramel Apple Cupcakes

0
by Cindy


We've had a few cool mornings to remind us how wonderful it is to experience the change of seasons.  My dogwood tree has turned red and the maple trees will be so beautiful when they turn yellow and red.  I love the beauty of fall and the cool crispness in the air.  I will miss being out in my mail jeep in the midst of the change this year, but I have a wonderful view out of my huge office window and a beautiful yard in which to watch the fall transformation. 

My office is hosting the Desk and Derrick Club meeting tonight and providing supper for the group.  I love all the planning and preparations that go into hosting an event.  I love to decorate and make special recipes for the seasons.  We're having sandwiches from Schlotzsky's Deli, and I'm making a Spinach Salad with candied pecans and Craisins and Caramel Apple Cupcakes.

  I wanted to make something seasonal for dessert so I picked out this recipe for Caramel Apple Cupcakes.  The recipe sounded delicious and it is.  When I made the cake, I was a little concerned because there were so many apples in the mixture that there didn't seem to be that much batter.  It was very thick too.  It turned out fine though, and they taste wonderful, with  lots of apples in each cupcake to really get the apple flavor.

The icing is a traditional caramel icing.  It is very similar to the icing that I put on the Jam Cakes that I make at Christmas.  My suggestion for anyone making this is to chop up the apples first and then make the icing, because the icing does have to cool for an hour.  I didn't do this so I was up pretty late last night.  The apple cupcakes topped with the Old-fashioned Caramel Icing are a great combination, and do have the caramel apple taste.  I hope everyone enjoys them tonight. 


Caramel Apple Cupcakes

Fresh Apple Cake

1/2 cup butter, melted
1 cup granulated sugar
1 cup firmly packed dark brown sugar
2 large eggs
1 t vanilla
2 cups all-purpose soft-wheat flour
1 t baking soda
1 t salt
2 t ground cinnamon
4 large Granny Smith apples, peeled and chopped
Paper baking cups
Vegetable cooking spray

1.  Preheat oven to 350 degrees.  Stir together first 5 ingredients in a large bowl until blended.

2.  Combine flour and next 3 ingredients; add to butter mixture, stirring until blended.  Stir in apple.
3.  Place paper baking cups in 2 (12-cup) muffin pans, and coat with cooking spray; spoon batter into cups, filling two-thirds full.

4.  Bake at 350 for 12 to 15 minutes or until a wooden pick inserted in center comes out clean.  Cool in pans on wire racks 10 minutes; remove from pans to wire racks, and cool completely.

Old-fashioned Caramel Frosting

1 cup butter
1 (16 oz.) package dark brown sugar
1/2 cup evaporated milk
1/4 t baking soda
1 T light corn syrup
4 cups powdered sugar

1.  Melt butter in a 3-qt. heavy saucepan over medium heat.  Add brown sugar; bring to a boil, stirring constantly.  Stir in evaporated milk, baking soda, and corn syrup; bring to a boil.  Remove from heat, and let cool completely (about 1 hour).  Transfer to bowl.
2.  Gradually add powdered sugar to caramel mixture, beating at medium speed with an electric mixer until blended.  Beat at high speed 2 minutes or until creamy.  Use immediately.


Recipe from
Simply Sweet Best Cupcakes Ever!
Oxmore House
Read More »

Friday, September 14, 2012

Chocolate-Peanut Butter Fudge Bars

0
by Cindy


I love Reese Cups, and I think the pairing of peanut butter and chocolate is genius.  I remember the Reese Cup commercial when I was growing up.  Two people run into each other and one person's chocolate bar gets put in the other's peanut butter.  I bet several of you remember that one.  It's a good commercial when it is still remembered years later, but it's so true. 

I've been wanting to make something "oh so good" lately and I found this recipe from Woman's Day.  It has three layers and uses a boxed brownie mix so it's pretty easy. It calls for Triple Chocolate Decadence Brownie mix, but I used my favorite boxed brownie mix, which is the one that has the Hershey's chocolate syrup packet (Betty Crocker Original Supreme Brownie Mix.)  You can do so much with brownies by added nuts, chocolate chips, marshmallow cream ...etc. The only other thing I will change the next time I make this is to use milk chocolate chips instead of semi-sweet chocolate chips on the top layer.  I think this is just a personal preference, so you could use either.  I tested one or two (they were small, lol)  this morning with my coffee (not the healthiest breakfast choice, I know)  and they are really good.  I love the three layers, and it is "oh so good" and chocolatey.  The brownie layer is chewy with a little crunch from the peanuts, and the middle layer is soft and creamy with the flavor of peanut butter.  The top layer is almost pure chocolate, which is what I love.  If you love peanut butter mixed with chocolate, you will love these. 


Chocolate-Peanut Butter Fudge Bars

1 box (18 oz) Triple Chocolate Decadence Brownie Mix
1/2 cup peanut butter chips
1/2 cup dry roasted peanuts, chopped

Peanut Butter Filling
3/4 cup creamy peanut butter
1 c marshmallow cream (such as Marshmallow Fluff or Creme)
3/4 stick (6T) unsalted butter, softened
3/4 cup confectioner's sugar

Chocolate Glaze
6 oz bittersweet baking chocolate, coarsely chopped
5 T unsalted butter
1 T light corn syrup

1. Heat oven to 350 F.  Line a 9 inch square pan with foil, letting the foil extend above the pan on opposite sides.  Coat foil with nonstick spray.
2.  Prepare brownie mix as package directs for fudgy brownies.  Stir in peanut butter chips and peanuts.  Spread evenly in prepared pan.
3.  Bake 30 minutes, or until a wooden pick inserted in center comes out with moist crumbs attached.  Cool completely in pan on a wire rack.
F.  Filling:  Beat peanut butter, marshmallow cream and butter in a medium bowl with mixer on high until well blended.  Reduce speed to low, add confectioners' sugar and beat until blended.  Spread evenly on brownie.
5.  Glaze:  Microwave chocolate and butter, stirring at 30-second intervals, until melted and smooth.  Cool slightly; stir in corn syrup.  Spread evenly over filling.  Refrigerate 1 hour until filling is firm and glaze is set.


Note:  To cut, lift out of pan and pull foil down on the sides.  I love this tool to cut brownies and bars because it cuts so smoothly and neatly.  It is a very handy tool to have in the kitchen and I have used it for this and many other ways. 


recipe from
WomansDay.com
Read More »

Wednesday, September 12, 2012

Nashville Restaurant Week

0

For all you Nashvillians, if you didn't already know- This week is Nashville Originals Restaurant Week! It is a semi-annual event held every year in Nashville by some of Nashville's best local dining venues! They offer special prices and menus (mostly 3 courses) and it really is one of my favorite times to dine out in Nashville!

If you are interested on more info, check out their website for a list of the restaurants and their menus! You wont regret it!!!! (I tried Jimmy Kelley's last night and headed to Yellow Porch tonight)

http://www.nashvilleoriginals.com/restaurantweek.php
Read More »

Friday, September 7, 2012

Strawberry Shortcake Cookies

0
By Christy


Somehow or another Labor Day has come and gone.... Sometimes I really do wonder where the time goes. This week we are taking the time to pull out one final super summery recipe in honor of the passing summer heat and super fresh fruit and veggies, AND with excitement as all our fall ideas are on the horizon! Today my recipe is called strawberry shortcake cookies. You get the delicious cakey aspect of a shortcake but the sweet and richness of the strawberries all served up in a single serving cookie. Can we say Y-U-M! They are fresh, and delicious and I can't imagine anyone who wouldn't like these cookies.

Ingredients:
12 ounces strawberries diced into 1/4 inch pieces
2 teaspoons lemon juice
1/2 cup & 2 tablespoons granulated sugar
2 cups all purpose flour
lemon zest from 1 lemon
2 teaspoons baking powder
1/2 teaspoon salt
6 tablespoons cold butter, cut into pieces
2/3 cup heavy cream

Preheat the oven to 375. Mix strawberries, 2 tablespoons sugar, and lemon juice in a small bowl and set aside.
In a large bowl, mix together lemon zest, 1/2 cup sugar, flour, baking powder and salt and mix until well combined. Using a pastry cutter or a paddle attachment on a mixer blend in butter until you have coarse crumbs. Add the cream to the bowl and continue mixing until the dough starts to come together. Gently stir in the strawberry mixture.


Using a cookie scoop, drop dough on a prepared baking sheet (I recommend using parchment paper). If you want an extra hint of sugar, sprinkle the top with granulated or coarse sugar. Bake for 12-15 minutes or until the cookies are golden brown.
Since these cookies contain fresh fruit, keep them stored in an airtight container and are best served the first day of preparing. They should be good up to 2 days.

This recipe was inspired by: Budding Baketress
Read More »

Homemade Vanilla Ice Cream

0
by Cindy


Sadly summer is coming to an end, so to say goodbye to summer I made some more homemade ice cream.  No one has sent me any ice cream recipes, but Kimberly, at the office, gave me one to try.  This recipe is her husband's mother's recipe. They love her ice cream so I gave it a try.  
 It is really so quick and easy to make the custard.  It only took about 10 minutes to put it all together, then I just poured it in my countertop ice cream maker, and it was done in 30 minutes or less.  I used Egg Beaters just to be on the safe side.  I don't like to make anyone sick from using raw eggs.  I know it doesn't happen very often, but I just don't like to take chances like that.  I left out the Junket Mix, because I bought a package of Junket Mix and it was in pill form.  I thought it would be a package of dry powder like a pudding mix, so I wasn't sure if it was the correct Junket Mix.  It needed to be added to water to dissolve.  I tasted the Junket and water mixture and didn't really think it tasted very good, so I didn't add it.  I'm going to make this recipe again with the Junket Mix, because Kimberly says that it really tastes even better with the mix.  I thought it tasted good, but I decribed it to Kimberly as a little icy, like snow ice cream (by the way - I really love snow ice cream).  I think the Junket Mix must make it more creamy and bind it together.   I'm going to investigate the Junket Mix and see if I can find the powder package and make this recipe again using it. 

Homemade Ice Cream

2-boxes Junket Mix (vanilla)
3 T vanilla extract
1 pint Half & Half
1 cup  whipping cream (2 if desired)
8 to 9 cups milk
5 eggs
1/2 to 3/4 t salt
2 cups sugar

Beat eggs well.  Add sugar and Junket Mix.  Mix in the rest of the ingredients.  Makes 6 quarts


Read More »

Sunday, September 2, 2012

Chocolate Cheesecake

0
By Christy


Mom gave me a new cookbook for my birthday: Southern Living Home Cooking Favorites. There are so many delicious recipes in this cookbook it was hard to choose which recipe to try first but I decided on making a chocolate cheesecake. I based it off the recipe listed as a German Chocolate Cheesecake in the book but I decided the cheesecake was perfect enough, even without the topping. It's just the right amount of sweet, and chocolate, and deliciousness.

Ingredients:
1 cup chocolate graham cracker crumbs
2 tablespoons sugar
3 tablespoons melted butter
3 (8 ounce) packages of cream cheese, softened
3/4 cup sugar
1/4 cup unsweetened cocoa
2 teaspoons vanilla
3 large eggs

Preheat the oven to 325. Stir together the first three ingredients (crumbs, sugar, butter) and press ingot an ungreased 8 or 9 inch spring form pan. Bake for 10 minutes and cool crust.

Increase the temperature to 350. Beat cream cheese, sugar, coca, and vanilla at a medium speed until blended. Add eggs, 1 at a time, beating just until blended after each addition.  Bake for 35 minutes. Once removed from oven, run knife around the edge of pan. Cool completely in the pan. Cover and chill for 8 hours.


Read More »

Thursday, August 30, 2012

"Subway" White Chocolate Chip Macadamia Nut Cookie

1
by Cindy


Subway is one of my favorite sandwich and salad places to eat.  They make it easy to eat healthy and I love that, but their cookies don't really go along with the healthy eating idea.  I don't buy cookies there regularly now, but there was a time when as a family we would buy the 3 for $1 deal.(See that was a long time ago lol) We would split them up so that there wasn't too much damage to the diet.  I love all of their variety of cookies but my favorite is the White Chocolate Macadamia Nut Cookie.
 
I have tried several different recipes looking for the one that tastes the most like the White Chocolate Chip Macadamia Nut Cookie, and I think I've found it.  This recipe is very similar to any regular chocolate chip cookie recipe.  I loved the way they turned out.  They are soft and chewy and totally yummy.  I'm going to have one with my morning coffee as soon as I post this, but I'm giving the rest away so that they don't tempt and talk to me all weekend.  

Have a safe and enjoyable Labor Day weekend! 

"Subway" White Chocolate Macadamia Nut Cookies

1 lb butter
1 2/3 cups brown sugar
1 cup granulated sugar
3 large eggs
1 T vanilla
4 1/4 cups unbleached white flour
2 t baking soda
1 t salt
1 (12 oz) bag white chocolate chips
1 1/4 cups macadamia nuts, chopped

1.  Make sure oven keeps the right temperature.  The cookies may need a minute or two more or less than stated.
2.  Preheat oven to 350 degrees F.
3.  Line baking sheets with parchment paper (no need to grease).
4.  Measure flour, baking soda and salt in a large bowl and blend together.  Set aside.
5.  In a large mixing bowl, preferably a heavy-duty mixer, and using the paddle or beater attachment, beat butter until creamy.
6.  Add brown sugar and beat again.  Scrape down the bowl and add the granulated sugar.  Beat until fluffy.
7.  Add eggs one at a time, beating after each addition.
8.  Add vanilla, beat and scrape again.
9.  On low speed, add flour mixture 2 cups at a time, and mix well.
10. Mix in white chocolate chips and macadamia nuts. Mix only until blended.
11.  Using a cookie scoop, place dough on prepared baking sheets, spacing evenly to allow for spreading.
12.  Bake at 350 degrees for 10-12 minutes or until lightly browned.  Do NOT over bake these cookies.  They continue to bake for a few minutes after they are removed from the oven.
13.  Transfer to cooling racks.  Store in air tight container or plastic bag to stay soft and moist.
14.  Makes 48 warm and gooey cookies.


recipe by
Gingerly J on


Read More »

Thursday, August 23, 2012

Vote 'Best Food Blog' of Nashville

0
Calling all readers and followers from Nashville! It is that time of the year in the great city of Nashville when we get to vote on "the best of Nashville" for the Nashville Scene. This survey covers every possible facet of the Nashville market, which of course includes Nashville's best food blogs. Even though our site is comprised of women from 3 different states, I am proud to represent Nashville on our site and we would LOVE your vote for the Best Food Blog!

Follow the link and under the media/politics to find the the Best Food Blog category and enter Buttercream Baker!

Thanks!!! If you have any questions, don't hesitate to ask.

Read More »

Monday, August 20, 2012

Blueberry Cheesecake Ice Cream

1
by Cindy


I've really wanted to make homemade ice cream this summer and haven't found the time until this last week.  Christy has spoken about our homemade ice cream memories, but I have a whole lot more of those than she does.  When I was growing up, we made homemade ice cream several times during the summer and it was always a big deal.  We would all sit outside and watch Dad pack in the ice and salt, and wait and wait and wait. When it was finally done, Mom would give us a big mixing bowl to put the mixing beater in.  We would take spoonfuls off of it.  It was soooo good.  It sounds like Christy enjoyed our ice cream making experiences, but I wish that we had made it more often.   I have never been able to replicate the ice cream my mom made.  I think it's just something about the memory of it that can't be replicated  If anyone out there has one of those old fashion custard ice cream recipes, please send them my way. 

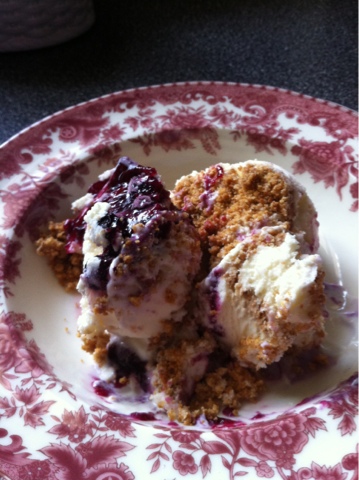
I've been on a blueberry and cream cheese kick for the last month, and I saw this recipe a while back and tried it last week. It's a simple recipe, but takes a little time for some of the mixtures to cool before freezing the ice cream.  I made the graham cracker crust and the blueberry sauce the day before, and then I made the ice cream mixture the next day and froze it.  It taste delicious and I like the cheesecake flavor and blueberries together.  After putting it in your freezer, it freezes really hard so I would suggest taking it out of the freezer at least 30 minutes before trying to serve.  With all the new kitchen ice cream makers, it's so quick and easy to make.  Making the ice cream only took 30 minutes, so give it a try and make some memories for your family. 

Blueberry Cheesecake Ice Cream

Ingredients

  • 1/2 cup sugar
  • 1 tablespoon cornstarch
  • 1/2 cup water
  • 1-1/4 cups fresh or frozen blueberries
  • 1 tablespoon lemon juice
  • GRAHAM CRACKER MIXTURE:
  • 2-1/4 cups graham cracker crumbs (about 36 squares)
  • 2 tablespoons sugar
  • 1/2 teaspoon ground cinnamon
  • 1/2 cup butter, melted
  • ICE CREAM:
  • 1-1/2 cups sugar
  • 1 package (3.4 ounces) instant cheesecake or vanilla pudding mix
  • 1 quart heavy whipping cream
  • 2 cups milk
  • 2 teaspoons vanilla extract

Directions

  • In a small saucepan, combine sugar and cornstarch. Gradually stir in water until smooth. Stir in blueberries and lemon juice. Bring to a boil. Reduce heat; simmer, uncovered, for 5 minutes or until slightly thickened, stirring occasionally. Cover and refrigerate until chilled.


  • In a large bowl, combine the cracker crumbs, sugar and cinnamon. Stir in butter. Pat into an ungreased 15-in. x 10-in. x 1-in. baking pan. Bake at 350° for 10-15 minutes or until lightly browned. Cool completely on a wire rack.

  • Meanwhile, in a large bowl, whisk the ice cream ingredients. Fill ice cream freezer cylinder two-thirds full; freeze according to manufacturer's directions. Refrigerate remaining mixture until ready to freeze. Whisk before adding to ice cream freezer (mixture will have some lumps).
  • Crumble the graham cracker mixture. In a large container, layer the ice cream, graham cracker mixture and blueberry sauce three times; swirl. Freeze. Yield: 2 quarts


recipe from
Taste of Home
Read More »

Friday, August 17, 2012

New Resturant in Nashville : Silo

0
By Christy

I promise I haven't given up baking and trying out recipes but I have been more on the social scene in Nashville the last couple of weeks. Last night was girls night, which for us is the perfect excuse to try out a new restaurant among the always evolving Nashville scene. A restaurant that has been high on our list to try as soon as it opened was Silo in the Germantown area of Nashville.

Last night was the first night the restaurant was open to the general public and sure enough we got our ressie for 7:45. Upon walking in this restaurant, I was instantly impressed by the very architecturally and aesthetically pleasing decor. The restaurant has a very warm and modern ambiance but has a touch of vintage class.

Now for the most important part.... the food! Silo focuses on a farm to fork menu, which basically means they use fresh local products to prepare their food. We covered our basis pretty good ordering wine, first and second courses, getting extra sides and we tried all of the available desserts. I am pretty sure there wasn't anything we had we didn't like.


My entree was the gulf shrimp, tasso "dirty" grits, tomato & okra stew and it was down right amazing! 

The menu was very unique, delicious and you could tell how fresh all the ingredients were. Most entrees were around $18 but the bang was worth the buck. I have no doubts that Silo will do well and if you are looking for a great new place for a date or a girls night put this on your to do list!
Read More »

Monday, August 13, 2012

East Nashville Tomato Festival

0
Happy Birthday to me!!


This weekend marked yet again another year under my belt as I  turned 27. Besides a romantic dinner with Big Cat, we also decided to attend an East Nashville tradition: The Tomato Festival. The Nashville Scene said it perfectly, "East Nashville is known for many things — exceptional restaurants, fun bars, fabulous old houses, lost dogs, and a vibrant and vocal community. Since 37206 — and 37216 for you Inglewood dwellers — is bursting with creativity and diversity, it's no surprise this area would embrace an event that celebrates an inanimate object that is a uniter, not a divider."

This was my 3rd summer living in East Nashville and all the hype (it has been polled the best Nashville festival since 2007 ) about this festival was so fun and exciting I broke my almost nearly decade tradition of going to KY lake for my birthday to attend this 9 year old Nashville festival. The Tomatofest was exactly what I pictured of a festival in East Nashville-Very Original. There was a 5k, a parade, tons of (tomato) art, live music stages throughout, tomato costume contests, best bloody mary contest, super dog friendly, fashion show of vintage clothing and animals to adopt, delicious food, unique shopping booths, about 20000 hipsters all in one place and tons more. I even had a friend that participated in Nuvo Burritos wet burrito contest- which as crazy as it sounds is actually a contest to see who can eat a burrito the fastest while getting sprayed with a water hose. Anything really does go in East Nashville! lol


If you are interested in the Tomato Festival, please check out their website for more information. Also, if you went, leave some comments about your favorite part!

Barkley, my 5 1/2 month old Goldendoodle also attended the event with Big cat and me and he LOVED it. Turns out my little guy is a big ladies man. ;o)

Read More »

Friday, August 10, 2012

Blueberry Cream Cheese Coffee Cake

0
by Cindy


Well we're celebrating two birthdays at the office today, so I made a blueberry coffeecake for our potluck breakfast.  It is more like a blueberry cheesecake because it turned out to be more dense than a regular cake.  It's kind of a combination leaning more toward the dense texture.  I followed the recipe as printed but when it said to pour the batter, my batter was not pourable.  When it said to drop the cream cheese on top of the cake, I had to pour the cream cheese mixture on.  I don't really know why this happened, but I just went with it and it worked out.  I didn't use the almond extract or dust it with powdered sugar, and I used pecans instead of almonds (and only put them on half of the cake as you can see in the pic).  It's not too sweet but sweet enough and tasted great with my coffee.  ;)

Blueberry Cream Coffee Cake

Cream Cheese Filling
8 ounces cream cheese, at room temperature
2/3 cup granulated sugar
2 large eggs

Cake
1 cup all-purpose flour
1 1/2 t baking powder
1/2 t salt
1/2 cup (1stick) unsalted butter, at room temp
1/2 cup granulated sugar
3 large eggs
2 t vanilla extract
1/2 t almond extract
1 cup fresh or frozen thawed blueberries or raspberries
1 cup sliced almonds

 1.  Preheat oven to 375 degrees.  Butter and flour or use Bakers Secret Spray on a 10-inch spring form pan.
2.  To make the filling, combine cream cheese, sugar and eggs in a large mixing bowl with an electric mixer on medium speed.  Set aside.

3.  To make the cake, combine the flour, baking powder, and salt in a mixing bowl.
4.  Beat the butter and sugar in a large mixing bowl with an electric mixer on medium speed until fluffy.  Add the eggs one at a time, beating well after each addition.  Beat in vanilla and almond extracts.
5.Gradually add the flour mixture on low speed until just blended.  Stir in 3/4 cup blueberries (or other berry) and 1/2 cup almond into the batter.

6.  Pour half the batter into the pan.  Drop spoonfuls of the filling over the batter and swirl it with a knife.
  Add the remaining batter, then top with the remaining blueberries and almonds.

7.  Bake for 35-40 minutes, or until a knife inserted in the center comes out clean.  Cool in the pan.  Dust with confectioner's sugar before slicing. 


adapted from Crazy About Cakes by 
Krystina Castella "Raspberry Cream Coffeecake" 


Read More »

Monday, August 6, 2012

Cake Boss Tour

0
by Cindy


The Cake Boss came to Evansville last night and I was in the audience.  There was quite a crowd and it was a very diverse group with women, men and children.  There were vendors set up on the second floor showing and giving away samples of their tasty cakes and delights.  There was one cake that was especially Cake Boss worthy and it was done really well.  It showed many important features about Evansville. 
 All of the samples were delicious and right on spot.  I also took a picture of a cake that I thought was super cute and hope to copy myself someday.   

The Cake Boss came out a few minutes late just like a rock star.  He's looks exactly like he does on TV.  He talked to the audience about his beginnings and how he got started in the business when he was just 17 years old.  His father was sick so he quit high school (hoping later to return to finish high school when his father recovered)  and he started there by filling in for his father at the bakery.  His father didn't recover and that's how it all began.  It was a very inspiring and motivating story.  He said he's working harder now than ever and that he loves what he does.  He used audience participants to have 3 competitions, with the last prize being a cake from his bakery, which is going to start selling cakes nationwide soon.  I would love to taste one of his cakes, but I'm sure they are a little too pricey for my pocketbook. 

I do love watching cooking and baking shows on television so I think I'll put him back on my DVR list because he is a lot of fun to watch. 


Read More »

Thursday, August 2, 2012

Chocolate Bourbon Pecan Pie Bar

0
By: Christy


One word for this dessert: SINFUL! It is this amazing ooey gooey bar filled with pecans, coconut, chocolate, and bourbon on top of a dense brown sugar shortbread cookie. Is your mouth watering yet? Even though this treat is super rich, the flavors combined make a very finger licking good dessert that you just want more of. The bourbon really does complete the dessert and actually really compliments the sweetness of the filling.  I had a piece of pie bar this morning with a big cup of hot coffee and I think the quote "eat dessert first" finally made complete sense to me. Amazing!


Big Cat and I at the Jim Beam Bourbon Distillery

Ingredients:
Crust:
1 and 1/2 sticks butter, softened
1/2 cup packed light brown sugar
2 cups all purpose flour
1/2 teaspoon of salt (leave out if you used salted butter)

Filling:
1/3 to 1/2 cup of semisweet chocolate
1 tablespoon butter
4 large eggs
3 cups packed light brown sugar
1/8 cup bourbon
3 tablespoons butter, melted
1 tablespoon vanilla extract or paste
1/2 cup all purpose flour
1/2 teaspoon salt (leave out if you use salted butter)
1/2 - 1 cup sweetened flaked coconut
1 cup chopped pecans

Preheat the oven to 350 degrees. This will be a messy dessert once finished, so I recommend lining your pan with parchment paper sprayed with cooking spray. Also this recipe calls for a 10 inch square pan.

Start by making the crust. Using a mixer (I recommend the paddle attachment), beat the softened butter until nicely whipped. Add the sugar and beat until well combined. Add the flour and salt and mix on low speed until evenly incorporated but still crumbly. Press the mixture evenly over the bottom of the prepared pan. Bake the crust until it has turned golden brown (about 20 minutes)
While the crust bakes and cools, start on the filling. Place the chocolate and 1 tablespoon of butter in a bowl and melt in the microwave. Start with 30 seconds, then stir, and follow with 10 second increments until the chocolate has fully melted and is creamy. Let this mixture cool slightly while you mix together the eggs and brown sugar in a separate large bowl.  In the egg/sugar mixture, stir in the chocolate mixture, bourbon, butter, vanilla, flour and salt. When the mixture is well combined, add the chopped pecans and coconut.


Pour the filling over the cooled crust and bake until set (about 30 minutes). Cool bars, and then refrigerate them before slicing (if not the filling will run everywhere!). Keep bars stored in the refrigerator until ready to serve.

Recipe adapted from The Pastry Queen
Read More »