Friday, December 30, 2011

NYE Champagne Cupcakes

0
By Christy

Can you even believe that tomorrow is the last day of 2011? I sure can't! SOOOO much has happened in my life over the last year. Started grad school, remodeled part of my house, started dating a really great guy, bought a new car, my parents split up, my nephew turned one, a big international trip and lots of little domestic trips, moved to a window seat at work, started a baking blog with my mom and sister :) .... The list could go on. It's crazy all that can happen in a span of 365 days.... I can't wait to see what the new year will bring!

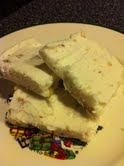
So...In honor of the new year and baking with alcohol this week I decided to make champagne cupcakes. It's such a delicious twist on a simple white cupcake with buttercream icing. After work today, my date and I are headed to Louisville, KY to bring in the new years. (This year I get to spend the first day of the year with my fellow Buttercream Bakers <smiles>). I wouldn't be a proper house guest without an offering to the hosts, so I'm headed north with my New Years Eve Champagne Cupcakes. Figured we might as well end 2011 with a delicious, calorie full cupcake before we begin our 2012 resolutions.

So, today I want to make a toast... (raise your glasses, or in this case-cupcakes!)
"Here's a toast to the future, A toast to the past, And a toast to our friends, far and near. May the future be pleasant; The past a bright dream; May our friends remain faithful and dear". ~ Anonymous

And last but not least- a toast to baking everyday better in 2012!

Ingredients:
1 Duncan Hines white cake mix
Make cupcakes according to the box. Only difference is you will replace the water with champagne. Ingredients listed should be: 3 egg whites, 2 tbsp vegetable oil, 1 1/3 cup champagne (I used Martini and Rossi - Asti flavored. I think the sweeter the better for this recipe)

Champagne Icing:
3 sticks butter (at room temperature)
3 cups powdered sugar
3 tbsp champagne
(More softer icing use a little more champagne. If you make it to runny, add some more powdered sugar)

Preheat oven to 350. Make cupcakes according to the box but remember to replace the water called for in the recipe with champagne. Bake cupcakes.

While cupcakes are baking/cooling, make the icing. First whip the butter until smooth. Add the champagne and slowly add the powdered sugar until the icing is smooth. More softer icing use a little more champagne. If you make it to runny, add some more powdered sugar.

I wanted to dress up my cupcakes. So I added a few little classy touches. First I added cupcake pearls. They can be found in the baking section at your local grocery right next to the sprinkles. The pearls on the creamed colored icing made for a very pretty contrast.

Secondly, I wanted to make my cupcakes more festive for New Years so I decided to make chocolate cupcake toppers. To do this as well, just put a square of chocolate bark in a plastic bag and melted the chocolate in the microwave. Once the chocolate is melted, snip a very small corner of the zip lock and pipe your design (obviously I chose to write out 2012) on wax paper. For text, make sure to use cursive and that all letters/numbers are touching. When you are done piping as many toppers as you desire, put them in the freezer to harden. Once hard, simply just peel the cupcake topper from the wax paper and gently push into the top of the icing.

Read More »

Tuesday, December 27, 2011

Rum Cake

0


by
Cindy

Christmastime is a very busy time for me with all of the extras that have to be done along with the old regular stuff.  I love the season though and all of the beautiful lights, decorations, food, and music.  Oh do I love the Christmas music.  This year Christmas was a little different for me but I enjoyed seeing and doing new things.  Christy and I went to church at 11pm and I loved all of the music that we heard and sang.  We sang at least 6 carols and Christy could barely keep her eyes open. lol  I'm the night owl not her, but she was a trooper to go with me since she knows how much I love it.  Anyway, I'm glad to get all of the Christmas baking done and on with the new year.  This week I made Rum Cake and I think this is the original Bacardi Rum Cake recipe and I've made this for years.  It's an easy recipe and makes a really moist cake.  I do the rum glaze a little different than the original recipe.  Instead of just drizzling it over the top of the cake, I keep the cake in the pan and pour the glaze into the bottom of the cake so that it absorbs all of the liquid.  This makes for a much stronger rum taste so if you don't want that strong of a rum taste, just drizzle the glaze over the top of the cake.  Here's to the New Year!

1/2 cup chopped pecans
1 pkg Butter Recipe Golden Cake Mix
1 pkg instant vanilla pudding mix
1/2 cup light rum
1/2 cup water
1/2 cup veg oil
4 eggs

Grease bundt or tube pan. Crumble nuts in bottom of pan.  Put cake mix and pudding mix in mixing bowl.  Add rum, water, oil, and eggs.  Mix 2 minutes at medium.  Pour batter into bundt pan and bake for 50 - 60 minutes in a 325 degree oven. 

Hot Rum Glaze

1 cup sugar
1 stick butter
1/4 cup light rum
1/4 cup water

Place in a small sauce pan and bring to a boil.  Boil for 2 to 3 minutes. Remove the cake from the bundt pan and pour the glaze over the hot cake and let set for 30 minutes.  Or leave in the pan and pour glaze over bottom of cake and cool.  Remove cake from the pan. 

Read More »

Monday, December 26, 2011

Cooking Q & A

0
By: Christy

Aristotle once said, "What we have to learn to do, we learn by doing." And while food and cooking are part of human functioning ,this quote still applies greatly to cooking and mastering the kitchen. During the holidays everyone tends to cook a little bit more... Between Christmas goodies and family/friend gatherings, the holidays often bring out the inner homemaker in people. Over the last couple weeks I have been asked and approached about many different questions about cooking so I thought it would be a good idea to write a post about some interesting Q & A about cooking that I've (and I am sure many others) have wondered about one time or another when they were searching through the grocery store, attempting to follow a recipe, or attempting to get creative in the kitchen.

  • Is light brown sugar and dark brown sugar interchangeable in a recipe?
    • Yes... Basically brown sugar is made by adding molasses to white granulated sugar. Dark brown sugar is just made using more molasses and has a stronger, more intense flavor. Depending on your personal preference they can be used interchangeably.
    • I generally always use light brown sugar, but I do love a strong brown sugar flavor in my chocolate chip cookies so I use that occasionally.

  • When do eggs really expire?
    • "Eggs stay usable for a surprisingly long time as long as they are refrigerated.  The best way to tell if an egg is still usable without cracking it open is to put it in water–at least 4 inches of water.  If it stays on the bottom, you’re good to go.  If it’s a floater, toss it away Why this works: All eggs have a membrane between the shell and the albumin (the clear, viscous liquid inside).  There is no air between the membrane and the shell in a freshly-laid egg, but as the egg ages, the air pocket inside gets larger and larger due to osmosis through the permeable shell. Once the egg has enough of an air pocket to float, it has definitely passed its prime."
    • "Prolong egg life by storing eggs in the containers they came in on the bottom shelf of your fridge.  Don’t store them in those cute little egg holders that come in some refrigerator doors.  It’s warmer in the doors because of all the opening and closing."
    • For the whole article on this topic visit  Reluctant Gourmet website.
    • There is an expiration date on the egg carton itself. If it doubt, just follow that date. Luckily, eggs are fairly inexpensive!

  • Is there a difference between "liquid" and "dry" measuring cups?
    • In my opinion liquid and dry measuring cups are interchangeable in general unless baking. Baking is a more exact science so you have to be a little more careful with your measurements.  If you are just cooking or fooling around in the kitchen then it really wont matter.
    • One of the best answered I found for this question came from Yahoo! Answers. "Wet and dry ingredients have different volume measurements, so they require different measuring cups for accuracy. Using a liquid measure for dry ingredients and vice versa may alter the outcome of a dish, especially in something like a cake or cookies, where ingredients mix in a precise chemical reaction to produce a predictable result."
    • "Liquid measuring cups are most commonly available in one, two and four-cup measures. They are almost always made of a clear material, such as glass or clear plastic, so the cook can see the level of the liquid rise as he pours. Most liquid measuring cups also have pouring spouts, distinguishing them from dry measures.Dry measuring cups usually come in sets, with individual measures for 1/4, 1/3, 1/2 and 1 cup. Dry measuring cups may be made of clear or opaque plastic, glass, metal or even wood. Most have handles and are flat on the top and bottom to ensure accuracy in measuring. The lip of dry measuring cups is even, also, so a cook can level off ingredients at the top of the measure."
  • Should I grease cookie sheets when baking cookies?
    • In general no (for instance if you are making chocolate chip cookies) because there should be more than enough butter and oil in the cookies to keep them from sticking. If you do choose to grease the pan it will make the cookies kind of "melt" and look more flat and be more crispy. If you don't grease a cookie sheet when making cookies it will make them taller and fluffier.
    • A good alternative all together for baking cookies is to buy a silpat. Mom uses those for baking cookies (you can see it in some of her pictures)

  • What is the difference in baking with butter, margarine, or shortening?
    • Each ingredient will slightly alter the taste, texture, and final outcome. So how do you choose? Frank Carter wrote an article to help explain this controversy. Here are some of the article's highlight
    • "Shortening is 100% fat. Butter and margarine contain 80% fat. The advantage of shortening over butter or margarine is its smoke point (higher temperature before burning). Another advantage is its has a higher melting temperature. During the baking process of cookies it helps dough hold its shape longer. This allows the flour and eggs to set, keeping the dough from spreading too much."
    • "Margarine is better than butter when it comes to our heart, but falls flat in the flavor department. Butter also adds a creamy texture. Shortening helps to keep your cookies from deflating or spreading out, but again it does not enhance the flavor. In fact shortening has no flavor. If you are a fluffy cookie fanatic use half shortening and half butter. You get the raised cookie with the buttery flavor.When it comes right down to the decisions between shortening, margarine, salted butter or unsalted butter is a personal preference."
    • When I'm making cookies, my favorite recipes usually include a combination of both butter and shortening.

  • Should I use salted or unsalted butter?
    • Frank Carter's article also helped with this question. "Salt in butter acts as a preservative, so butter won't turn rancid when left out at room temperature. The down side is you are adding extra salt to your recipe. The problem with reducing salt in a recipe to substitute for salted butter is different brands of butter has different salt contents. The rule of thumb is when using salted butter reduce the salt added ½ teaspoon per cup of salted butter. The purist baker will always use unsalted butter. That way they can be in control of the salt being added to the recipe. Salt in butter is also believed to add flavor, overpowering the sweet butter taste, and mask butter odor."
    • Personally, I always bake with salted butter. I believe the salt in the butter blends better than the granules of salt called for in a recipe because the granules don't melt into the mixture as well. If I do choose to use salted butter, I do cut down on salt I add to the recipe. While salt isn't really good for us I think it really does make a difference in flavor. My cake decorating class instructor would dissolve the salt in the water she added to the recipe to make sure the salt was distributed evenly in the batter... I thought it was an in genius idea.
Read More »

Saturday, December 24, 2011

Party Tips

0

This year mom and I got to attend an open house/Christmas party at my Uncle's house. Among some of the 100+ guests, this party was perfectly hosted down to a beautiful home, musical entertainment, Christmas decorations, and delicious food and drinks. I wish I had taken more pictures to show off!! (I actually only snapped a picture of me and her and a picture of the mini cupcakes they served for dessert.) My mom and I both thought the mini cupcakes were a perfect touch for a mini bite sized dessert for a large party. They were served in vanilla, red velvet, and chocolate and were simply garnished with either a butterscotch or chocolate chip and each had a small amount of icing. The sterling silver tiered serving piece really set the mode for the occasion, dressing up a simple mini cupcake to be cocktail attire appropriate.

If you are planning a party remember people want delicious food, not necessarily just beautiful food. Using serving pieces and decorations you can turn any treat into a beautiful or fun tablescape to fit whatever occasion you are celebrating. Also, keep in mind at large parties to keep food items small, easy to eat (possibly with one hand if seating is limited and something that requires no/few utensils), and as mess free as possible.

If you had a party this season, I wish you best of luck being the hostess with the mostest and if you need any help please feel free to email us questions at anytime!

Happy Holidays!


Read More »

Thursday, December 22, 2011

Coconut Cream Pie

0
Coconut Cream Pie

By
Cindy

I just started a new job this month and we are having a Christmas lunch at the office today.  The business next door is giving us a Boston Butt and we're bringing the rest.  I asked what they wanted me to bring and the girls asked for Coconut Cream Pie, so that is what I made last night.  I'll buy a festive table cloth and napkins at the Dollar Tree this morning when I got get the mail and we will have a feast.  We're going to have German Potato Salad, Devil Eggs, Pasta Salad, Corn Casserole, and Baked Beans.  My mouth is watering just thinking about all the goodies.  They know how to do it up right and we're going to have a fantastic lunch. 
 I was going to make Patti's Coconut Cream Pie but I can't find my Patti's cookbook since I moved last month.  I'm sure it's there somewhere but I had to improvise.  I used the custard recipe that goes with the Peanut Butter Pie that was on the blog earlier in the year.  It cooks up really well and I actually like it just as much as the Patti's recipe
1 baked pie shell
2/3 cup sugar
1/4 cup cornstarch
2 cups milk
3 egg yolks, beaten
1 cup coconut
1/4 t salt
2 T butter

Meringue
3 egg whites or more
6 T sugar (2 T per egg white) 
1/8 t cream of tartar

Mix in sauce pan sugar, cornstarch, and salt. Add milk and eggs and heat over medium heat stirring constantly until  thick and bubbling.  Add vanilla, butter, and coconut but save a little coconut  for the top of the pie.  Pour into baked pie shell. 
Whip egg whites and cream of tartar until stiff.  Add 1 T of sugar at a time and mix well.
Spread on top of the pie making sure the meringue touches the pie shell on the edges.

 If not the meringue will shrink up a little.  Sprinkle saved coconut on top of the meringue and bake for about 10 minutes in a 350 degree oven.  Watch closely so it doesn' burn.
Read More »

Tuesday, December 20, 2011

Peanut Butter Bars

0
Peanut Butter Bars

by
Cindy

I've always made a variety of cookies, bars and candy for my Christmas gathering and events. I remember when my mom and I would work all day making Christmas cookies. It was so fun decorating the sugar cookies and we made a huge mess.   I love that memory and wish that I had done more of that with my girls, but something must have stuck because here we are in different cities baking away. One of the candies that I make at Christmas is this Peanut Butter Bar or Bark Bars.  It is really simple and is so good.  Rhonda, my previous boss, brought this into work several years ago and of course I had to have the recipe.  I've made it every year since then. It is quick and easy and good - my favorite combination in a recipe. 

1 lb Vanilla Almond Bark
1 1/2 cup peanut butter
1 1/2 c mini marshmallows
1 1/2 c Rice Krispie cereal

Melt bark in the microwave according to instructions.  Add the rest of the ingredients and pour into a lined
9 x 13 inch pan.  Let set in refrigerator about 15 minutes or until it cools.  Cut into squares.
Read More »

Monday, December 19, 2011

Toffee

1
Every year for Christmas there are those few Christmas goodies that make Christmas, Christmas in my mind. Mom has already posted a few…. Red velvet cake, sherry dream bars, chocolate chess pie but there is one she hasn't posted yet that also has always been a part of our Christmas tradition: Toffee.


Candy like  toffee is not only super delicious and easy to make and is very easy to package, store, and give as gifts.  One batch makes about two pounds deliciousness.

Ingredients:
2 cups of butter
2 cups of granulated sugar
2 tablespoons corn syrup
1/3 cup of water
1 package of milk chocolate chips
1/2-1 cup chopped pecans

Cover a 9x13 cookie sheet in aluminum foil.

Melt the butter in a sauce pan. Once butter is melted add the sugar, corn syrup, and water. Continue to stir until the mixture starts boiling. Continue stirring frequently for about another 20-30 minutes (if you have a candy thermometer, boil until the candy reaches 290 degrees). The liquid will transition from a light color to a rich golden brownish color. The longer you cook it the harder the candy will get.

Once the candy thermometer has reached 290 degrees, pour the candy mixture onto the lined cookie sheet. Remember do not touch! It will be VERY hot! After the candy has set for about 5 minutes or so, pour the chocolate chips on top. Wait a few minutes and the chips will melt and use a rubber spatula to evenly distribute the chocolate on top. Then sprinkle nuts on top of the melted chocolate and gently pat the pecan chips into the soft chocolate to ensure it sticks.


The toffee will need to sit and harden for several hours or you can put the toffee in the refrigerator/freezer to speed up the process. Once the chocolate has cooled simply pull the toffee off of the aluminum foil and break into small pieces with your hands and serve!
Read More »

Saturday, December 17, 2011

Christy's Home!!!

0
Bratwursts
So it's official, I'm back! After three days in Barcelona, Spain and 7 days in the southern part of Germany,  I have seen some great sites, had some great times and have eaten some great food!
Here are a few pictures to share!
 
On left, Apple Schnitzel, top: broken up pancake like cake that you dip in apple sauce, Right: hot chocolate


traditional Christmas goodies (Left: Christmas cookies, Middle: Fruit Cake, Right: Gingerbread cookies) from a backerie from Ettal, Germany

Hot Chocolate with condensed milk on bottom and freshly made whipped cream on top


Pretzels, Pretzels and more Pretzels! LOL


Lots of different Tapas in Barcelona


Read More »

Friday, December 16, 2011

Red Velvet Cake

1
Red Velvet Cake

by
Cindy

Red Velvet Cake is my favorite cake and I only make it at Christmas and Thanksgiving., so when this time of year comes around I'm ready for several pieces of heaven.  I personally think it's all about the icing, so if you want to make this in a quick way use the Red Velvet Cake mix.  The icing takes a little time to make but it's sooo good and well worth the effort.  I've already made several for this Christmas and I'm going to make some cupcakes to give away.  Sometimes I make them in mini bundt pans as gifts or for a small get together.--- I'm dreaming of a piece of Red Velvet Cake and a cup of coffee.

1/2 cup shortening
2 eggs
3 T cocoa
1 cup buttermilk
1 t vanilla
1 t baking soda
1 1/2 cup sugar
2 oz red food coloring
2 1/4 c flour
3/4 t salt
1 t vinegar

Combine shortening and sugar then add eggs.  Sift together flour, salt and cocoa.  Add to sugar mixture alternating with buttermilk.  Add vanilla and food coloring.  Fold in vinegar and baking soda.
Pour into 3 - 8 inch cake pans or 2 - 9 inch cake pans.  Bake for about 25 - 30 minutes. Do not overbake. 

Icing

3 T flour
1 cup milk

In a saucepan, combine and cook stirring constantly until thick and bubbling.  Put a piece of wax paper on top of the mixture to eliminate a skin that develops on top when it cools.  Cool to room temperature.

1 cup butter (room temperature)
1 cup sugar 
1 t vanilla

Cream butter with sugar and beat until light and fluffy (15-20) minutes.  Add vanilla. combine the 2 mixtures.  I use a mesh strainer and push the cooked mixture through it using a spatula so that I eliminate all lumps.  Spread on the cake.  If you like a lot of icing double this recipe.


Red Velvet cake in cupcake form

Read More »

Thursday, December 15, 2011

Chocolate Sherry Dream Bars

0
Chocolate Sherry Dream Bars

by
Cindy

It wouldn't be Christmas at my house if I didn't have Sherry Dream Bars in a Christmas tin.  My mom made these every year and they have a special place in my heart.  I know that sounds weird but some foods just make the memories flood back.  I adapted them to be thinner so I use a larger pan but they can be made in a 9 x 13 inch pan.  The bottom layer would just have to cook a little longer.  I make these and cut them up and put them in tins and freeze them until I need them.  This is one of those recipes that I love, love, love!  I can't say that it's a quick recipe but it is easy.  Since it has layers it just takes a little more time.  They are so good and rich and chocolatey!!

4 oz dark chocolate (unsweetened)
1 cup butter

Melt and cool.

Beat 4 eggs and add 2 cups sugar.  Add this to the chocolate mixture.
Sift 1 cup flour and 1/2 t salt.  Add this to first mixture and add 1 t vanilla.  Pour into a
pan that has been greased and floured (I use a tall cookie sheet and the flour spray).  Bake at 325 degrees for 20 minutes.  Do not overcook  because the edges can get too done.  Cool.


Mix 1/2 cup butter, 4 cups powdered sugar, 1/4 cup milk, and 4 T dry sherry (not cooking).  Beat until fluffy and add 1 cup chopped pecans.  Spread on the cooled layer.
 
Melt and mix well 6 oz semi-sweet chocolate chips (or milk choc), 3 T water, and 4 T butter.  Pour this on top of the last layer and spread.  Refrigerate and when firm cut into little squares.  This freezes well.

Read More »

Tuesday, December 6, 2011

White Fudge

0
White Fudge

by
Cindy

Since Christy is out of the country, I've added an extra recipe for the white chocolate category.  I told her that I would try to fill in for her but that's a hard job.  My friend Karen gave me this recipe and her friend Keith gave it to her.  It is a very quick and easy recipe and the fudge tastes really good.  They are very rich and you can taste both the cream cheese and chocolate in them.  This would make a great gift to go in a cookie tin for a gift exchange or served at a lady's meeting or potluck.  The list goes on and on......they're good taken anywhere!

8 oz cream cheese, softened
4 cups powdered sugar
1 1/2 t vanilla extract
12 oz white chocolate chips or bark
3/4 cup chopped nuts

Beat the cream cheese with mixer.  Gradually add the powdered sugar.  Add the vanilla and mix until smooth.
 
Melt the chocolate chips in the microwave one minute at a time at a medium power setting, stirring after each minute.  Do not overcook.  Add this to the first mixture and beat until smooth.  Stir in nuts.  Spread into a greased 8 x 8 pan or a larger pan for thinner fudge. 

Chill until firm and then cut into small squares. 
Read More »

Chocolate Chess Pie

1
Chocolate Chess Pie
by
Cindy

This week is cocoa week and there are so many goodies made of cocoa, but I didn't have to think very hard about what I'd like to make because this chocolate pie is one of my favorite things to eat!!  I think this is a recipe that my mom gave me.  It is so easy and quick and it so sooooo goood!.  I promise.   I've add meringue to it before because I like the chocolate part so much and it is so much easier to make than the custard chocolate pies.  This recipe makes two pies so if you only want one, you have to half the recipe.  I doubled it years ago so that I wouldn't waste the evaporated  milk.  If you want a rich chocolate pie and you don't have much time, give this recipe a try.  You can add a dollop of cool whip or whipped cream to top it off.  I hope you love it like I do. Yum!  Let me know what you think.

3 cups sugar
6 T cocoa
4 unbeaten eggs
1 stick of butter (melted)
1-12 oz can evaporated milk
2 t vanilla extract
2 unbaked pie shells


Mix together the sugar and cocoa.  Add the rest of the ingredients and pour into 2 unbaked pie shells.  Cook for 50 minutes at 325 degrees. 

Read More »